
Introduction
We will go over How To Resize/Rotate Images Using Python.
Did you know that using python you can automate and perform this in a batch job across multiple images?
Image manipulation does not need to be a taunting task. Today we will go over on how you can programmatically using Python perform these operations which opens up a lot of possibilities and can be a huge time saver.
We will break down this in the following sections:
- Why it is useful to use Python to do image manipulations
- How to Resize an Image using Python while preserving the aspect ratio
- How To Resize a huge list of images using python
- How To Create A thumbnail of an image using python
- How to Rotate a Python Image
I have used this successfully in various projects and it works very well and has saved me a ton of time resizing images by hand using graphical user interface image editors as I can just run my code and have this resize a lot of files at once.
We will go point by point on getting you up and running in less than 5mins, you do not need to have any programming knowledge to use the tool we are going to be developing here.
This is a complete guide and should cover all your questions on using Python to resize and rotate image files.
All code and examples on how to do this can be found in the Github link here.
Why Use Python For Image Transformations
There are many reasons on why would someone want to introduce programming to do image transformations. While we will focus on this part a lot in this section I will go more into specifics on why you would want to use Python specifically.
Python has a rich feature set of libraries and one that’s very good at abstracting a lot of the complex logic for image manipulation. The library we will be leveraging here is called Pillow. It’s a very mature framework and can do a plethora of operations many of which are outside the scope of this document. However since I want to give you context the same concepts we will be using here for rotating and resizing images can be done on any of the other features the library offers.
Below I’m going to provide you with a list of why I think it’s useful to do this programmatically and not with a traditional image editor.
Pros
- Ability to apply the same exact logic with coordinates across the spectrum offering a great amount of consistency. For example let’s say you want to use specifically a resolution of 323width 404height then you can easily do this by specifying the coordinates in the code itself and not have to memorize it for each image you convert.
- Another great thing that doing things programmatically is that you can perform batch operations. Lets say you wanted to do a transformation over 1000 images for a project you have at work. Doing this manually will be a very tedious and time consuming task. If you introduce programming in the equation this can be done in the matter of a single click. So having code do your transformation in this case could be time saving.
- Avoid doing monkey work. Certain tasks in graphics can be tedious. Even the best designers will tell you this and those that can do things fairly fast. Doing things programmatically takes away this and lets you focus on more creative and interesting parts of the job.
- Scalability and re-useability. We touched upon doing things in batch operations earlier but this also means you can scale it across different computers and across your entire organization. Furthermore the same exact code you wrote can be re-used for other projects or other teams that have similar problems to solve.
- Automation is another important part of a lot of workflows. If this is a step of a set of tasks that you are performing in a set of images, you can simply automate it. Meaning you can do whatever manual editing you want to do and at the end just run the program to finalize and close it out. This can be particularly useful if the above is coming from an already existing programming workflow and you want to stay programmatic all the way through.
The above list is a good amount of reasons as to why this may be useful for you, however there are some drawbacks as well that this may have in the whole process or things you may want to watch out for.
Cons
- Quality, whenever you automatic something meaning there’s no visual inspection by a human being the quality may degrade. As much as you may want to perfect a process if there’s no human inspection done at the end, the final result will never be as good as something that a human did manually.
- Bugs as with everything related to code a programming mistake could mess up images in some situations. No one can foretell or give you a list of use cases of when this and if it will happen but it does happen especially when you perform this at scale. Statistically you may end up with a few images that have issues or they are not even processable.
- Unsupported formats it is often that one of the images you are processing will be in a format that your code does not understand or supports. In this case you will need to manually convert it first to one that your code supports and run it again through the workflow.
How To Setup Python Pillow
We will quickly cover how to get Pillow setup in your computer so we can start testing the code below.
In order to do this the first step we need to do is create a virtual-environment and activate it.
$ virtualenv venv
created virtual environment CPython3.9.12.final.0-64 in 225ms
  creator CPython3Posix(dest=/Users/alex/code/unbiased/python-resize-rotate-images/venv, clear=False, no_vcs_ignore=False, global=False)
  seeder FromAppData(download=False, pip=bundle, setuptools=bundle, wheel=bundle, via=copy, app_data_dir=/Users/alex/Library/Application Support/virtualenv)
    added seed packages: pip==22.0.4, setuptools==62.1.0, wheel==0.37.1
  activators BashActivator,CShellActivator,FishActivator,NushellActivator,PowerShellActivator,PythonActivator
$ source venv/bin/activate
The next step is to install the Pillow library which is defined in the requirements file as shown in the Github repo.
$ pip install -r requirements.txt
Collecting pillow
  Downloading Pillow-9.1.0-cp39-cp39-macosx_11_0_arm64.whl (2.8 MB)
     ━━━━━━━━━━━━━━━━━━━━━━━━━━━━━━━━━━━━━━━━ 2.8/2.8 MB 8.9 MB/s eta 0:00:00
Installing collected packages: pillow
Successfully installed pillow-9.1.0

$ ipython
In [1]: import PIL
In [2]: PIL.__version__
Out[2]: '9.1.0'
As shown above we successfully installed the Pillow library and checked the version to ensure it imports well. In this case we will be using version 9.1.0 but you can use whatever version works for you as long as it’s later than this. The compatibility across versions is very much consistent so all examples here should work fine.
How to Resize an Image using Python While Preserving Aspect Ratio
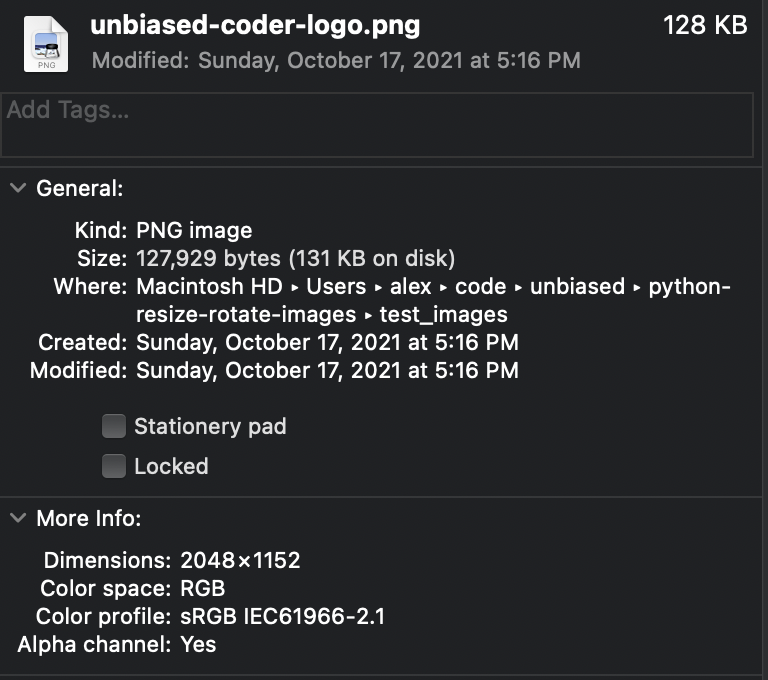
For all the examples below we will be using the Unbiased Coder logo file which is shown below.
Some things to keep note and you can see the screenshot below are:
- Size: It is 131KB in size, this is important to know as we will be resizing it in one of the examples.
- Dimensions: It is 2048×1152 this is also good to know to see if the resize will work after we execute some code later.
Now that we have the information regarding the test image we are going to use we will proceed with implementing our first example which is resizing an image while at the same time maintaining the aspect ratio of it.
Also note that the test image has also been uploaded in the git hub repository here in the test_images folder so you can use it freely to your disposal on testing the code below.
The code that resizes the image follows the steps outlined below:
- First we define the source image (the one above) and the destination image which is the location of where we will be saving it. For now we will be using the test_images folder to store all of our tests.
- The next step is to use the Pillow library to open up the image and read the metadata from it. More particularly we read in the width and height of the image to use it to calculate our aspect ratio.
- Using the original width and height we halve that to resize our image to basically half the coordinates. To do that we simply divide the original dimensions by 2 and round it up to the lowest integer.
- Finally we call the resize function and save the image in the destination folder as mentioned above.
from PIL import Image

src_img = 'test_images/unbiased-coder-logo.png'
dst_img = 'test_images/unbiased-coder-logo-half.png'

print (f'Using source image: {src_img}')

with Image.open(src_img) as im:
    print (f'Found image width: {im.width} and height: {im.height}')

    new_width = im.width // 2
    new_height = im.height // 2

    print (f'Using new image width: {new_width} and height: {new_height}')

    im_resized = im.resize((new_width, new_height))
    im_resized.save(dst_img, 'png')

print (f'Saved half resized image: {dst_img}')
Now that the code is ready we can go ahead and execute it to see it read the coordinates from our image and perform the resize.
$ python ./python_resize_image_aspect_ratio.py
Using source image: test_images/unbiased-coder-logo.png
Found image width: 2048 and height: 1152
Using new image width: 1024 and height: 576
Saved half resized image: test_images/unbiased-coder-logo-half.png
As shown above the resize took place and a new image was created and saved in the path test_images/unbiased-coder-logo-half.png. To see if the operation was successful we will be opening the file and checking the file size and dimensions so we can compare it to the original version.
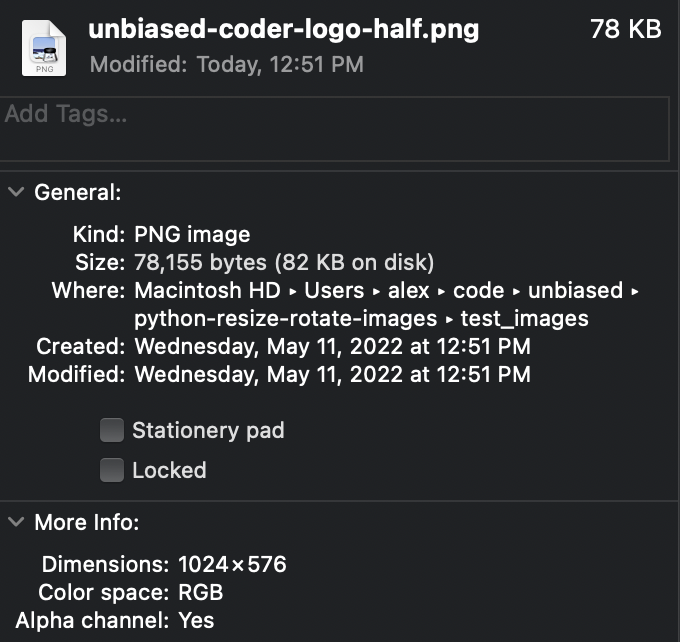
A quick comparison above verifies that the new image has the following two important changes:
- The size now is only 82kb compared to 131kb, this is a good indication that something shrank
- The dimensions are now 1024×576 which is half of what the original file had
The above two verify that the file was successfully resized to half of what it was.
How To Batch Resize A List of Images Using Python
One of the easiest things to do now is to perform the above operation in a batch mode. In order to do this we simply need to encapsulate the code above in a loop that basically reads as a src file the filename from the test_images directory. If you are using a different directory feel free to adjust the code to whatever you prefer your code to use.
Furthermore you can add a file extension check there in case you have other files which you do not want to process. So this could be simply checking for the .png in the filename. If you were processing a different file type and only wanted that to be processed you’d simply adjust the if condition to something else like .jpg.
for src_img in os.listdir('test_images'):
  if '.png' in src_img:
     dst_img = src_img + '-new.png'
Once the code is encapsulated inside the loop you can simply re-use the code above and it will work.
How To Create An Image Thumbnail Using Python
The next piece of code we will be demonstrating is creating an image thumbnail. This is very useful in a lot of CMS type applications but there are a lot of other use-cases that you will need to create one or a series of thumbnails from a lot of images.
The structure of the code is very similar to above and works in the following way:
- We specify the source and destination files
- We read the metadata from the source image
- We specify the new dimensions for the thumbnail, in this case we will simply generate a 128×128 version
- Finally we will call the thumbnail and save function
from PIL import Image

src_img = 'test_images/unbiased-coder-logo.png'
dst_img = 'test_images/unbiased-coder-logo-thumbnail.png'

print (f'Using source image: {src_img}')

with Image.open(src_img) as im:
    print (f'Found image width: {im.width} and height: {im.height}')

    new_width = 128
    new_height = 128

    print (f'Generating a 128x128 thumbnail')

    im_thumbnail = im.resize((new_width, new_height))
    im_thumbnail.save(dst_img, 'png')

print (f'Saved thumbnail image: {dst_img}')
To verify we also execute the code to generate the thumbnail image.
$ python ./python_thumbnail_image.py
Using source image: test_images/unbiased-coder-logo.png
Found image width: 2048 and height: 1152
Generating a 128x128 thumbnail
Saved thumbnail image: test_images/unbiased-coder-logo-thumbnail.png
Once we open it we notice the file has changed significantly and this is because now it’s much smaller than the original version. The reduction now is all the way down to 12KB and the dimensions are correctly 128×128 as we specified in our thumbnail code.
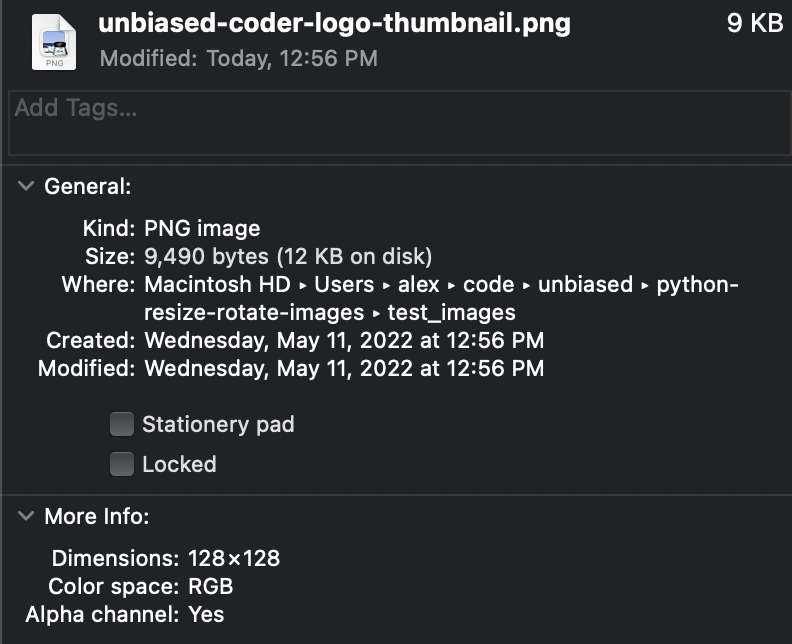
This successfully verifies that the thumbnail was correctly generated.
How to Rotate An Image Using Python
Finally we will be demonstrating one more useful feature which is rotating an image using Python Pillow. The code is very similar to the previous examples and works as follows:
- We specify our source and destination image files
- We specify a rotation angle in this case we will be rotating the image by 45 degrees
- Finally call the rotate function and save the output file
from PIL import Image

src_img = 'test_images/unbiased-coder-logo.png'
dst_img = 'test_images/unbiased-coder-logo-rotated.png'

print (f'Using source image: {src_img}')

with Image.open(src_img) as im:
    print (f'Rotating image by 45 degrees')

    im_rotated = im.rotate(angle=45)
    im_rotated.save(dst_img, 'png')

print (f'Saved rotated image: {dst_img}')
As a next step we execute the new rotation code to generate the new rotated image.
$ python ./python_rotate_image.py
Using source image: test_images/unbiased-coder-logo.png
Rotating image by 45 degrees
Saved rotated image: test_images/unbiased-coder-logo-rotated.png
As shown above the code executed and the output file was saved successfully to the test images folder with the rotated name tag. In this case in order to verify that the code worked we can simply open the file and see how it visually looks as we won’t be seeing much of a difference in the file size and coordinates of it.
As shown below the image looks successfully rotated by 45 degrees.
This successfully demonstrates that the rotation code worked. If you would like you can execute the same code as well with your example image file or even use the unbiased coder logo image that I have provided in the Github repo here.
Conclusion
We were able to successfully go over How To Resize/Rotate Images Using Python, hopefully I answered any questions you may have had and helped you get started on your quest of downloading YouTube videos.
If you found this useful and you think it may have helped you please drop me a cheer below I would appreciate it.
If you have any questions, comments please post them below or send me a note on my twitter. I check periodically and try to answer them in the priority they come in. Also if you have any corrections please do let me know and I’ll update the article with new updates or mistakes I did.
What’s your favorite way of resizing images?
I personally like to use my code because I trust it, it’s clean, open source and freely available to everyone with no strings attached to it. It also offers a lot of benefits that I discussed earlier and it’s a huge time saver if you are performing this task across multiple images.
If you would like to visit the official Pillow documentation here.
If you would like to find more articles related to automating computer tasks with Python you can check the list below: