
Introduction
Today we will discuss on how to setup and use Django Rest Framework with Python 3. The main focus will be to get you started from ground up with no knowledge. I will walk you through setting up your system and some basic useage so you can get started on your new projects.
First let me talk a bit about the Django rest framework. To summarize it’s a way for Django to offer to users an easy to use REST API interface that takes care a lot of the boiler plate code that you would usually write if you were writing vanilla Django code.
I have been working in the Software industry for over 23 years now and I have been a software architect, manager, developer and engineer.
I am a machine learning and crypto enthusiast with emphasis in security. I have experience in various industries such as entertainment, broadcasting, healthcare, security, education, retail and finance.
How to setup Django Rest Framework
In this section I’m going to tell you how to easily setup your environment so you can get started with Django Rest Framework. I’m making the assumption you have Python installed in your environment and the Python Package manager pip. If you haven’t you can look into this guide to learn more about installing it.
How to create a virtual environment for Django Rest Framework
- First install the virtual env using the python command: ‘pip install virtualenv’
- Then create a new virtual environment
- Finally you need to activate your virtual environment so we can start installing packages, please see below

How to install packages in Django Rest Framework
Now that we have activated our virtual environment we need to proceed and install all of our package dependencies that will be utilized in order to use the Django Rest Framework. Along those I’m going to show you how to install some dependencies. Don’t worry about having to memorize the commands you can find all the code in the github code repo here.
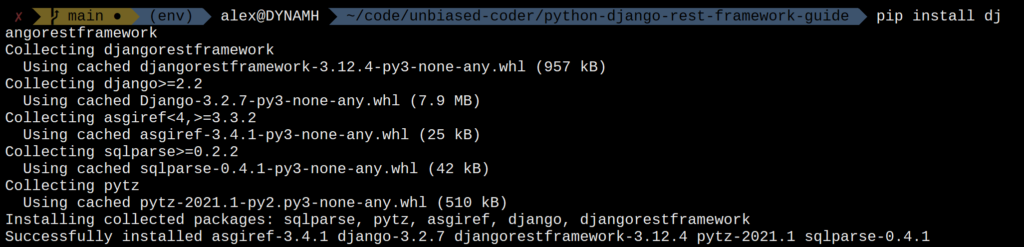
Verifying it works
So now that we have successfully installed the Django Rest Framework packages we can proceed into the next part which is making sure our environment works. Since the virtual environment we created is still active we can go ahead and test our installation by trying to import the packages.

How to use Django Rest Framework
Now that we have successfully setup the Django Rest Framework lets go into explaining how it works at a very high level. Once we understand the high level architecture we can start drilling down the code and make a fully working example.
Django Rest Framework Architecture
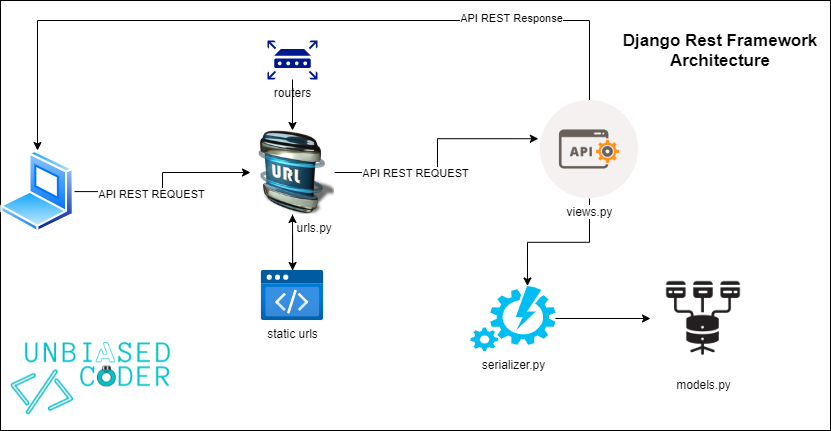
The flow of the Django Rest Framework is fairly easy. Basically it all starts with an API REST request from a client (either an app or web frontend) and it flows into your urls file which contains all the routes. The routes are split into two categories:
- Static urls
- Routers
These two dictated which model view will get executed next via the api view file. This is simply an abbreviation for all the REST requests which comes configured out of the box to work with your model. This does not require any extra work and it will do and run all the boiler plate for you such as adding, editing, deleting a new model in your database backend. It does that with the help of a serializer which validates the datatypes among other things or you can have your own validators associated with it. Finally the models file which is a standard Django model which defines the table structure so the ORM can work with it. If you would like to read more about the Django models you can go to this link here.
Some things to note here and it’s very easy to go wrong has to do with how the view handles the pre-processing of your data before it goes to your analyzer. In vanilla Django I used to do a lot of transformations for various reasons here’s a few to consider:
- The app or web frontend sends us data that is not formatted properly and we may need to adjust it
- Do security sanitization so the data isn’t violating some of the backends policies, nowadays a lot of simple things which used to affect direct SQL queries like SQL injection are handled by the framework (Django is great this).
- Adding a new field based on what the client has sent and any other form of conditional logic.
- Parsing the request for human identifiable information or medical data and rejecting it.
The list above can go on and on but to summarize a lot of these things that would typically take place in the Django view are now moved in an elegant way on the serializer. So when you are processing data let your serializers do the heavy lift and keep your views purely with business logic rather than corrections of the incoming request.
How to scale Django Rest Framework
Besides this making your code easier to read and to debug it also adds another layer to the onion like framework of Django and keeps things where they should be. Letting a developer deal with data manipulation in one layer and deal with business logic in another layer. This may seem simple for most developers working on smaller teams of up to 5 people but when it comes to a larger group where each role is isolated it plays a significant role.
I was privileged to be managing a team of 30 people where the data manipulation and validation was very important and had to undergo through different things of sanitization. This means our incoming request had to be validated by several things:
- Antivirus checking
- Human identifiable information
- Medical information
- Fraud detectors
- Security checks
Initially when we developed the project we had used our own Django middleware where it processed the incoming request before it reached in the higher layers of processing and the app. You can think of it as a Trap where data gets intercepted and only if it passed some checks it moves on to the next portion of the code. The diagram below illustrates how this used to work, now it’s used the Architecture diagram shown above.
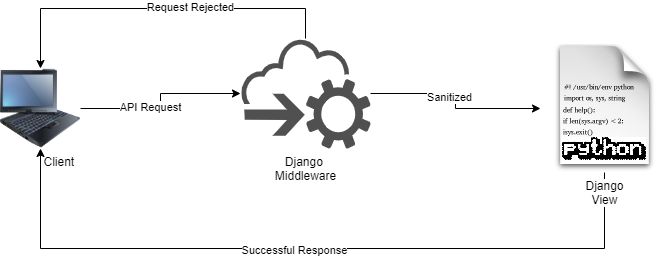
With the use of serializes we were able to solve this issue in a much cleaner way and we actually saw some gains in speed of processing the data. If you are still using vanilla Django or are interested on how to do this programmatically with the middleware please drop me a line below and I will share the steps and code with you.
Example code
Now that we have the architecture document lets just dive into the coding aspect of this. We will go through all the motions of making a fully functional API that changes a person with the following three attributes:
- First Name (fist_name)
- Last Name (last_name)
- Date of birth (dob)
We will be using those to define our models, serializers and finally the view and the routes.
How to create a Django Project
We will start with some of the basic setup which may be boring for those that know how to setup a Django project please skip on the section below with the Django Settings description. Before we do anything we need to create a Django project. A project basically contains all the apps, some settings and basic models that Django offers off the box such as user and group management along with an administration interface. If you would like to know more please refer to the Django official webpage to understand the project structure. Since this is beyond the scope of this document I will briefly show you how to create the project and it looks like in the filesystem once setup.
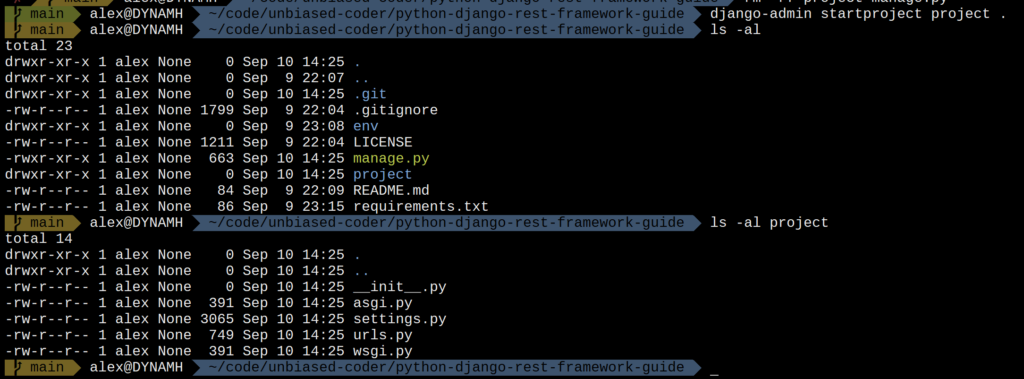
As you can see it created some basic files which we will modify later to make it see our Django Rest Framework. Now that the project is successfully setup we need to go ahead and create a simple app for it. We will just name it app for now.
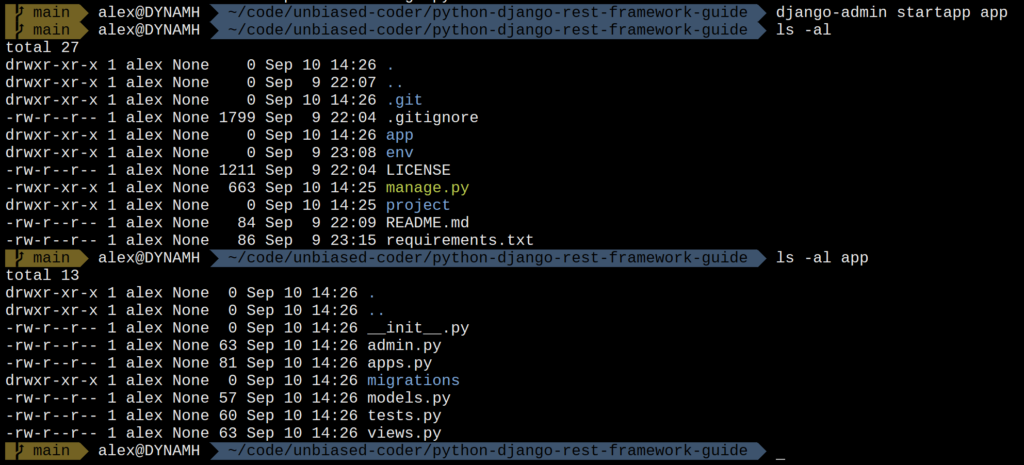
The important files for us are the:
models.py, views.py, urls.py and settings.py (from project)
- models.py (from app)
- views.py (from app)
- urls.py (from project)
- settings.py (from project)
As you can tell right now we are missing an important file that was showing in the Architecture diagram above which is serializers.py. This is normal up to now we just have vanilla Django setup we have not done anything about setting up Django Rest Framework. For now we can go ahead and create a blank serializers.py file in our app directory which we will later edit and add our code.
How to initialize and run Django
Now that everything is in place we have to perform two task.
- Initialize the Django ORM using the command: ‘python manage.py migrate’ (make sure your env is initialized if you used virtualenv using source env/bin/activate)
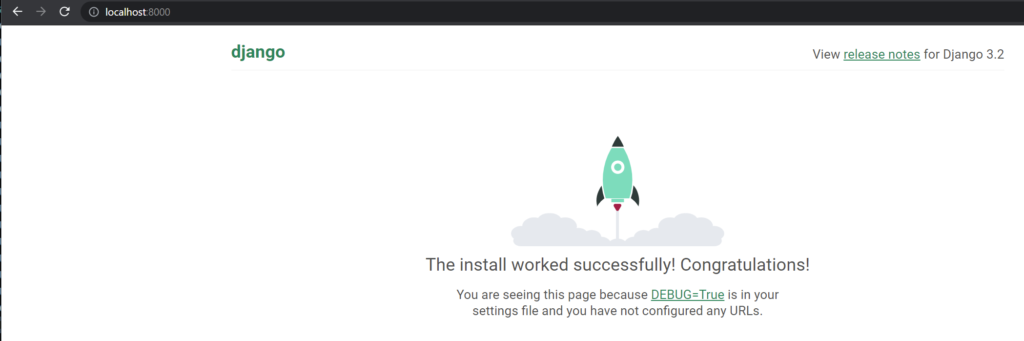
- Start the Django development server, this will start it by default on your localhost binded on port 8000 so in order to access it you will need a web browser pointed to: http://localhost:8000
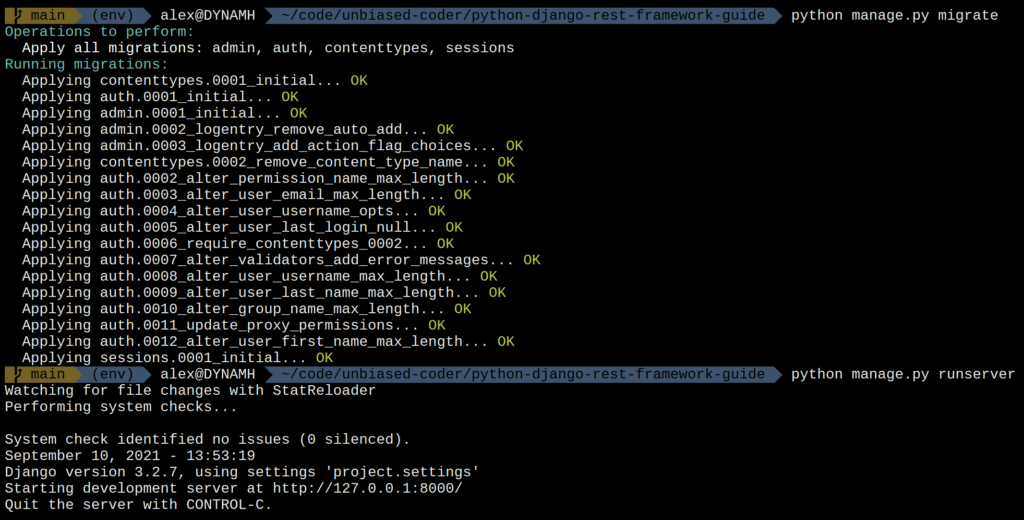
If you see the Starting development server and there are no errors you can quickly verify it works by opening your browser and pointing it to the address described above. If it works you should see something like this depending on your version of Django.
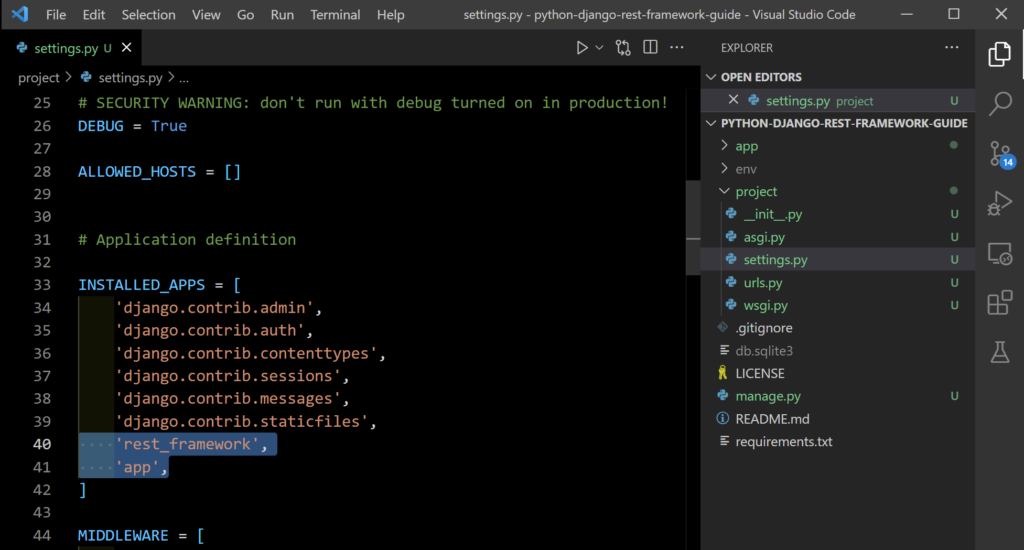
How to modify Django Settings
Now that we have our Django webserver working we can proceed into configuring our settings.py file with the changes needed in order to see our Django Rest Framework and the sample app we added. To do this you will be doing two things adding 2 entries in your INSTALLED_APPS section of your settings.py file as seen below. You can also find this file in our git repo here.
How to create a Django Rest Framework Serializer
We will be creating a simple app which has a person object with three simple attributes:
- First Name
- Last Name
- Date of Birth
So this would look something like this:
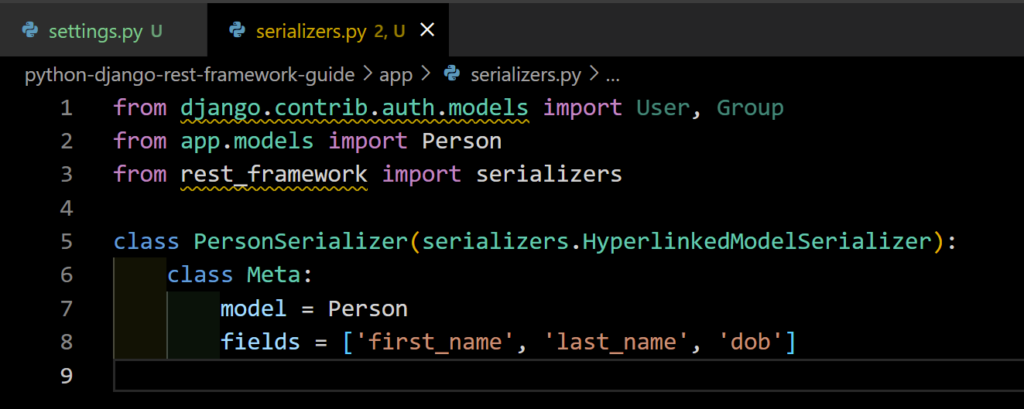
The fields list is what defines your object model attributes that will be getting included in the serializer. You can read more about how to adjust these in this article.
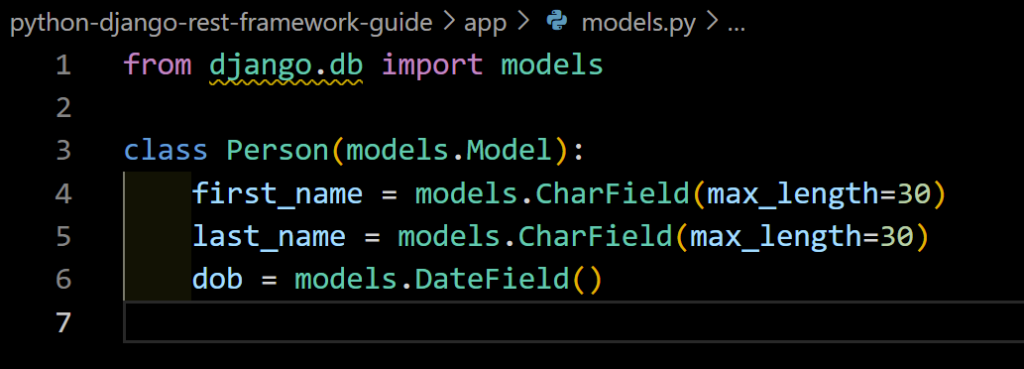
How to create Django model
Also for reference I’m include the basic Django model of how the Person object looks like this is a vanilla Django model with nothing special about it.
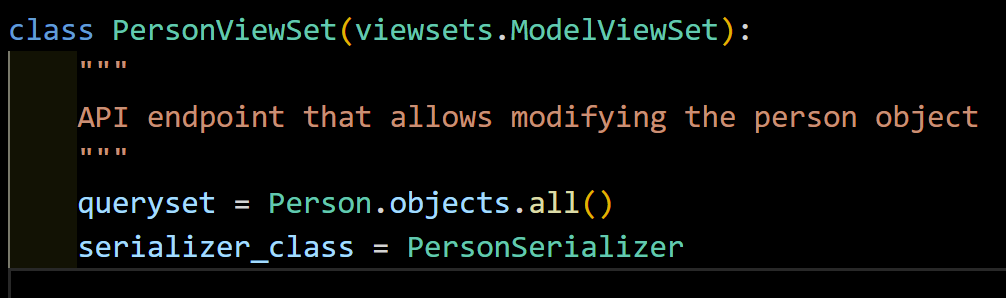
How to create a Django Rest Framework viewset
The view of our model will be super simple now that we are using the Django Rest Framework and you will start realizing the potential what can be done just by writing a few lines of code. The idea is based on referencing a base class called the ModelViewSet.
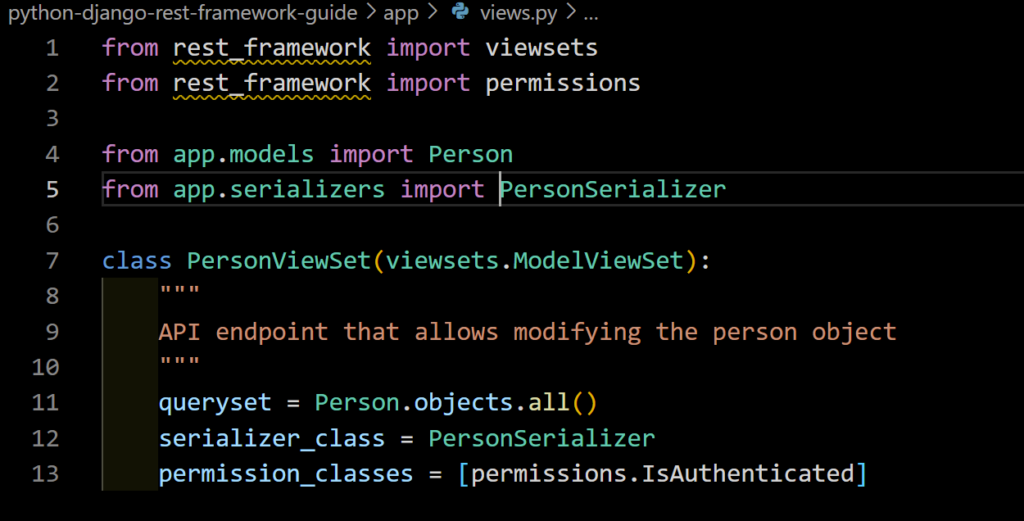
As you can see above all you have to tell it is what queryset all REST operations will be taking place on. In the case above we are not applying any filters or ordering but we can easily do so. For simplicity we are just operating in the entire result set. Furthermore we are instructing the DRF to use a serializer to validate the request and returning of results when they come in. Later we will walk through of adding/deleting/adjusting a Person object step by step so you can see how easily this is done with 3 lines of code.
How to add a route in Django Rest Framework
As a last step we need to add a route so our API can get exposed to the user. The DRF has a way of doing that using routers which creates all the static urls for you without you having to type them in manually. This is again an elegant way of abstracting a lot of boiler plate code you would otherwise be writing if you were to use vanilla Django. I personally find that feature very useful and it’s one of my favorites.
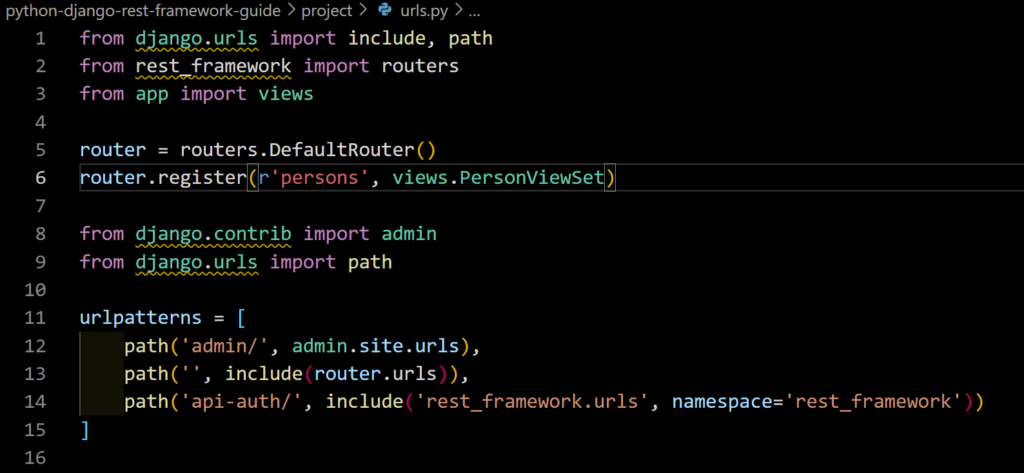
The key difference above is the router addition, this is the magic that registers all the routes as explained above.
How to test Django Rest Framework
How to check Django Rest Framework Permissions
Now that everything is in place we are ready to start playing and testing our platform to see if it does what we intended it to do. But before we start testing there’s something worthwhile mentioning. If you notice in the view screenshot above there’s a key detail about permissions. In the real world you wouldn’t want to have all your APIs exposed to the public and that’s where permissions come in handy. With DRF you can fine grain this to the API level which is a great addition. As defined above if we were to try our existing page we will get the following problem:
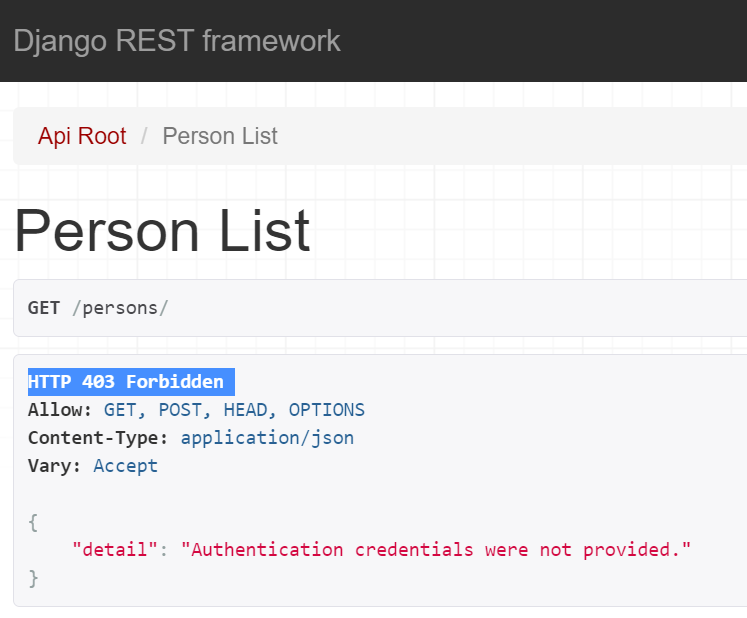
The reason this is happening is because we told our framework to make sure the user is authenticated before the request is allowed to go through. Since I just went to my browser and tried to load the API endpoint this did not work and I got the Forbidden 403 HTTP Error code. There’s two ways around this:
- Remove the authentication permission code
- Login using the Django authentication system
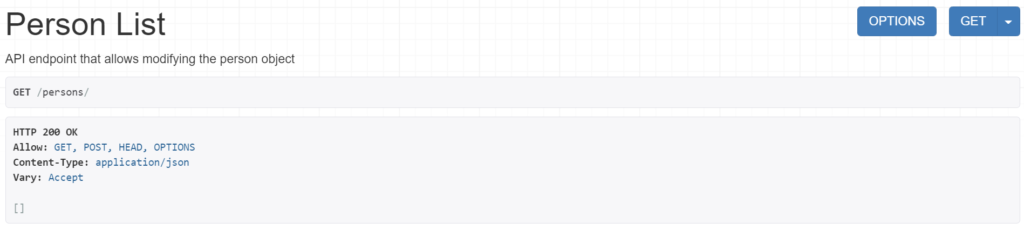
Since we are debugging this locally and we don’t really care for authentication we can go ahead and completely remove it for now from our code so the updated view will look like this:
Now that the permissions are fixed we will retry and that should land us in the Django main page which we could adjust things and start testing our code.
How to implement a Django REST POST Request – Add new records
So now that we have a fully functional API endpoint we can start testing it by adding a few Person objects to it. The page is pretty self explanatory and you can use the DRF ui to do this but you can also use alternatives such as curl or sending directly API requests programmatically.

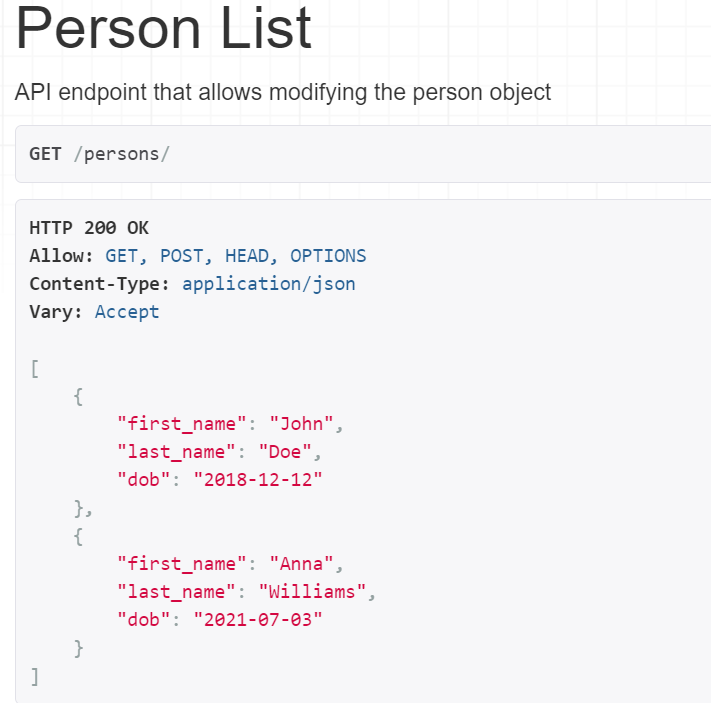
How to implement a Django REST GET Request – Get records
If we do not specify anything to the API endpoint it will default in to showing you all the entries from the table that were previously added, additionally you can request specific ones using an ID at the end of it so for example in order to get all the results you would be going to: http://localhost:8000/persons and if you want to request lets say the first record you would be visiting: http://localhost:8000/persons/1. Below you can see all the entries we just added.
How to implement a Django REST DELETE Request – Delete records
When we try to do this we will get an error from the Django server saying that the DELETE method is not supported. This is because the default ModelViewSet by the Django Rest Framework does not support object deletions in the http methods allowed. In order to do this we need to slightly adjust our model code and introduce a variety of different classes that need to be imported in our code. This would allow us to support deletions of objects. The code below which an also be found in our github is shown below.

As you can see from above we inherited some vanilla classes from DRF into our view in order to accomplish the DELETE code change and removed the default one we had used previously.
In order to test this we need to step outside our web browser context and use the curl command to send our DELETE request. To do this you can use the following command:
curl -v -H “Accept: application/json” -X DELETE “https://unbiased-coder.com:8000/persons/1/”
This will be requesting from our API endpoint to delete the first entry and also give us a result in JSON format. Make sure you use the -X DELETE to specify the method for the curl command otherwise it will default to a GET request.
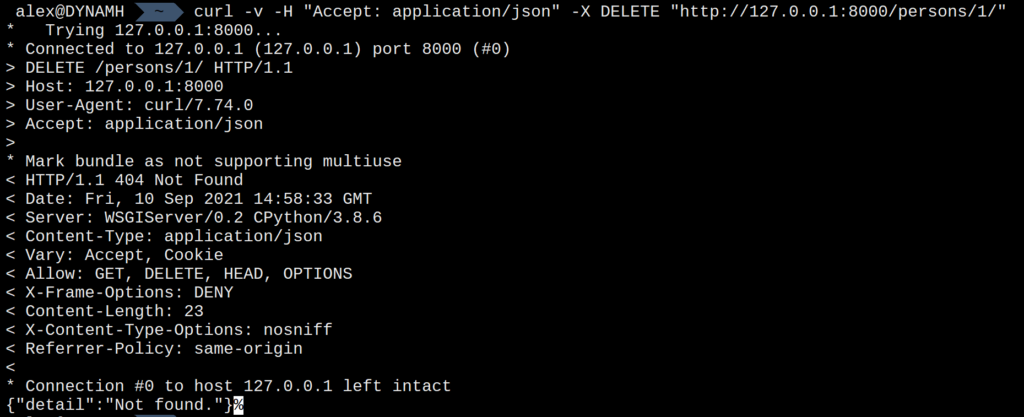
Now that we have done this lets go ahead and see if the first entry in our list got deleted.
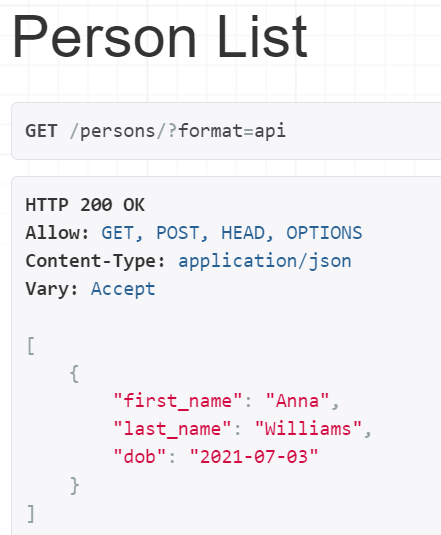
As you can see above the entry is now gone which means our DELETE command was successfully sent and accepted by our API endpoint. Without having to write too much code we got for free another popular REST API, the deletion.
How to implement a Django REST PUT Request – Modify a record
In a similar way with the deletion method above in this case we will be adding one last mixin into our inheritance of our base person view which is ‘mixins.UpdateModelMixin’. Pretty self explanatory the naming convention used by the mixins this allows you to update records using the PUT http method. Similar to before we can use the curl command to adjust the record that’s left in our Person table. To do this we issue the following command:
curl -v -H “Accept: application/json” -X PUT “https://unbiased-coder.com:8000/persons/2/” -d first_name=Nick -d last_name=Malone -d dob=2011-1-1
This will update the name to Nick the last name to Malone and the date of birth to 1-1-2011
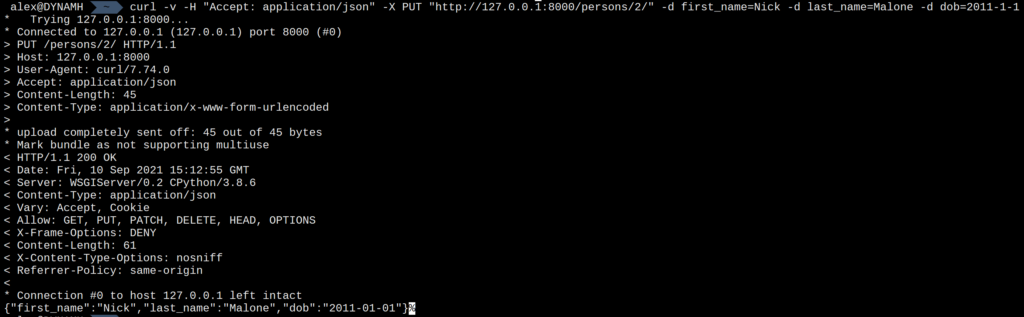
And to verify things worked fine we load up the browser again to get all of our remaining records (there should be only 1).
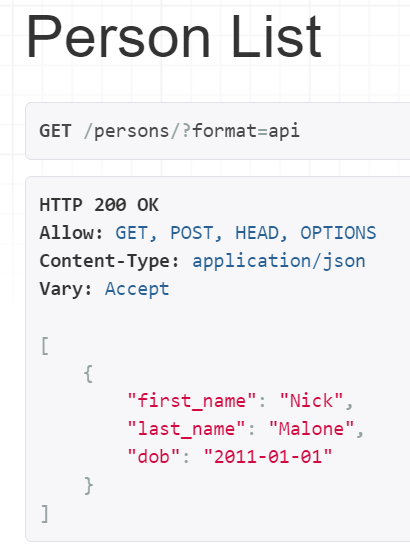
As you can see above the result was successful. We previously delete the first record and now we have successfully edited this record.
Conclusion
If you found this article useful and you think it may have helped you please drop me a comment below I would appreciate it.
Don’t forget to drop me a line for any questions, comments below I check periodically and try to answer them in the priority they come in.
Also if you have any corrections please do let me know and I’ll update the article with new updates or mistakes I did.
If you would like to learn more about Python please take a look at my section here for more articles.
I also have another interesting article specifically for Django talking about other popular Django extensions 7 Django Extensions that will make your life easy article that you can find here.
Which Python Django API framework you find useful?
You can find some relevant Django articles below: