Introduction
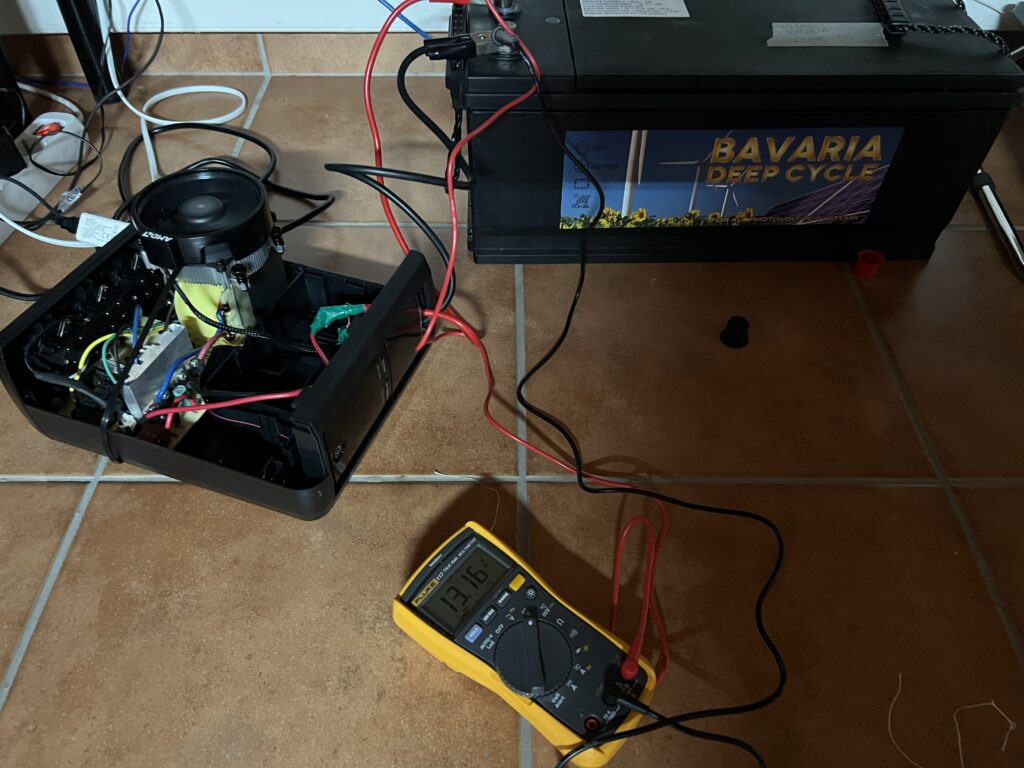
We will go over how to Convert UPS To Use Car Battery.
Did you know that you can turn your cheap UPS into a battery powerhouse?
We will break down this in the following sections:
- How to modify your UPS to Use a car battery
- How to cool down your UPS to sustain the larger battery charging
- How to secure wire connectivity
I have used this successfully for 6 months now and it has been working pretty well. It’s a solid solution for me to have power when there’s a power outage. Since living in South Florida this happens frequently with the storms and hurricanes having this setup handy helps out a lot.
I will cover this step by step for you so you can replicate it for your unit if you decide to do so.
Keep a note that I’m not a professional nor I endorse you doing it. In fact, this is strictly for educational reasons and is completely theoretical. If you are not a certified electrician with experience working with electricity please do not attempt this in any way shape or form. Making a mistake on the wiring can be lethal and cause a fire. Batteries are highly inflammable and if they overheat due to overcharge could catch on fire or even an explosion.
Why Convert A UPS To Use Car Battery
This is a common question that I always get. Why should you convert your UPS to a car battery and not just use a traditional setup such as an inverter and a battery? Well there’s many reasons lets go over them below:
- UPS batteries are generally pretty low in amp hours which is the measurement of how long they last, so if you want more time they are not a good solution
- If you were to just use an inverter you will also need to buy a charger to use your battery, the UPS serves both functions and it actually does this automatically as it has a built-in controller in the unit.
- The UPS has extra functionality such as built-in fuses and maintaining mode for the battery.
- If you were to do the same setup with an inverter and a charger you will need a lot of space to store them which sometimes is a problem, especially in a workplace setting.
- Typically inverters are very noisy and they do not do well with being on for prolonged hours. With the mods we will do to our UPS this could be a 24/7 working setup.
- Cost, cost cost! The UPS costs a lot less than a charger and an inverter combined. You can get away in fact with a cheap 100$ UPS like the one I used below by Cyberpower.
The list above should be enough to incentivize you to consider the setup I’ve gone with but if it isn’t you can read about it for fun.
How To Convert UPS To Use Car Battery
So let’s get our hands dirty and go over how you can convert an over-the-counter UPS unit to use a car battery.
How Does A UPS Work
To begin with, you need to understand what really a UPS does and how it works so let me break this down for you as simple as possible:
- It has a built-in controller that detects when the battery gets low and starts charging it
- It uses the battery as a power source and with the help of a DC to AC converter it outputs the voltage in sockets at the back
- It has an internal battery that is used when the power fails and this is detected by a power source voltmeter which constantly measures the input voltage from your wall plugs to see if it drops low and then kicks in to using the battery.
- It protects you from power or low voltage surges, essentially you get to use your UPS as a protecting unit for all your peripherals.
How To Soder Battery Into UPS
Before you do anything you need to unplug the UPS from any power sources. To ensure it’s completely powered off and none of your capacitors are holding any charge press the power button once unplugged from the wallet this will discharge any current and it’s good to do.
Next ground yourself to ensure safety for your equipment and yourself, I generally like to touch a metal source that’s grounded. Furthermore, I like to wear rubber shoes as they offer further protection.
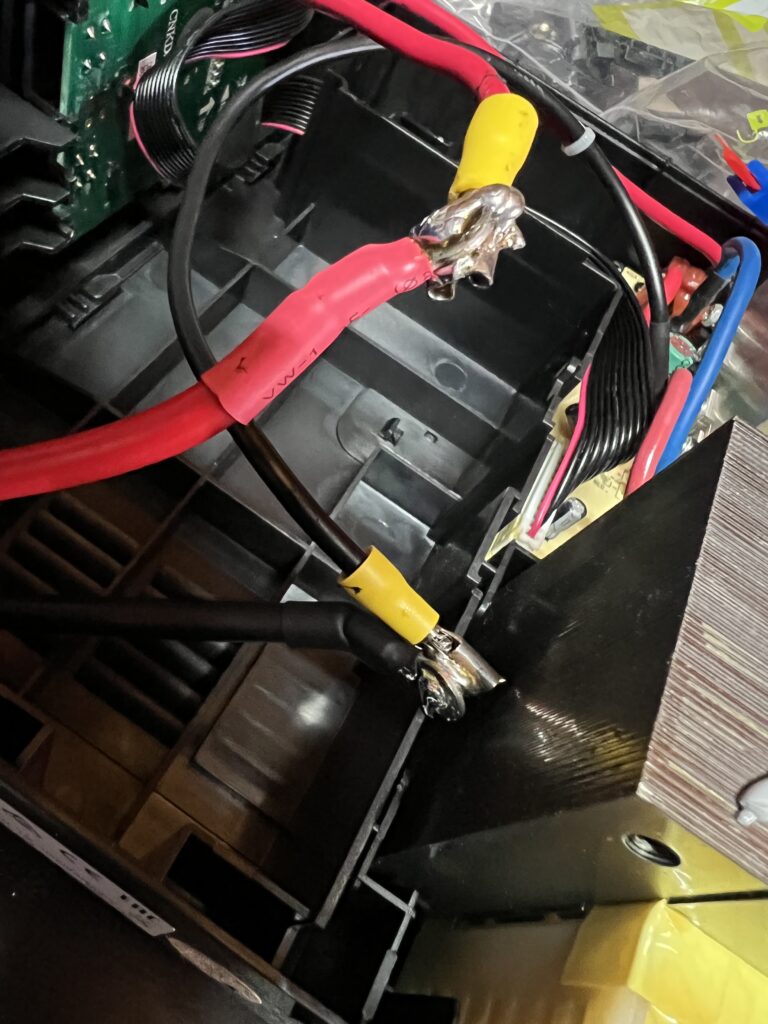
Moving on we will go over what you need to do.
- Open up the UPS unit. Basically, this is dependent on the UPS you are using but essentially all you have to do is find what screws are visible and non-visible (mine had some under some stickers) need to be unscrewed so you can get access to the interior of your unit.
- Then we need to do is remove the current battery and place it in a safe place. Start by removing the negative (black) cable first and then proceed into the red one (positive).
- Now that the battery is out we need to splice our connecting extension red and black cable with the existing one. This step is optional if you think the existing cables will reach your battery but in my case I wanted to have them pretty far apart so I had to make some extensions to the black and red cables.
- Use alligator clips at the end of your cables so you can easily attach and remove new batteries to your UPS to make it hot-swappable. Note I never actually do this while the unit is ON but in theory, you may be able to do it not that I recommend it, always try to turn off the unit and back on when you disconnect and connect a new battery.
- The next step is to connect a fuse at the end of the positive (red) cable in case there’s a spike to protect your UPS unit. Again this step is optional but I do it regardless. The amps for your fuse should be similar to what your usage is.
How To Test UPS Battery
So in my case in the picture shown below, I connected a 150ah battery to get a lot of time in case the electricity drops. This allows my internet to work for approximately 20 hours without power. But let’s see how we can test this.
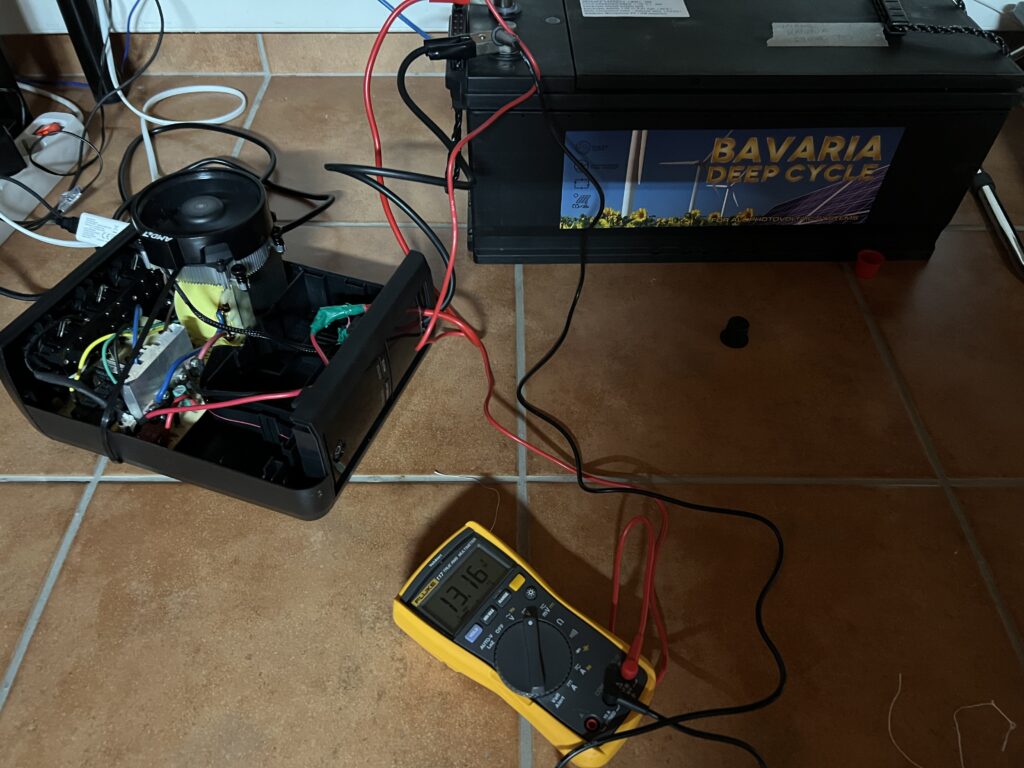
Basically, we will be using a voltmeter here to measure the voltage in our battery and to see if it’s charging with the UPS. When I first connected the battery it was relatively on the low end for a battery at 12.1volts. Basically, you want your battery to always be between 12.8-13.8 Volts. So what I did I essentially let it connect on the UPS and started taking measurements of it every few hours to see if it was charging.
After the first couple of hours, my battery had reached a charge of 12.6Volts which is a bit slow but you can’t expect much from a small unit charging a huge battery! So I let it sit overnight and I woke up to basically 13.6volts which is really good and where things should be at. This validated in my mind that the UPS was charging and using the battery as needed.
As an additional step to further test my setup I basically unplugged the UPS from the wall and I let it see if it was working. Everything checked out fine and it was successfully powering all my devices without problems.
How To Install Heatsink/Fan In UPS
And here comes the problem! Since the UPS is a small unit and it was not designed to charge such a big battery heat became quickly a problem. Especially if you live in south Florida where it gets really hot year through. So what I did was a small incision to my unit to fix the problem, keep reading to find out! Note this part is optional and you may not need it if you have good cooling in your room but I prefer to run things for a long time and increase the longevity of my electrical appliances as much as I can.
In the picture below you can see how I retrofitted a CPU cooling fan in the UPS along with a heatsink. If you don’t have one don’t worry any computer case fan will also suffice to get the job done.
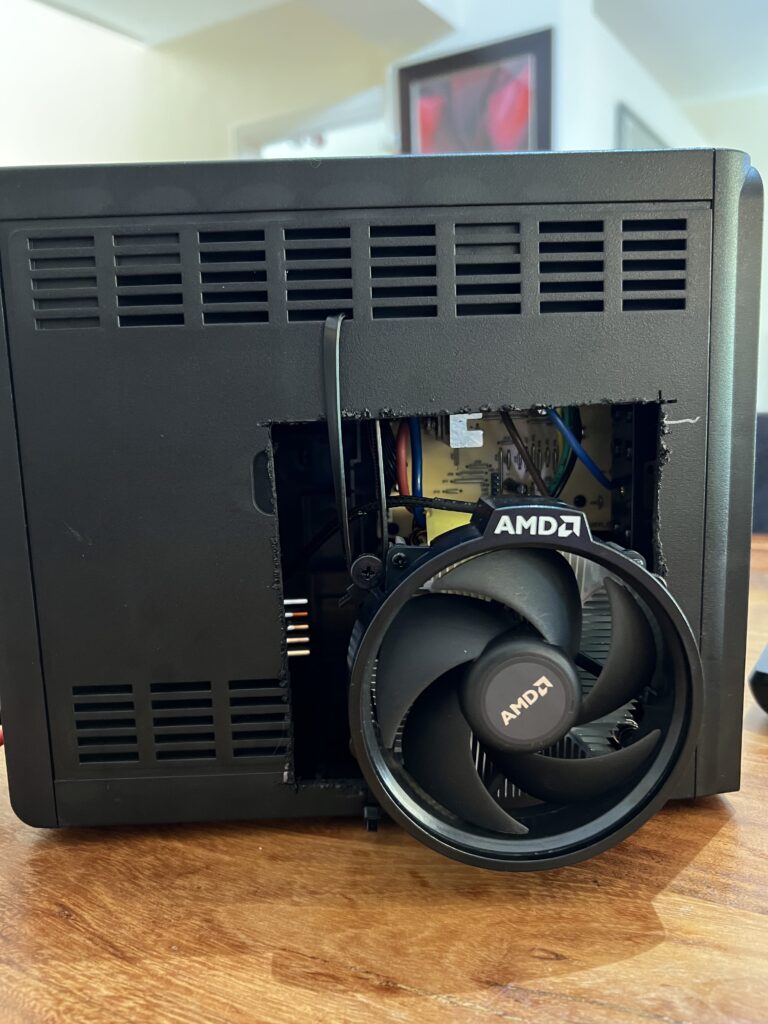
So lets go over the steps that I did for my UPS and I believe you will do to do as well in yours.
- We start by doing a cutting incision on the plastic if needed and the fan doesn’t fit. In this case I used a simple power tool cutting drill with a blade that’s designed to cut hard plastic surfaces. You can get that kind of stuff at home depot or other hardware stores. Note I did this because I didn’t want to have any of my electronics exposed, you can completely skip this step by keeping the entire side of your case open.
- Once the cutting is done I used some thermal paste and I connected the heatsink/fan combo on top of the biggest inductor I found in my unit. This is typically easily identifiable as it already has a heatsink on it and if you hold it in touch (after the UPS has been working sometime) it would feel super hot. The general rule of thumb is to basically pick one of the hottest parts of your UPS and install it near it or on top of it as I did.
- Finally, you need some way to secure it, either using clamping screws or some form of cable ties. In my case it was very difficult to apply screws so I just used cable ties which I secured in the cutting/openings that the UPS already had. This step may require some creativity in your case it may be easier or harder to do. If you are going with a completely side-open design then you can simply skip this step.
Converted UPS to Use Car Battery Final Design
The final product that you can see below is how mine ended up looking. Obviously, you do not need to have a voltmeter around for your case but I had it in the beginning as I was measuring and testing my battery. Please very careful and ensure no cables are left loose or exposed to kids or anyone that may touch them. I ended up applying plastic covers on everything I had to protect myself and anyone else from touching them by accident and you should too!
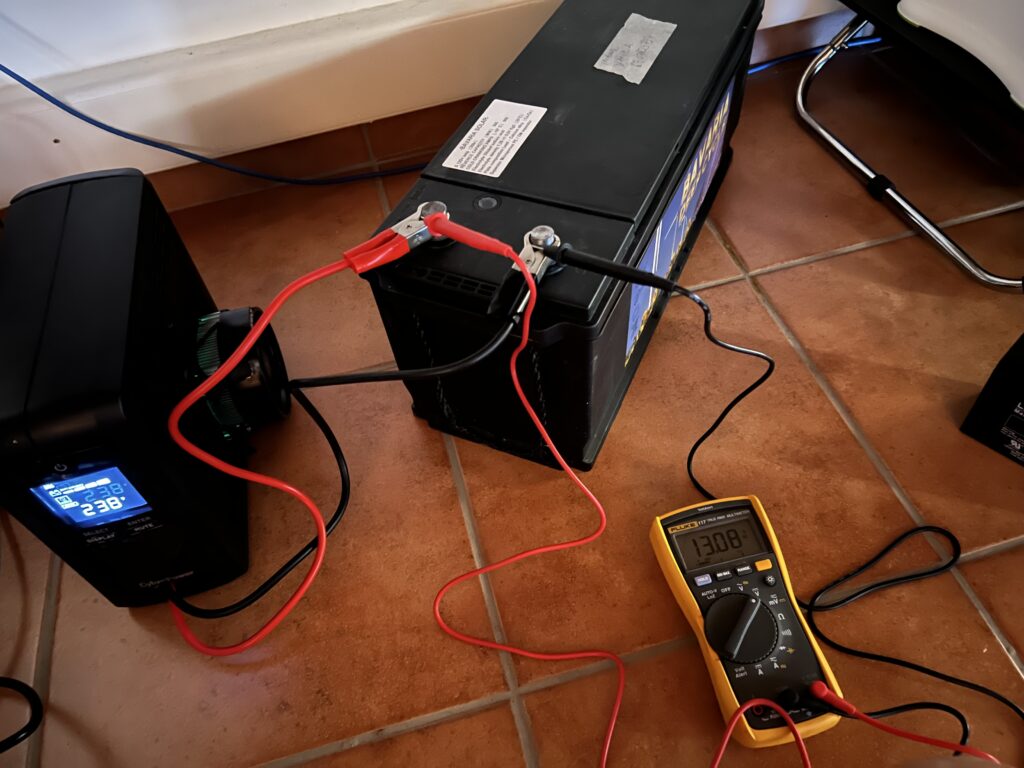
I would leave you with that last picture for now but I will check back in and add more based on the interest I get from people.
Conclusion
We were able to successfully go over how to Convert UPS To Use Car Battery, hopefully I answered any questions you may have had and entertained you. Again this is a highly difficult thing to do and only professionals should attempt it. The risk is extremely high for something going wrong and you may end up getting electrocuted.
If you found this useful drop me a cheer below I would appreciate it.
If you have any questions, or comments please post them below or send me a note on my twitter. I check periodically and try to answer them in the priority they come in. Also if you have any corrections please do let me know and I’ll update the article with new updates or mistakes I did.
Is it worth to invest on an expensive UPS?
If you are not a certified professional with electronics or electrical background please do so. If you have experience and it’s your daytime job to work with electrical appliances and have the sufficient knowledge then you can follow my guide and save some money.
Related:
You can find some references to what we discussed earlier here: