Introduction

Today we will discuss on How To Extract Text Using PDFMiner In Python in simple and easy to follow guide.
Did you know that Python has a lot of PDF processing libraries but PDFMiner has a feature rich set of helpers?
We are going to cover the following things:
- How To Install PDFMiner
- Full Code Example Of Extracting Text Using PDFMiner
- Test Run In Some Sample PDF Files
I have been working in the Software industry for over 23 years now and I have been a software architect, manager, developer and engineer. I am a machine learning and crypto enthusiast with emphasis in security. I have experience in various industries such as entertainment, broadcasting, healthcare, security, education, retail and finance.
You can find more on PDFMiner Source Code here.
The full reference documentation for the project can be found here.
All the code discussed in this document can be found in my Github repo here.
What Is PDFMiner In Python
PDFMiner is a Python Library and Tool that lets you extract text in a programmatic way from a PDF document. The library includes a rich feature set and capabilities that allow you to extend beyond the basic PDF processing. It can be used as part of your analytics, document processing or even conversion tools.
Does PDFMiner Work In Python 3
Since PDFMiner was ported into the pdfminer.six version it has since then been available exclusively for Python 3. So the support for it is very good as I have personally used it extensively in various projects with success even using the later versions of Python 3 such as 3.10. Pending newer releases this may break compatibility so I recommend you lock in your Python version and PIP package version if you are using this in production.
What Is The Difference Between PDFMiner and PDFMiner six
The difference is that PDFMiner six is a community maintained fork of the original library which was called just PDFMiner. Since then it has been extended to support later versions of Python and included any new developments, features and additions added to the tool.
How To Install PDFMiner
To get started we are going to use the virtualenv approach along with pip packages to setup PDFMiner six in our system. This method works well and can be easily ported to any operating system, docker containers or virtual machines. I recommend you lock in the environment with the method I describe below if you are using this in any production environment to avoid incompatibilities or version fluctuation between Python releases and PDFMiner releases.
Python 3 and PDFMiner Requirements
In order to install PDFMiner to your system you need to have at least a few things installed in your system:
- Python 3.0: You can download this from the python website here based on whatever operating system you have here
- PIP: The Python package manager called PIP to install the dependencies which you can find here
Setup Virtual Environment for PDFMiner
The output of all commands may be slightly different for you based on what operating system you are using. In my case I’m using Mac OSX with a zsh shell running on iTerm2.
Setting up the virtual environment is as simple as installing the virtualenv command and then activating the environment that we are going to use to get the PDFMiner package installed. You can do this by following the instructions below:
main alex@diamesos ~/code/unbiased/python-extract-text-pdfminer > pip install virtualenv
DEPRECATION: Configuring installation scheme with distutils config files is deprecated and will no longer work in the near future. If you are using a Homebrew or Linuxbrew Python, please see discussion at https://github.com/Homebrew/homebrew-core/issues/76621
Requirement already satisfied: virtualenv in /opt/homebrew/lib/python3.9/site-packages (20.10.0)
Requirement already satisfied: distlib<1,>=0.3.1 in /opt/homebrew/lib/python3.9/site-packages (from virtualenv) (0.3.4)
Requirement already satisfied: backports.entry-points-selectable>=1.0.4 in /opt/homebrew/lib/python3.9/site-packages (from virtualenv) (1.1.1)
Requirement already satisfied: filelock<4,>=3.2 in /opt/homebrew/lib/python3.9/site-packages (from virtualenv) (3.4.0)
Requirement already satisfied: six<2,>=1.9.0 in /opt/homebrew/lib/python3.9/site-packages (from virtualenv) (1.16.0)
Requirement already satisfied: platformdirs<3,>=2 in /opt/homebrew/lib/python3.9/site-packages (from virtualenv) (2.4.0)
Note this was already installed on my system in your system it may fetch some new packages. but the command to use is the one shown above.
The next step is to create and activate a virtual environment which we are going to use across this guide, the process of this is shown below:
main alex@diamesos ~/code/unbiased/python-extract-text-pdfminer > virtualenv venv
created virtual environment CPython3.9.9.final.0-64 in 196ms
  creator CPython3Posix(dest=/Users/alex/code/unbiased/python-extract-text-pdfminer/venv, clear=False, no_vcs_ignore=False, global=False)
  seeder FromAppData(download=False, pip=bundle, setuptools=bundle, wheel=bundle, via=copy, app_data_dir=/Users/alex/Library/Application Support/virtualenv)
    added seed packages: pip==21.3.1, setuptools==59.6.0, wheel==0.37.0
  activators BashActivator,CShellActivator,FishActivator,NushellActivator,PowerShellActivator,PythonActivator
main alex@diamesos ~/code/unbiased/python-extract-text-pdfminer > source venv/bin/activate
main (venv) alex@diamesos ~/code/unbiased/python-extract-text-pdfminer >
Note once the environment is activated if you are using oh-my-zsh then it will show a little (venv) the name of the environment you selected as the activated one next to your shell prompt. If you don’t see that don’t worry about it as long as the source command did not report any errors everything should be activated as usual.
Install PDFMiner Pip Package
Now that we have a virtual environment activated we can proceed to install the PIP package as shown in the command below.
main (venv) alex@diamesos ~/code/unbiased/python-extract-text-pdfminer > pip install pdfminer.six
Collecting pdfminer.six
  Downloading pdfminer.six-20211012-py3-none-any.whl (5.6 MB)
     |████████████████████████████████| 5.6 MB 2.6 MB/s
Collecting chardet
  Downloading chardet-4.0.0-py2.py3-none-any.whl (178 kB)
     |████████████████████████████████| 178 kB 38.3 MB/s
Collecting cryptography
  Downloading cryptography-36.0.1-cp36-abi3-macosx_10_10_universal2.whl (4.8 MB)
     |████████████████████████████████| 4.8 MB 2.1 MB/s
Collecting cffi>=1.12
  Downloading cffi-1.15.0-cp39-cp39-macosx_11_0_arm64.whl (173 kB)
     |████████████████████████████████| 173 kB 6.8 MB/s
Collecting pycparser
  Downloading pycparser-2.21-py2.py3-none-any.whl (118 kB)
     |████████████████████████████████| 118 kB 8.1 MB/s
Installing collected packages: pycparser, cffi, cryptography, chardet, pdfminer.six
Successfully installed cffi-1.15.0 chardet-4.0.0 cryptography-36.0.1 pdfminer.six-20211012 pycparser-2.21
main (venv) alex@diamesos ~/code/unbiased/python-extract-text-pdfminer > pip freeze > pip-requirements.txt
As mentioned above the first thing we do is execute the command to install the package. Once this is done we freeze the versions using the pip freeze command and save the in a requirements file so we can easily revert back to the versions whenever needed. This is particularly useful if you are working in a production environment and stability is important for you as you can easily restore to a specific setup that you know is good and works.
Verify Installation of PDFMiner
Finally now that everything is completed in terms of installation we need to test and make sure the package was successfully installed. To do this we just run a Python shell and import the package and check the version of it. This will signify a successfully installation of PDFMiner.
main (venv) alex@diamesos ~/code/unbiased/python-extract-text-pdfminer > ipython
/opt/homebrew/lib/python3.9/site-packages/IPython/core/interactiveshell.py:949: UserWarning: Attempting to work in a virtualenv. If you encounter problems, please install IPython inside the virtualenv.
  warn(
Python 3.9.9 (main, Nov 21 2021, 03:16:13)
Type 'copyright', 'credits' or 'license' for more information
IPython 7.30.1 -- An enhanced Interactive Python. Type '?' for help.

In [1]: import pdfminer

In [2]: pdfminer.__version__
Out[2]: '20211012'
As it can be seen above the package has successfully been installed with versions 2021-10-12.
How To Convert PDF to Text With PDFMiner Command Tool
Now that everything is in place we can proceed and start working with the library and package that got installed. The PDFMiner package comes with a bunch of command line utilities which can be used to process and examine a PDF document. One of them is converting the PDF document into a text document in a quick and easy way without having to write any code. Later we will analyze how we can also do this programmatically.
In order to do this we need to use one of the pre-made Python utilities called pdf2text.py which is part of the library, running it can be shown below:
main (venv) alex@diamesos ~/code/unbiased/python-extract-text-pdfminer > python venv/bin/pdf2txt.py unbiased-coder-sample.pdf
My Name is Unbiased Coder

My blog is:
https://unbiased-coder.com

My Twitter is:
https://twitter.com/unbiasedcoder
As it can be seen above the pdf2text utility found the text as shown in the terminal. If you would like to save it to a text file you can also use the shell redirect or the outfile argument: –outfile OUTFILE. This will save the output in whatever file you specify as an argument.
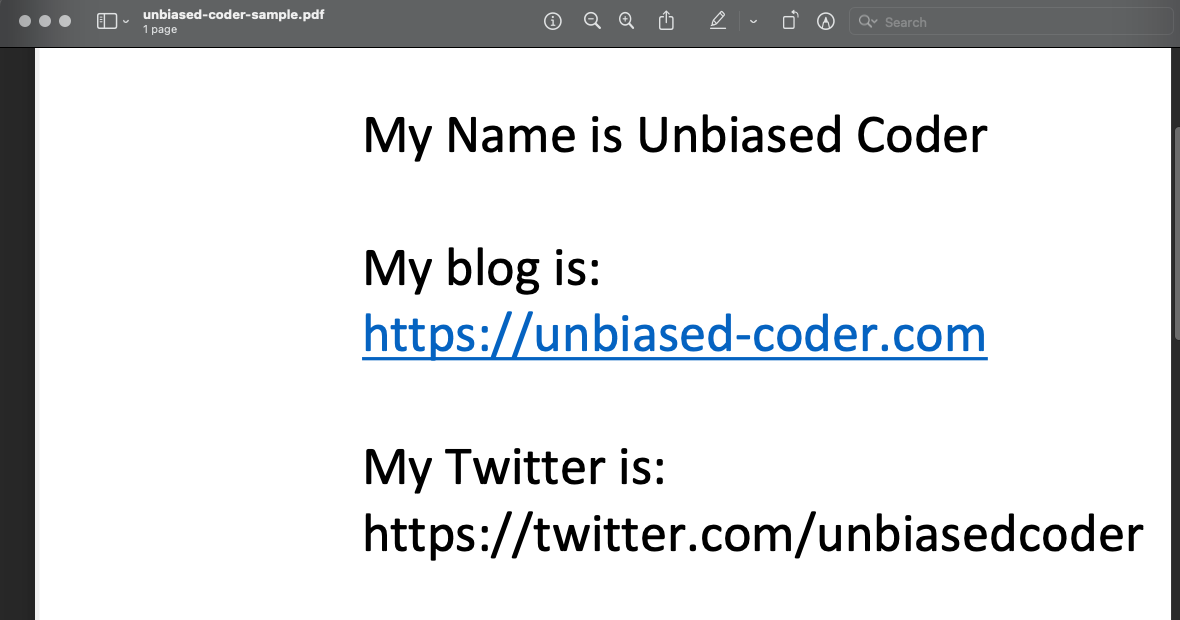
As a confirmation if we open the PDF with a normal system viewer to verify that all text got extracted it would look like this:

As it can be seen above this confirms our test worked.
How To Extract Text From PDF using PDFMiner Python
Since the code above that we executed is basically written in Python you can use that as a reference to extract the text from the document. The important part that we care about is the following code:
outfp = extract_text(**vars(A))
This function extracts the text from the PDF document and is part of the library. You can find the full source of the file in venv/bin/pdf2txt.py once you install the package.
How To Extract Links From A PDF
The links would show up exactly as the text so there’s a further step we need to add here and introduce a library like BeautifulSoup which will get the job done on identifying the <a> href tags in the document. There’s however one step we need to do before that and this is convert or PDF to an HTML document. For simplicity here we can use again the command line tool to do this as shown below. This step is necessary because BeautifulSoup only understands an html buffer.
Install BeautifulSoup To Extract Links From A PDF
As mentioned above the first thing we need to do is introduce the beautifulsoup library to help us out with parsing for those links.
main (venv) alex@diamesos ~/code/unbiased/python-extract-text-pdfminer > pip install beautifulsoup4
Collecting beautifulsoup4
  Downloading beautifulsoup4-4.10.0-py3-none-any.whl (97 kB)
     |████████████████████████████████| 97 kB 2.9 MB/s
Collecting soupsieve>1.2
  Downloading soupsieve-2.3.1-py3-none-any.whl (37 kB)
Installing collected packages: soupsieve, beautifulsoup4
Successfully installed beautifulsoup4-4.10.0 soupsieve-2.3.1
Couldn’t Find a Tree Builder with The Features You Requested: LXML
If you are using a MAC computer you may get an error as follows if you try to use BeautifulSoup:
FeatureNotFound: Couldn't find a tree builder with the features you requested: xml. Do you need to install a parser library?
Since HTML is based on the XML parsing format to work it requires an XML parser which is not by default available. One of the most popular ones in place is LXML in order to do this simply follow the instructions below to install the package and this will resolve the error.
main (venv) alex@diamesos ~/code/unbiased/python-extract-text-pdfminer > pip install lxml
Collecting lxml
  Downloading lxml-4.7.1.tar.gz (3.2 MB)
     |████████████████████████████████| 3.2 MB 3.2 MB/s
  Preparing metadata (setup.py) ... done
Building wheels for collected packages: lxml
  Building wheel for lxml (setup.py) ... done
  Created wheel for lxml: filename=lxml-4.7.1-cp39-cp39-macosx_12_0_arm64.whl size=1494525 sha256=0977435aa487ce7b4cd453d64616cdda3fc9e78a78549eee1c463d53c3fc6341
  Stored in directory: /Users/alex/Library/Caches/pip/wheels/b2/0f/42/b06ea5234bf22bd3f4bf2d60a0dcdf4d4b2e709435d3ffb3c3
Successfully built lxml
Installing collected packages: lxml
Successfully installed lxml-4.7.1
Now that we have LXML installed this error shouldn’t happen anymore as BeautifulSoup will have a parser to work with.
Convert PDF to HTML Using PDFMiner
Next we need to convert the PDF document to HTML format so BeautifulSoup can understand it. To do this we can run the
main (venv) alex@diamesos ~/code/unbiased/python-extract-text-pdfminer > venv/bin/pdf2txt.py -o sample.html unbiased-coder-sample.pdf
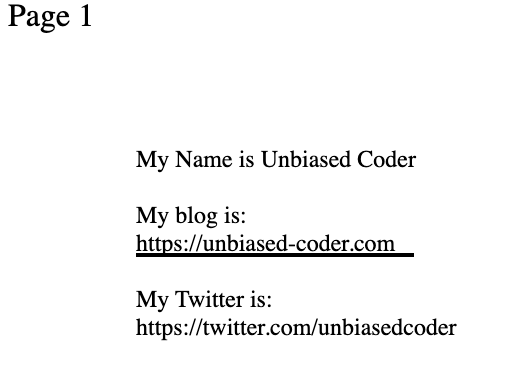
This will create a file called sample.html that has an html version of our PDF document. To verify we can simply open it in a browser to make sure it’s converted properly.

As it can be seen above it was converted properly, apart with some formatting we have as an underline to the unbiased-coder.com link.
Extract Links From HTML Document Using BeautifulSoup
So now that we have extracted successfully the text and converted into an html format we can use BeautifulSoup to read the sample.html file and see if it can successfully identify the links in the document. We will craft a small piece of code to do this task as shown below and test it out.
Before we do this however since we created our PDF without HTML tags the links included where simple text. So we need to go ahead and slightly modify our HTML file to include those more specifically the changes will look like this:
<br>My blog is:
<br><a href="https://unbiased-coder.com">Blog</a>
<br>My Twitter is:
<br><a href="https://twitter.com/unbiasedcoder">Twitter</a>
So now we are ready to run the BeautifulSoup code which can also be found in the Github here.
from bs4 import BeautifulSoup

html = open('sample.html', 'r').read()
soup = BeautifulSoup(html, features="lxml")

for element in soup.find_all('a', href=True):
    print (element['href'])
As it can be seen above we are simply printout out any href values we see in our document. Running the script will yield the links we were looking for:
main (venv) alex@diamesos ~/code/unbiased/python-extract-text-pdfminer > python ./extract_links_from_html.py
https://unbiased-coder.com
Tweets by UnbiasedCoder
#1
The #1 number is something that got added when we converted our PDF and can easily get rid of it, if we add an extra check in our code to see if the string startswith http if we want to be more strict about the results it returns.
Conclusion
If you found How To Extract Text Using PDFMiner In Python useful and you think it may have helped you please drop me a cheer below I would appreciate it.
If you have any questions, comments please post them below I check periodically and try to answer them in the priority they come in. Also if you have any corrections please do let me know and I’ll update the article with new updates or mistakes I did.
The pdfminer library offers a lot of other useful functions that you may find useful so make sure you check their website here for more information.
What is your favorite PDF library for Python?
I personally like to use pdfminer because it offers a lot of rich features and works well with a wide range of PDF documents I have tested it with. I have also used it in many projects of mine and it has generally been stable without giving me a lot of issues.
If you would like to read more articles I’ve written in Python you can check the list below: