Introduction
Today we will discuss on everything you need to know about How to extract text from images in Python (OCR) in simple and easy to follow guide.
Did you know that Python libraries offer more than one way to extract text from images?
Today I will break down three different ways on how to accomplish this task.
The first solution is cloud focused and you need to pay for it and the other two solutions can be executed in a local environment. We will go over some samples of code and what advantages and disadvantages each of them has.
All the code and the steps along with images can be found in the GitHub Repo below:
https://github.com/unbiased-coder/python-ocr-guide
I have been working in the Software industry for over 23 years now and I have been a software architect, manager, developer and engineer. I am a machine learning and crypto enthusiast with emphasis in security. I have experience in various industries such as entertainment, broadcasting, healthcare, security, education, retail and finance.
How to setup your system to extract text from images in Python (OCR)
First we are going to discuss how to setup your system in order to be ready to extract text from images in Python. As mentioned above Python offers various libraries and frameworks that allow you to do this. In this section we will describe how to install the necessary per-requisites to get started with the code examples that we will walk through below.
How to setup a virtual environment to install Python PIP packages for extracting text from images
First thing is to create a virtual environment to host the packages we will be installing and activating it.
main alex@xelchaos ~/code/unbiased-coder/python-ocr-guide > virtualenv venv
created virtual environment CPython3.10.0.final.0-64 in 203ms
  creator CPython3Posix(dest=/home/alex/code/unbiased-coder/python-ocr-guide/venv, clear=False, no_vcs_ignore=False, global=False)
  seeder FromAppData(download=False, pip=bundle, setuptools=bundle, wheel=bundle, via=copy, app_data_dir=/home/alex/.local/share/virtualenv)
    added seed packages: pip==21.3.1, setuptools==58.3.0, wheel==0.37.0
  activators BashActivator,CShellActivator,FishActivator,NushellActivator,PowerShellActivator,PythonActivator
main alex@xelchaos ~/code/unbiased-coder/python-ocr-guide > source venv/bin/activate
How to install Python PIP packages to extract text from images
Once our virtual environment is initialized and activated we need to start installing the PIP packages. In our case we will install the three packages we will be going over:
- Python Tesseract (for Google Tesseract)
- Python OpenCV
- Python Boto3 (for AWS Textract)
main (venv) alex@xelchaos > ~/code/unbiased-coder/python-ocr-guide > pip install pytesseract opencv-python boto3 python-dotenv Pillow
Collecting pytesseract
  Using cached pytesseract-0.3.8-py2.py3-none-any.whl
Collecting opencv-python
  Downloading opencv_python-4.5.4.58-cp310-cp310-manylinux2014_x86_64.whl (60.3 MB)
     |████████████████████████████████| 60.3 MB 7.9 MB/s
Collecting boto3
  Using cached boto3-1.20.0-py3-none-any.whl (131 kB)
Collecting Pillow
  Using cached Pillow-8.4.0-cp310-cp310-manylinux_2_17_x86_64.manylinux2014_x86_64.whl (3.1 MB)
Collecting numpy>=1.21.2
  Using cached numpy-1.21.4-cp310-cp310-manylinux_2_17_x86_64.manylinux2014_x86_64.whl (15.9 MB)
Collecting s3transfer<0.6.0,>=0.5.0
  Using cached s3transfer-0.5.0-py3-none-any.whl (79 kB)
Collecting botocore<1.24.0,>=1.23.0
  Using cached botocore-1.23.1-py3-none-any.whl (8.1 MB)
Collecting jmespath<1.0.0,>=0.7.1
  Using cached jmespath-0.10.0-py2.py3-none-any.whl (24 kB)
Collecting python-dateutil<3.0.0,>=2.1
  Using cached python_dateutil-2.8.2-py2.py3-none-any.whl (247 kB)
Collecting urllib3<1.27,>=1.25.4
  Using cached urllib3-1.26.7-py2.py3-none-any.whl (138 kB)
Collecting six>=1.5
  Using cached six-1.16.0-py2.py3-none-any.whl (11 kB)
....
Installing collected packages: six, urllib3, python-dateutil, jmespath, botocore, s3transfer, Pillow, numpy, pytesseract, opencv-python, boto3
Successfully installed Pillow-8.4.0 python-dotenv-0.19.1 boto3-1.20.0 botocore-1.23.1 jmespath-0.10.0 numpy-1.21.4 opencv-python-4.5.4.58 pytesseract-0.3.8 python-dateutil-2.8.2 s3transfer-0.5.0 six-1.16.0 urllib3-1.26.7
How to install Tesseract in Linux and Windows
One last step we need to do is install Tesseract into the system so the Python PIP package can interface with it. This is highly dependent on your Operating System so for example if you are on windows you simply have to download the executable here. Using the Windows installer is as simple as installing any other package, just make sure you keep a note of the install location as we will need to provide it later in the code when initializing.
I use Linux so for me the installation process is slightly different than Windows. Each Linux distribution has their own package manager and you should refer to that in order to install the package. For example some of those are listed below:
- Ubuntu/Debian: For Ubuntu and Debian systems you can use the apt command to search and install your package (apt install pkg)
- Fedora: For Fedora you can use the yum command which is similar to apt as described above
- ClearLinux: This is the distro I use and the way it’s installed is shown below. Basically installing the bundle using swupd
main (venv) alex@xelchaos ~/code/unbiased-coder/python-ocr-guide > sudo swupd bundle-add devpkg-tesseract tesseract
Loading required manifests...
Downloading packs (4.02 MB) for:
 - devpkg-tesseract
 - devpkg-leptonica
 [100%]
Finishing packs extraction...
Validate downloaded files
 [100%]
No extra files need to be downloaded
 [100%]
Installing files...
 [100%]
Calling post-update helper scripts
External command: pacrunner.service: restarted (the binary was updated)
Successfully installed 1 bundle
1 bundle was installed as dependency
How to install a Tesseract language pack
One last step we need to do is install a language pack for the language we are trying to detect. To do this you can go to:
https://github.com/tesseract-ocr/tessdata/blob/main/
Once you go there you can select the train data set of the language you are trying to detect. For me it was English so I picked up the eng.traineddata file. Download and save it to your disk and based on where your trained data directory is you need to copy the file there for me it was /usr/share/tessdata.
Installing and verifying it works with the following commands:
main (venv) alex@xelchaos ~/code/unbiased-coder/python-ocr-guide > sudo cp ~/Downloads/eng.traineddata /usr/share/tessdata
main (venv) alex@xelchaos ~/code/unbiased-coder/python-ocr-guide > tesseract --tessdata-dir /usr/share/tessdata --list-langs
List of available languages (1):
eng
The output above shows eng which is the English trained data we installed for tesseract.
How to create a sample document to test OCR
For this we will be creating a sample image file that contains some text as long as some graphic in there (The Unbiased Coder logo). For this I used a simple GIMP image file that looks like the one below. The image file below is also in the GitHub repo here.
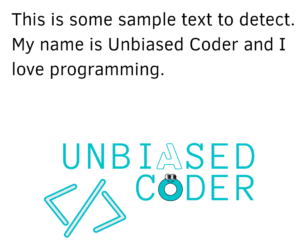
So the text our code below will be looking for is: This is some sample text to detect. My Name is Unbiased Coder and I love programming.
As a bonus we will be looking for the Logo text above ‘Unbiased Coder’.
How to extract text from images in Python Google Tesseract
The first library we are going to discuss is PyTesseract. This library is offered as a wrapper in Google’s Tesseract application. The library is very feature rich and supports all the important parts you will need to use in your code. Furthermore it’s very easy to get start (we will demonstrate this below) and does not have a big learning curve. If you want to get your hands dirty on the other hand you can provide your own training to it’s algorithm to improve along with extending it with your own language packs. These powerful features make it easy yet at the hands of a power-user very strong to accomplish difficult tasks and manage to read that difficult text.
In order to implement the code we need to follow the steps listed below:
- Import the Pillow library that we will be using to acquire an image object
- Initialize an image object using PIL
- Pass the Image object to Tesseract in order to process the file
- Print out the results of the processing
from PIL import Image
import pytesseract as pt

img_file = 'sample-ocr.png'
print ('Opening Sample file using Pillow')
img_obj = Image.open(img_file)
print ('Converting %s to string'%img_file)
ret = pt.image_to_string(img_obj)
print ('Result is: ', ret)
Once executed you can see the output of the text detected is shown below.
main (venv) alex@xelchaos ~/code/unbiased-coder/python-ocr-guide > python ./python-tesseract-ocr.py
Opening Sample file using Pillow
Converting sample-ocr.png to string
Result is:  This is some sample text to detect.
My name is Unbiased Coder and I
love programming.

UNB LA

</> Cfi[s)

ED
ER
A few observations can be made from the output above:
- The normal text we put at the top of our image was detected correctly
- The bonus text as part of the Unbiased Coder Logo was not detected properly only partly
Tesseract clearly failed to recognize the destorted O and A letters in the Logo. In order to address this issue more train data for this particular letters need to be made or the image can be improved with various graphics processing techniques leveraging the OpenCV library which will be explained below.
How to extract text from images in Python Google OpenCV
The second library we are going to discuss is OpenCV. Similar to PyTesseract OpenCV is an open source library that can be used free of use as long as you meet the licensing criteria. This makes it versatile and allows it to integrate in your project based on your needs. The main advantage of OpenCV is that it has a good community size and it’s widely accepted as an OCR alternative. The features are well documented on the website which you can find here. OpenCV builds upon PyTesseract by helping it understand the text in an image. The way it improves is the following:
- Tesseract has a hard time with a lot of shadows on the image itself
- It does not discern weird hand writings of text unless it gets trained
- It performs poorly with code that has a lot of noise in it
To avoid going into details on how to optimize the image the idea here is that you use OpenCV as a pre-processor on your image and then send it over to PyTesseract to process and extract the text as it was described earlier. There’s a great article here which explains how to denoise your images in detail, I highly recommend you read through it if you want to perfect the art of text extraction.
How to extract text from images in Python AWS Textract
The final option we will be using is a service based approach. In this case we will be using one of the services in AWS called Textract. As with everything running in the AWS infrastructure it’s a paid service so if you decide to use this do know that there’s a cost associated with it. The biggest advantage of this approach is that it basically does everything from you. AWS abstracts all the logic and just gives you the result you need without having to do any work.
More specifically using a transformation workflow either via a Lambda or a Step function you can call into the API using the Boto3 library with an S3 location of a file and get the output it needs. The main advantage of it is that it has absolutely no learning curve. Furthermore it handles all the image corrections for you and also supports various formats other than pictorial files.
As mentioned earlier the biggest pitfall in my opinion is that it’s costly at the time of this writing Nov 2021 it costs $1.5 per 1000 pages which is something that could add up fairly quickly in a commercial environment that does millions of image record processings a day. Having said that AWS only charges you for when you use it so if you have small use cases or just want to throw at it some of the harder tasks that your OpenCV/Tesseract approach can’t handle then go for it.
Furthermore as with everything that runs on a service there’s a huge performance hit as data has to move from within the network. If you are processing a lot of pictures that are big in size, especially if you are dealing with medical data this is a big problem as every file has to be transferred to AWS and then within AWS from one service to another. If your app is performance based and mission critical in terms of timing that could be a non-starter for you. Make your decision based on what you think is the right solution.
Below we will go over an example of how we can extract the text from our image in the AWS ecosystem. Before you do this I recommend two articles that I wrote one in an abstraction library I wrote and detail in this blog post here:
Boto3 Session: Setup Profile, Create, Close and Mock sessions
This will help you get started on communicating with Boto3 and then you may also find useful another one I wrote on how to communicate and upload files to AWS S3 programmatically here:
Boto3 S3 Upload, Download and List files (Python 3)
For the second task you can skip it by uploading the file via the Web Console (also described in the article above).
Now that we have the basics out of the way we can proceed and make use of our session library to start talking to AWS Textract.
The code is split in the following sequence:
- Initialize boto3 session using the boto3_helper library as documented in the articles above and can also be found in the git repo here.
- Initialize client object for textract
- Submit the job and wait for the response
- Process the result and print out the extracted text that we received.
import boto3_helper
print ('Initializing boto3 session...')
session = boto3_helper.init_aws_session()
print ('Getting Textract client...')
textract = session.client('textract')
s3_obj = {
    'Bucket': 'unbiased-coder-bucket',
    'Name': 'sample-ocr.png'
}
print ('Setting up object location: ', s3_obj)
doc_info = {
    'S3Object': s3_obj
}
print ('Processing document: ', doc_info)
ret = textract.detect_document_text(Document=doc_info)

print ('Received result: ')
for item in ret['Blocks']:
    if item["BlockType"] == "LINE":
        print (item["Text"])
The resulting output would show us what it got back from the extracted text. A few observations on this are:
- It contains all of the text in the sample image we showed above
- It detected also the logo text UNBIASED CODER as a bonus despite the anagrams in the letters O and A.
main (venv) alex@xelchaos ~/code/unbiased-coder/python-ocr-guide > python ./python-boto3-textract.py
Initializing boto3 session...
Getting Textract client...
Setting up object location:  {'Bucket': 'unbiased-coder-bucket', 'Name': 'sample-ocr.png'}
Processing document:  {'S3Object': {'Bucket': 'unbiased-coder-bucket', 'Name': 'sample-ocr.png'}}
Received result:
This is some sample text to detect.
My name is Unbiased Coder and I
love programming.
UNBIASED
CODER
Which Python OCR package is better Tesseract vs Textract
As you can tell Textract did better at detecting the strange text compared to vanilla Tesseract. Which really means two things:
- Textract will perform better with less overhead and code however it costs a lot of money
- Tesseract is a good option if you want some results and are willing to put in the work to make it work better for your needs
As you can tell Open Source gives you more power but comes at a cost of your time whereas the paid solution comes at a cost of your pocket, either way it seems you will somehow to invest in this to work well either by money or by time.
Conclusion
If you found How to extract text from images in Python (OCR) useful and you think it may have helped you please drop me a cheer below I would appreciate it.
If you have any questions, comments please post them below I check periodically and try to answer them in the priority they come in. Also if you have any corrections please do let me know and I’ll update the article with new updates or mistakes I did.
Which Python OCR Solution do you prefer to use?
My personal favorite is Google’s Tesseract library. The main reason is that it’s functional and works very well and supports a good amount of customization including adding new languages and training it for special hand writing. It’s also completely free as long as you abide by the Licensing and has very small upfront footprint to initialize and get going.
If you would like to learn more about Python related stuff I have a few articles below: