
Introduction
We will cover How To Setup AWS S3 Bucket Using AWS CDK Python.
Did you know that AWS CDK gives you the flexibility to create resources based on business logic?
I will break this review in the following sections:
- Why setting up an AWS S3 Bucket using CDK is helpful
- Walk through step by step on How To Setup AWS S3 Bucket Using AWS CDK Python
I have been using this code successfully on all my Python AWS CDK deployments to launch new S3 Buckets.
Going to keep things simple and straight to the point on how to get up and running in less than 5 minutes.
All source found in this guide can be found in the GitHub repo here.
Why Should You Use AWS CDK Python To Setup An S3 Bucket vs AWS Console
There are several reasons as to why you may want to use AWS CDK Python to deploy your S3 Buckets, I will list them below and see if one of them suits your needs or you find yourself still needing to do that.
- When creating them manually it may be a tedious task
- You can create multiple S3 buckets dynamically so that means you can deploy 100 very fast using a coding loop
- You are from a programming background rather than DevOps so programming makes more sense to you
- Avoid all the clicking and logging into the AWS console
- You have conditional and business logic on how you want to use
- You want to do a clean up and destroy resources after being used
If any of the above reasons is you then keep reading and I’ll help you get started and going super fast.
How To Setup AWS CDK Python Environment
I have written a detailed step by step guide here which you can follow and get up and running in less than a few minutes. Please follow this before proceeding into writing code. If you already have AWS CDK setup in your system there’s no need to do this.
How To Setup AWS CDK With Python
How To Setup AWS S3 Bucket Using AWS CDK Python
Now that we have the environment all setup we will do the following:
- Create a new project
- Initialize our Environment file
- Write the Code that Sets up our Stack
Create New AWS CDK Python S3 Project
If followed the previous guide and want to re-use the project you have created that’s fine. We will be doing a slight twist to this here and basically initializing it with a different name since it’s going to be dedicated for an AWS S3 creation using AWS CDK Python.
$ cdk init app --language python
...
Enjoy!
Please run 'python3 -m venv .venv'!
Executing Creating virtualenv...
✅ All done!
Setting Up AWS Environment Credentials For CDK
In order to do this I have made a detailed guide which you can find here:
Boto3 Session: Setup Profile, Create, Close and Mock sessions
You can follow the steps listed above to add a new iam user and configure your .env file accordingly.
The permission you want to use is the following in this case:
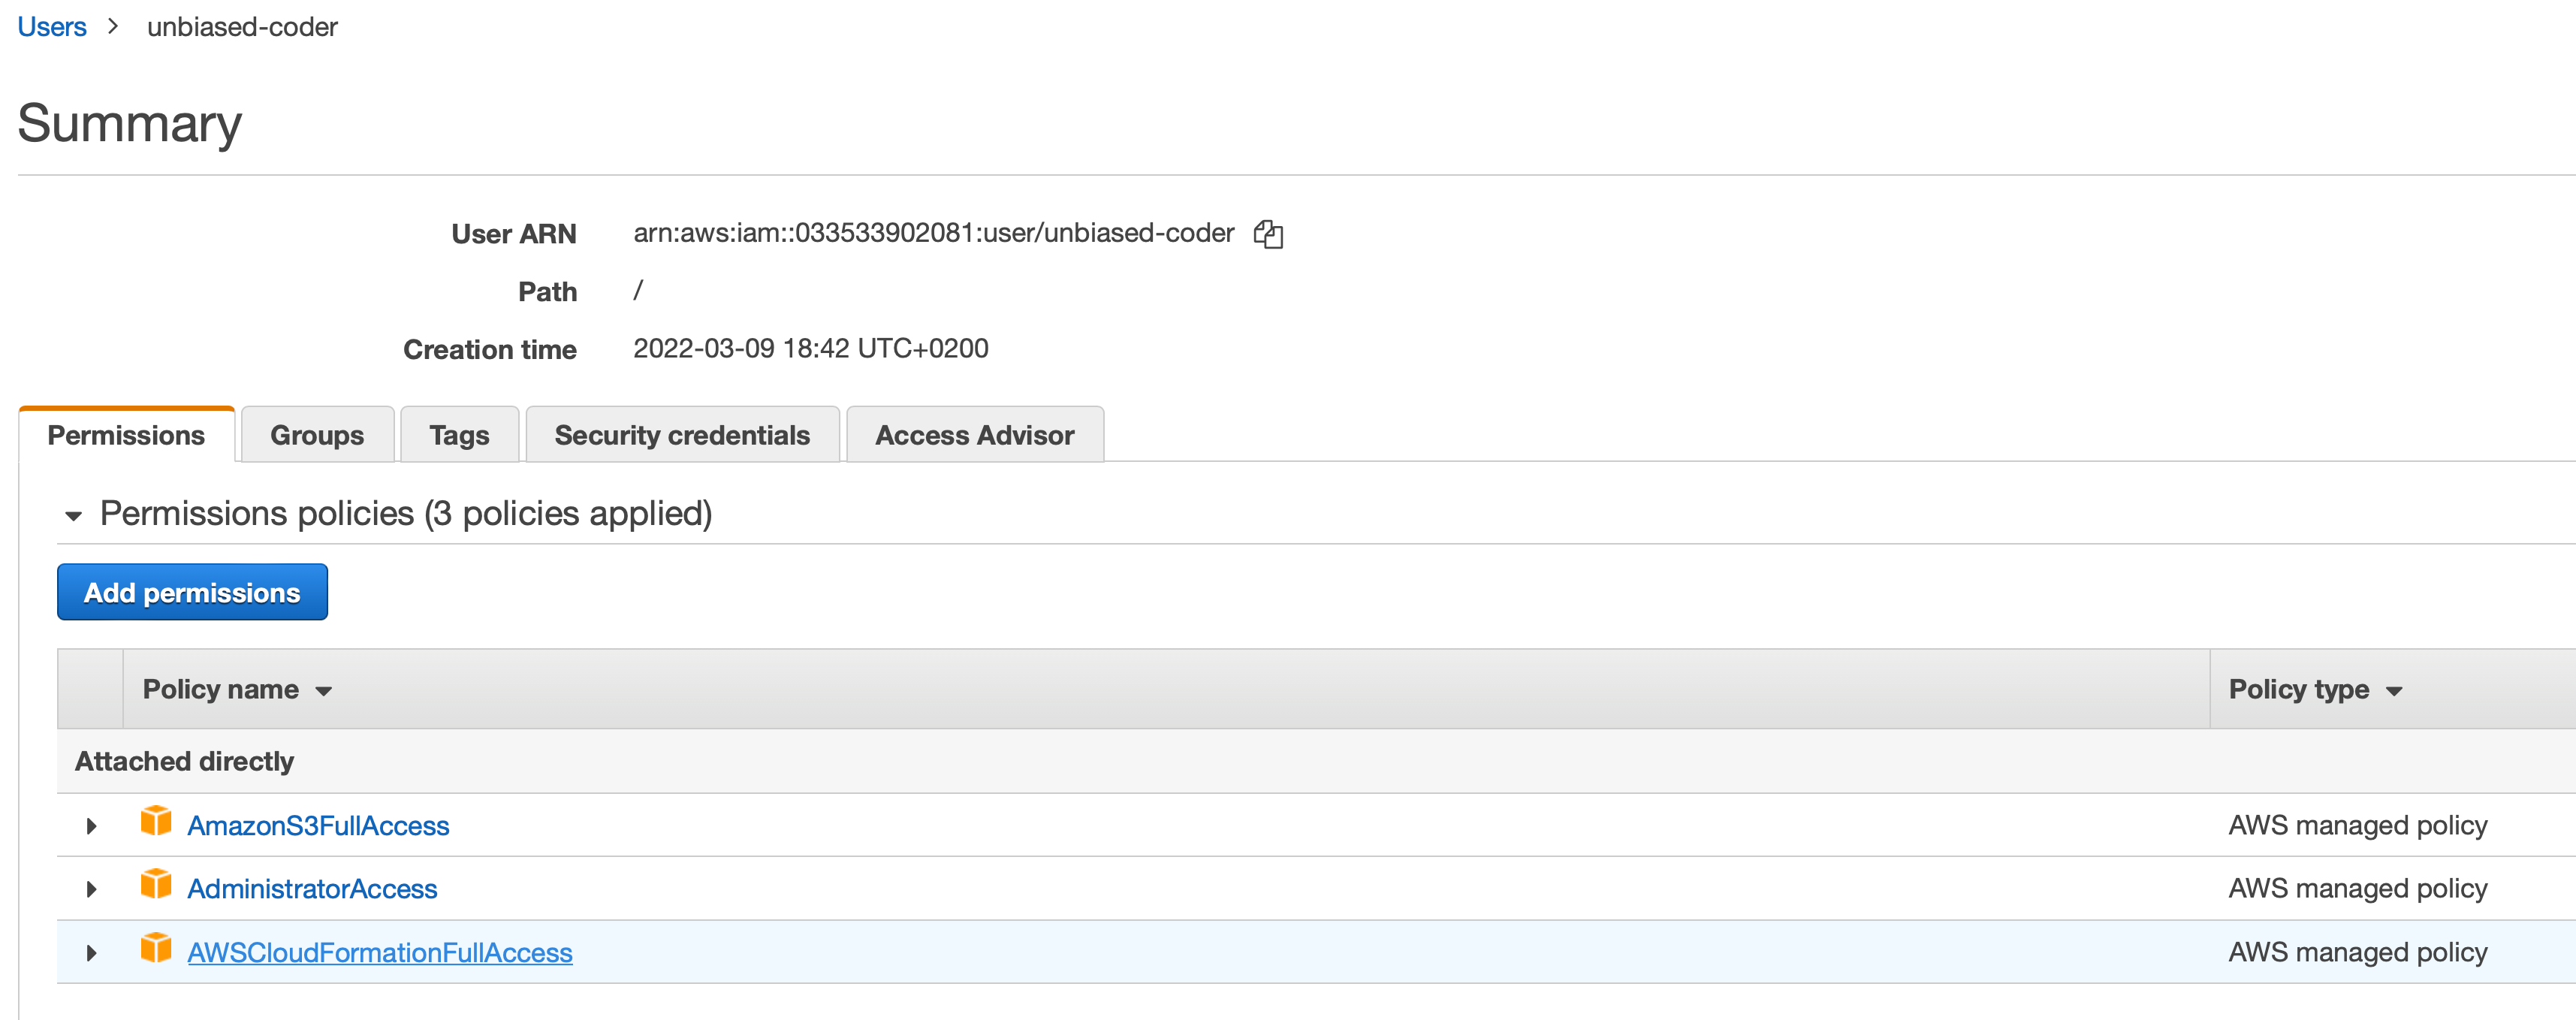
Other than the change above you can follow the guide as is to initialize the AWS SDK permissions. Do note you may not need the S3 and Cloudfront permission this is only if you plan to using the same user to programmatic upload new code or changes to S3 the Administrator permission supersedes it here.
Once this is done you also need to setup your credentials sections in your config, in this example I will be using a profile named test_deploy_s3.
The typical values such as the secret key and access keys need to be entered. Mine looks something like this:
$ cat credentials
[test_deploy_s3]
aws_access_key_id=YOUR ID
aws_secret_access_key=YOUR KEY
aws_default_region=us-east-1

$ cat config
[test_deploy_s3]
region=us-east-1
Modifying The AWS CDK Environment File For Python
Besides that we need to add two more attributes to our AWS CDK environment file and those are related to the CDK.
More specifically this would look like this:
CDK_DEFAULT_ACCOUNT=YOURACCOUNT
CDK_DEFAULT_REGION=us-east-1
Make sure to replace the CDK_DEFAULT_ACCOUNT and CDK_DEFAULT region accordingly with your information which you can retrieve from the AWS console.
After that don’t forget to initialize your virtual environment and update your requirements.txt file as it’s shown in the Github repo here.
$ pip install -r requirements.txt
Collecting aws-cdk-lib==2.15.0
  Using cached aws_cdk_lib-2.15.0-py3-none-any.whl (64.0 MB)
Collecting constructs<11.0.0,>=10.0.0
  Using cached constructs-10.0.84-py3-none-any.whl (54 kB)
Collecting python-dotenv
  Using cached python_dotenv-0.19.2-py2.py3-none-any.whl (17 kB)
Collecting jsii<2.0.0,>=1.54.0
  Using cached jsii-1.55.0-py3-none-any.whl (383 kB)
Collecting publication>=0.0.3
  Using cached publication-0.0.3-py2.py3-none-any.whl (7.7 kB)
Collecting attrs~=21.2
  Using cached attrs-21.4.0-py2.py3-none-any.whl (60 kB)
Collecting python-dateutil
  Using cached python_dateutil-2.8.2-py2.py3-none-any.whl (247 kB)
Collecting cattrs<1.11,>=1.8
  Using cached cattrs-1.10.0-py3-none-any.whl (29 kB)
CDK_DEFAULT_ACCOUNT=
Collecting typing-extensions<5.0,>=3.7
  Using cached typing_extensions-4.1.1-py3-none-any.whl (26 kB)
Collecting six>=1.5
  Using cached six-1.16.0-py2.py3-none-any.whl (11 kB)
Installing collected packages: six, attrs, typing-extensions, python-dateutil, cattrs, publication, jsii, constructs, python-dotenv, aws-cdk-lib
Successfully installed attrs-21.4.0 aws-cdk-lib-2.15.0 cattrs-1.10.0 constructs-10.0.84 jsii-1.55.0 publication-0.0.3 python-dateutil-2.8.2 python-dotenv-0.19.2 six-1.16.0 typing-extensions-4.1.1
How To Synthesize And Deploy/Bootstrap Your S3 Using AWS CDK Python
The final step is to basically run our code to:
- Synthesize
- Bootstrap
- Deploy
How To Synthesize Your AWS S3 Bucket Using AWS CDK Python
The first step as mentioned above is to Synthesize your environment with code.
This can be done in three steps:
- Modify the app.py initialization file
- Run Synthesize command
How To Modify app.py To Initialize AWS CDK
Lets examine the code that implements this.
#!/usr/bin/env python3
import os
from dotenv import load_dotenv

# load our env file
print ('Loading env file')
load_dotenv()

import aws_cdk as cdk

from s3_deploy.s3_deploy_stack import S3DeployStack

print ('Creating environment')
cdk_env = cdk.Environment(account=os.getenv('CDK_DEFAULT_ACCOUNT'), region=os.getenv('CDK_DEFAULT_REGION'))


app = cdk.App()
S3DeployStack(
    app,
    "S3DeployStack",
    env=cdk_env
)

# synthesize it
print ('Synthesizing stack')
app.synth()
As noted we are using python-dotenv to load the environment variables we had created previously in this guide. This is to let the CDK know where we will be deploying our code. Also we will be naming in our case the stack S3DeployStack.
And to test it out we run the synthesize command:
$ cdk synthesize
Loading env file
Creating environment
Synthesizing stack
Resources:
  unbiasedcoderbucketFBD35120:
    Type: AWS::S3::Bucket
    UpdateReplacePolicy: Retain
    DeletionPolicy: Retain
    Metadata:
      aws:cdk:path: S3DeployStack/unbiased_coder_bucket/Resource
  CDKMetadata:
    Type: AWS::CDK::Metadata
    Properties:
      Analytics: v2:deflate64:H4sIAAAAAAAA/zPSMzTVM1BMLC/WTU7J1s3JTNKrDi5JTM7WAQrFFxvrVTuVJmenlug4p+VBWLUgZlBqcX5pUXJqrU5AZUlGfp6+sZ6lnqGBYlZxZqZuUWleSWZuql4QhAYAPPYlhmMAAAA=
    Metadata:
      aws:cdk:path: S3DeployStack/CDKMetadata/Default
Parameters:
  BootstrapVersion:
    Type: AWS::SSM::Parameter::Value<String>
    Default: /cdk-bootstrap/hnb659fds/version
    Description: Version of the CDK Bootstrap resources in this environment, automatically retrieved from SSM Parameter Store. [cdk:skip]
Rules:
  CheckBootstrapVersion:
    Assertions:
      - Assert:
          Fn::Not:
            - Fn::Contains:
                - - "1"
                  - "2"
                  - "3"
                  - "4"
                  - "5"
                - Ref: BootstrapVersion
        AssertDescription: CDK bootstrap stack version 6 required. Please run 'cdk bootstrap' with a recent version of the CDK CLI.
This creates the pre-step for deployment.
How To Implement Code To Describe AWS S3 Bucket Using AWS Python CDK
The final step we need to do is to implement the code that will be deploying our AWS S3.
from aws_cdk import (
    Stack,
    aws_s3,
)
from constructs import Construct

class S3DeployStack(Stack):

    def __init__(self, scope: Construct, construct_id: str, **kwargs) -> None:
        super().__init__(scope, construct_id, **kwargs)

        aws_s3.Bucket(
            self,
            'unbiased_coder_bucket',
            bucket_name = 'unbiased_coder_bucket'
        )
A few notes in the code above:
- The handler you specify must match the one in the file (the one in the GitHub repo is already defined as is)
- You can use any Python Runtime you prefer in this case I used Python 3.9
- Finally define the name of the bucket name (this is optional)
How To Bootstrap Your AWS S3 Bucket Using AWS CDK Python
The next step in the process is starting to bootstrap the AWS S3 using our AWS CDK Python code that we wrote earlier in this guide.
$ cdk bootstrap --profile test_deploy_s3
Loading env file
Creating environment
Synthesizing stack
 ⏳  Bootstrapping environment aws://ACCOUNT/us-east-1...
Trusted accounts for deployment: (none)
Trusted accounts for lookup: (none)
Using default execution policy of 'arn:aws:iam::aws:policy/AdministratorAccess'. Pass '--cloudformation-execution-policies' to customize.
 ✅  Environment aws://ACCOUNT/us-east-1 bootstrapped (no changes).
As it can be seen above the bootstrapping was successful. If you are following the code from the Github repo you should be good.
How To Deploy Your AWS S3 Bucket Using AWS CDK Python
The final step is to actually deploy our code into the AWS Stack. This is a lengthy process and syncs all the changes you made in your code to the AWS server infrastructure.
To do this run the cdk deploy command as shown below.
$ cdk deploy --profile test_deploy_s3
Loading env file
Creating environment
Synthesizing stack
✨  Synthesis time: 3.61s
S3DeployStack: deploying...
[0%] start: Publishing c4fd62c3ce186a2557629ecd112a6db2f0036b3575274f0205885d4006a5ccdf:ACCT-us-east-1
[100%] success: Published c4fd62c3ce186a2557629ecd112a6db2f0036b3575274f0205885d4006a5ccdf:ACCT-us-east-1
S3DeployStack: creating CloudFormation changeset...
 ✅  S3DeployStack
✨  Deployment time: 43.54s
Stack ARN:
arn:aws:cloudformation:us-east-1:ACCT:stack/S3DeployStack/c501ed60-a156-11ec-9998-0e2a25b59409
✨  Total time: 47.15s
As it can be seen above the S3DeployStack was successfully deployed.
In order to do an extra check and verify everything works we need to visit the AWS console and see if our S3 was created.
To do this navigate into the AWS S3 section and we should see our newly created bucket.
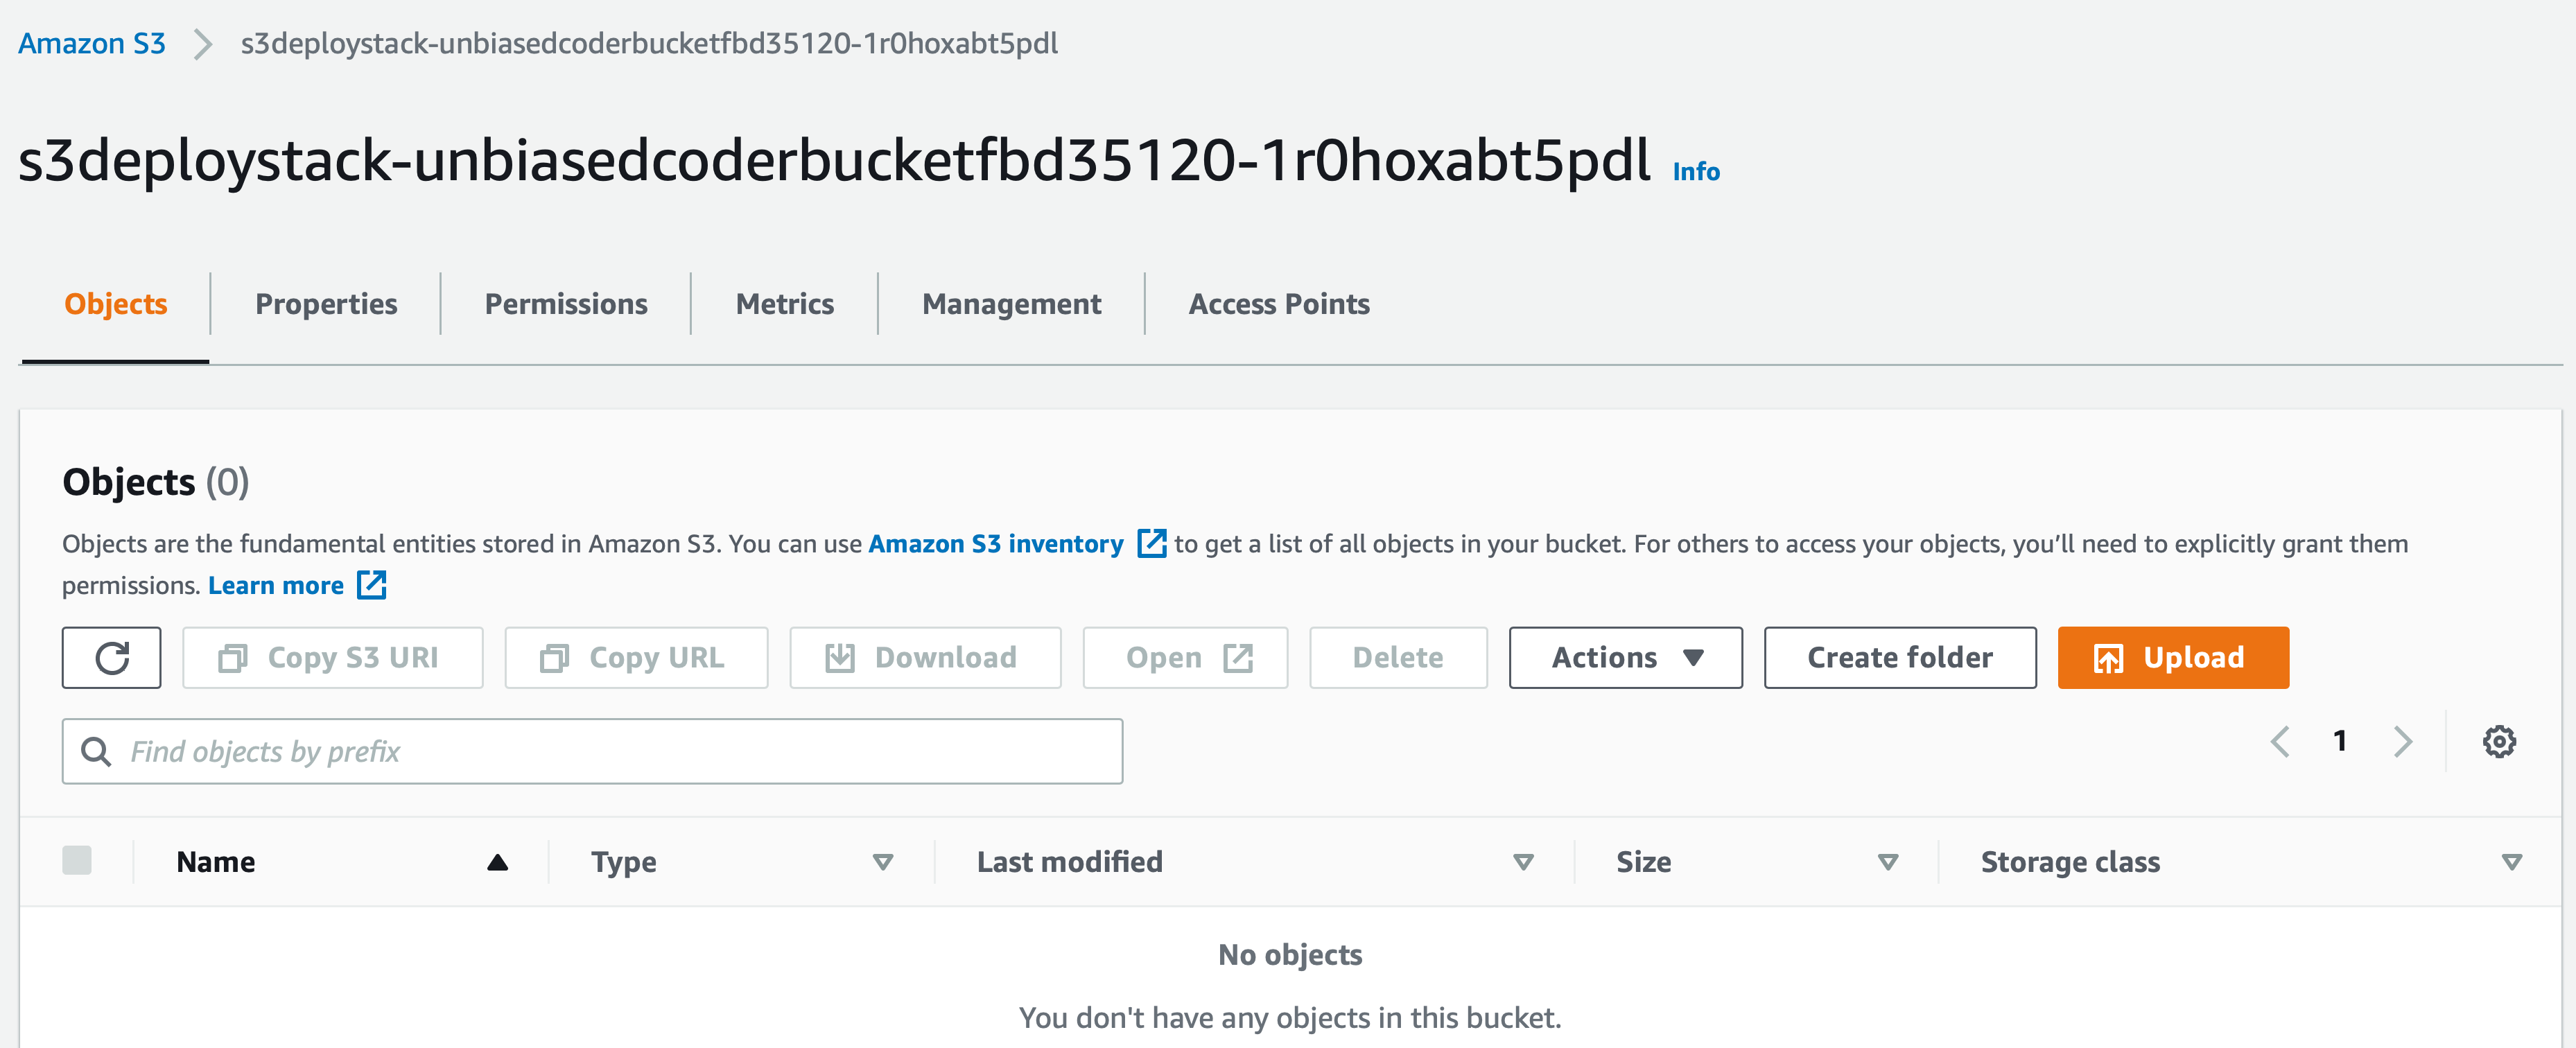
As it can be seen the AWS CDK has picked a random name extension based on the prefix we provided which was S3 Deploy Stack.
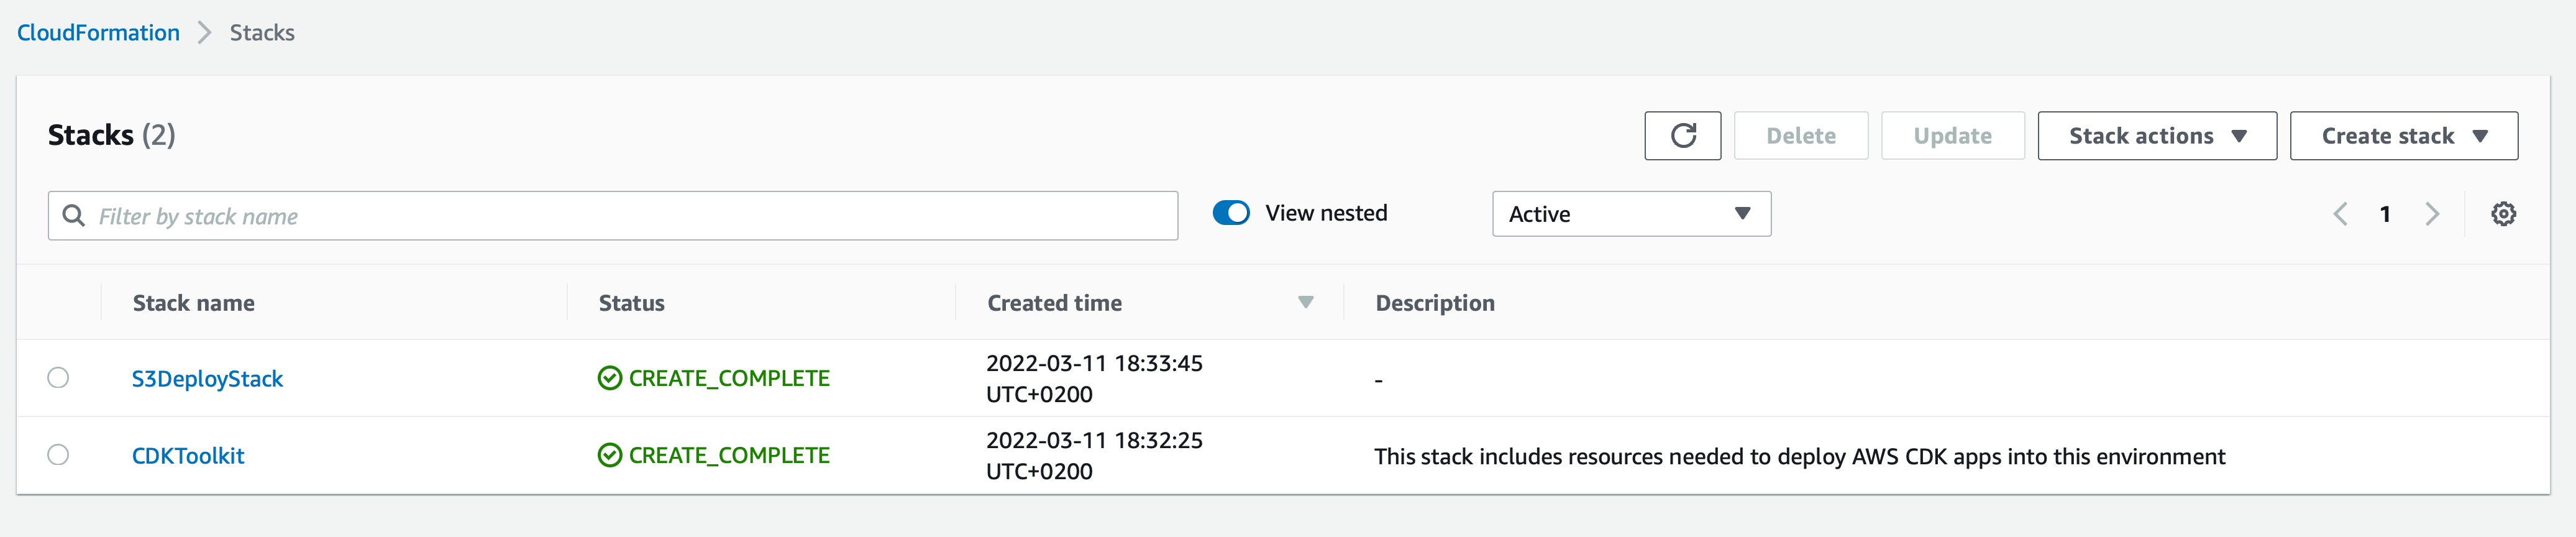
Finally we also need to take a note that AWS CDK installed two new cloud formations.
The first one is the SDK toolkit which is used internally and the second one is that for our S3 bucket deployment.
If you navigate to the Cloud formation section in the AWS console you will see the newly created cloud formations that were created by the AWS CDK Python deployment code.
Potential Error Deploying S3 Bucket Using AWS CDK Python
Do note that if you previously had a CloudFormation deployed by the AWS you may get a potential error and this may be silently suppressed in the AWS bootstrap command.
The error you may see is the following:
‘fail: No bucket named ‘cdk-assets’. Is account bootstrapped?’
This means there was previously a created bootstrapped cloud formation.
In order to fix this simply navigate to the Cloud Formation section in AWS console and remove the previously created CDKToolkit as shown in the screenshot above.
Once this is done you can proceed into running the ‘cdk bootstrap‘ command as explained earlier in the article to re-create the CDKToolkit CloudFormation to fix the error ‘No bucket named ‘…’ Is account bootstrapped’.
How To Destroy Your AWS S3 Bucket Using AWS CDK Python
As a bonus we will go over how to clean up and destroy any resources you setup in your infrastructure up to now.
To do that CDK offers a very simple destroy command which basically will remove everything we added.
If we were to execute this would look like this:
$ cdk destroy --profile test_deploy_s3
Loading env file
Creating environment
Synthesizing stack
Are you sure you want to delete: S3DeployStack (y/n)? y
S3DeployStack: destroying...
 ✅  S3DeployStack: destroyed
AWS CDK goes into our AWS infrastructure and deletes everything that it had previously created.
In order to verify this we go also in our AWS console and see if the S3’s and Cloudformations are gone.
An updated view looks like this:

It must be noted here that the user you created earlier and associated roles to it will not be deleted. This is something we did outside this context and you will have to navigate to the iam section and delete the user manually.
Conclusion
We were able to successfully show you How To Setup AWS S3 Bucket Using AWS CDK Python and why you may want to use it over using Terraform.
If you found this useful and you think it may have helped you please drop me a cheer below I would appreciate it.
If you have any questions, comments please post them below or send me a note on my twitter. I check periodically and try to answer them in the priority they come in. Also if you have any corrections please do let me know and I’ll update the article with new updates or mistakes I did.
Do you prefer to use CDK or the AWS console to create S3 buckets?
I have had a few projects in the past that required me adding and creating resources dynamically. AWS CDK was the answer to these so I’ve used it when needed. If I’m just creating a simple S3 bucket for simple use I prefer to use the AWS console.
If you would like to find more DevOps and to setup specific AWS resources please check the articles below: