
Introduction
We will go over How To Setup WordPress In Docker.
Did you know that running WordPress in a docker container has no performance hit?
We will break down this in the following sections:
- Why running WordPress in Docker is good
- How to download and setup WordPress to run in docker
- How to keep your WordPress data persistent
I have used this successfully in various projects, and it works very well and has saved me a ton of trouble and time debugging things.
We will go point by point on getting you up and running in less than 5mins; having some background docker knowledge is helpful if you want to fine-tune your setup, but you don’t need to follow this guide and get started.
This complete guide should cover all your questions on using setting up Docker in wordpress.
Why Run WordPress In Docker
You may find yourself asking what is the advantage of running WordPress inside a docker container. This is a very valid question and the answer has various reasons some of which may or may not apply to you directly. To make this more specific I have assembled a list below. Of course the alternatives is running it natively in your machine/server but this is beyond the scope of this article.
So our list below will be using those two points of reference when comparing things.
- Since it’s a docker container you can take with you and use it wherever you want
- You can keep a standard setup and configuration that’s consistent across the board
- Your pipeline integration later will be a breeze as you’d have everything ready to go and pre bundled
- Any third-party dependencies such as MySQL/Wordpress extensions can be turned only once in your docker container
- It’s easier to isolate it from the rest of your system applications
- It’s easier to start/stop and completely turn off or relaunch the container if needed
- You can easily snapshot your container and go back in time if needed to debug some issue
- You are guaranteed version consistency in the future if something changes in MySQL or WordPress
- Offers more security as it’s running on it’s own jail environment
The list above even though it’s not as exhaustive includes some of the reasons why I like to run WordPress in a docker container.
How To Install Docker
I have detailed this extensively in another article which you can find here:
How To Get The Docker Containers
Now that you have successfully installed docker in your system we want to go ahead and fetch the WordPress/MySQL docker containers for our machine. One thing that must be noted here is that WordPress depends on MySQL database. So prior to getting the WordPress docker container working we need to also install MySQL. In this article we will tackle both at the same time to make your life easier so you can get started right away.
The first command we will be issuing is to download the WordPress/MySQL docker container from the docker repository. This may require registration and an account in the docker hub which you can do online here.
Once you register and login either from the dashboard which we showed earlier or from the command line using the following command:
$ docker login SERVER_HERE
Now that you have successfully logged on to the docker hub we can go ahead and pull the MySQL/Wordpress image. The pull command for docker just means to download and register the image as available locally to start working with it. So you can think of it as a combination of two things:
- Download
- Register locally
In order to do this we need to specify also the MySQL/Wordpress docker image which in this case it’s simply mysql and wordpress respectively. As shown below once you pull the command it will start getting the latest version from the docker hub server.
$ docker pull mysql
Using default tag: latest
latest: Pulling from library/mysql
....
62c216491082: Pull complete
Digest: sha256:3e2eba0a6efbeb396e086c332c5a85be06997d2cf573d34794764625f405df4e
Status: Downloaded newer image for mysql:latest
docker.io/library/mysql:latest

$ docker pull wordpress
Status: Downloaded newer image for wordpress:latest
docker.io/library/wordpress:latest
....
Once the pull is successful you should be able to see the docker MySQL/Wordpress image in your docker dashboard image registry as shown below.
Basically this means the MySQL/Wordpress image is now ready to be used and spawned as a docker container and it was successfully pulled into your machine.
How To Invoke The Docker MySQL/Wordpress Container
We already covered how to get docker and download your MySQL/Wordpress container in your system. The next step in the process is running the MySQL/Wordpress Docker container in your machine. To do this we have to follow a list of steps that we will outline below:
- Start docker MySQL/Wordpress container
- Find MySQL/Wordpress Docker IP
- How to Stop it
How To Start Docker MySQL Container
The first step which is what most people call the entry point of the process is to start up our container. To do this we will be leveraging the docker run command along with some parameters which we will explain below. The docker run essentially lets you use an image that you have previously downloaded in our case the MySQL image and make out of it a container instance. The container instance will be based on the pre-built MySQL image file.
Lets take a look at the docker run command line attributes which we will be using to start Docker MySQL in your system.
$ docker run --rm --name mysql -p 3306:3306 \
-d -e MYSQL_DATABASE=wordpressdb -e MYSQL_USER=user \
-e MYSQL_PASSWORD=nicepassword -e MYSQL_ROOT_PASSWORD=dbrootpassword mysql
- rm: This automatically removes the container if it already exists. It’s useful if you are debugging and want to get rid of older container instances so you can re-use the name among other things. You don’t need to include it if you prune and maintain your containers manually.
- name: This is simply the name we will be using to refer to the docker container
- e: This allows us to pass some environment variables that are docker image related. More specifically in the case of the MySQL docker container we will be using the following ones:
- MYSQL_USER: This is the username we want our docker MySQL container to start with, also make a note of this username as we will be using it later to connect to it via pgadmin4
- MYSQL_PASSWORD: Similar to above this is the initial password we will be using for the mysql docker container instance
- MYSQL_ROOT_PASSWORD: This is the root password for the MySQL database that will get created
- MYSQL_DATABASE: This is the name of the MySQL database we will be creating to host our WordPress site
- p: This allows us to bind a specific IP address and port that’s exposed to the rest of the system. It’s useful to interact with the docker container locally for testing things and applications but also to manage it using an admin interface such as MySQL command line interface
- d: This demonizes and backgrounds the docker container as soon as it starts
- Finally we pass on the image name to use to start the docker container instance
Now that we have gone over everything we can go ahead and invoke the run command to see what happens.
$ ./run-mysql-docker.sh
f9e70cfa0164ec5c8aa6fb507b432970dd179c776be7cee8e9ddff65d976ee67
As you can see above the run command returns an ID for the docker container instance. Using this ID you can identify this particular container and be able to use to maintain and connect to the instance.
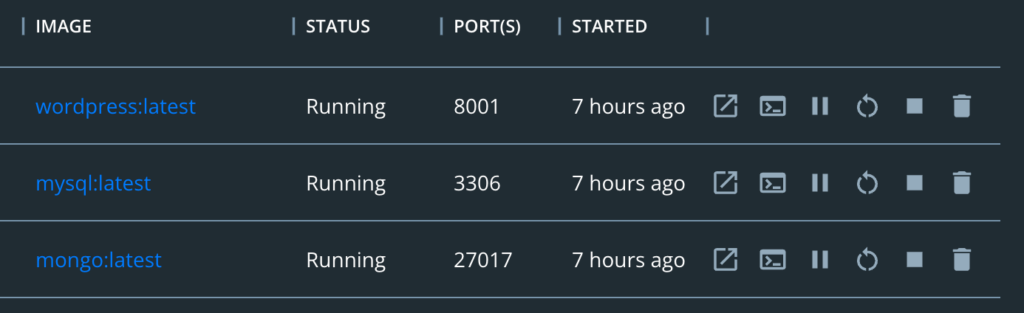
To verify the instance started and it’s on a good state we will be using the docker ps command. The docker ps command is very similar to the UNIX ps command it basically lets you list the running docker container instances. From the execution below we can see what’s running in our system.
$ docker ps
CONTAINER ID   IMAGE     COMMAND                  CREATED          STATUS          PORTS                               NAMES
f9e70cfa0164   mysql     "docker-entrypoint.s…"   48 seconds ago   Up 47 seconds   0.0.0.0:3306->3306/tcp, 33060/tcp   mysql
We know our invocation succeeded because we can see our abbreviated version of our container ID matching the one we started. Further more the STATUS for the container is showing that it’s been up for 3 seconds and it’s functioning properly.
How To Start Docker WordPress Container
For the WordPress container we follow the same process as mentioned earlier however we adjust the way the image gets created.
docker run --rm --name wordpress -p 8001:80 -d \
-e WORDPRESS_DB_HOST=192.168.1.102 -e WORDPRESS_DB_USER=user \
-e WORDPRESS_DB_PASSWORD=nicepassword -e WORDPRESS_DB_NAME=wordpressdb \
-e WORDPRESS_DEBUG=1 wordpress
The only section here that is different is the environment variables so I’m only going to analyze those parameters to keep it short. If you would like to see anything further you can check above.
- e: This allows us to pass some environment variables that are docker image related. More specifically in the case of the WordPress docker container we will be using the following ones:
- WORDPRESS_DB_USER: This is the username to connect to our MySQL database
- WORDPRESS_DB_PASSWORD: The password to connect to the MySQL database we created earlier, if you changed the password make sure you update it here accordingly
- WORDPRESS_DB_NAME: This is the name of the MySQL database we will be using to store our WordPress site environment variables
- WORDPRESS_DB_HOST: This is the IP address for the MySQL instance
- WORDPRESS_DEBUG: This is optional and allows you to see more verbose output of your errors, make sure you turn this off in production
Now that we have gone over everything we can go ahead and invoke the run command to see what happens.
$ ./run-wordpress-docker.sh
1865cda8abf62331e15e3b2540e63a628002299eb4f90fc54320bf646a096f5b
Similarly to before we verify in the docker ps output that the ID matches the one we created.
$ docker ps
CONTAINER ID   IMAGE       COMMAND                  CREATED              STATUS              PORTS                               NAMES
1865cda8abf6   wordpress   "docker-entrypoint.s…"   About a minute ago   Up About a minute   0.0.0.0:8001->80/tcp                wordpress
As you can see above the ID’s match so we are good to go.
How To Find MySQL/Wordpress Docker IP Address
The next step we want to do is find out what IP address we have allocated internally so we can connect to it. To do this we will be using the docker inspect command to find the docker WordPress and MySQL IP address. The invocation is as simple as running docker inspect followed by the docker container ID we received previously. To avoid going through the long output of the command we will pipe this to a grep that looks specifically for the IP address of the instance. Putting it all together and invoking is shown below.
$ docker inspect 1865cda8abf6 |grep -i ipaddress
            "SecondaryIPAddresses": null,
            "IPAddress": "172.17.0.3",
                    "IPAddress": "172.17.0.3",

$ docker inspect f9e70cfa0164 |grep -i ipaddress
            "SecondaryIPAddresses": null,
            "IPAddress": "172.17.0.2",
                    "IPAddress": "172.17.0.2",
The IPs respectively for our containers are as follows:
- MySQL -> 172.17.0.2
- WordPress -> 172.17.0.3
Using those internally you can connect to the instances, but we also exposed the ports to them into the localhost so you can directly connect via the local IP address too.
How To Stop WordPress/MySQL Docker Containers
Finally we will go over how to stop the WordPress/MySQL docker containers. In order to do this we will be using the container command which has a sub-command called stop. That subcommand essentially lets us give it a container ID parameter and basically stop it. However there’s an extra step we need to follow here which is a clean-up process. If we do not intend to re-use that docker container we need to make sure we prune it from our system so it remains clean. If we fail to do this every run will create a new docker container and eventually our system will get flooded with a big list of them.
$ docker container stop $(docker container ls -q --filter name=wordpress)
1865cda8abf6

$ docker container stop $(docker container ls -q --filter name=mysql)
f9e70cfa0164

$ docker ps
CONTAINER ID   IMAGE     COMMAND   CREATED   STATUS    PORTS     NAMES

$ docker container prune
WARNING! This will remove all stopped containers.
Are you sure you want to continue? [y/N] y
Total reclaimed space: 0B
Lets go over what we did above and explain things a bit.
- We use the docker container stop command to invoke a stop of the running container, however that command requires a docker container ID
- To solve the problem above we cascade the command with the docker container filtering by name as shown. That command allows us to find an ID from a container name, in this case WordPress and mysql
- Finally we verify that nothing is running by using docker ps which is shown to return empty
- As a cleanup we run the prune command to remove all stopped containers and save some space
How To Keep MySQL/Wordpress Persistent Data
As a bonus I want to cover a way to make your data persistent across your docker runs. After all a database is only useful if the data persists across reboots, starting and stopping. Similarly with docker’s file system we want to preserve any plugins, uploaded images and local changes done to our server.
Docker offers a feature that lets you expose a predefined directory by binding it to the docker container. This directive essentially makes the data persist outside the docker environment which is destroyed and recreated every time you start and stop it. In the examples we provided earlier we did not cover one of the options shown which was -v, below I explain why this is useful and how it solves our problem of persistency.
In order to do this we need to append an additional parameter in our docker run command using the -v parameter. This would look like this:
-v /HOST_PATH:/CONTAINER_PATH
There’s two important paths here that we need to adjust based on your installation and system:
- HOST_PATH: This is basically the path in your host operating system (Mac/windows/linux) that contains the data you want. In our case we can use a simply empty directory so feel free to make this anywhere the docker instance has permissions on and point it to it.
- CONTAINER_PATH: This is basically the path where your MySQL/Wordpress stores the data on. Based on your configuration this needs to be adjusted accordingly. By data I mean where the data folder for your database is inside the docker container.
More specifically for our examples these are the directory mappings you need to make for the default data to persist.
-v mysql-disk:/var/lib/mysql
-v wordpress-disk:/var/www/html
The default directories above are used by MySQL and WordPress respectively.
Once you do this and start your instance you should have all your data persist across installations and you can freely tear down and restart your docker MySQL/Wordpress containers.
Conclusion
If you found How To Setup WordPress In Docker useful and you think it may have helped you please drop me a cheer below I would appreciate it.
If you have any questions, comments please post them below I check periodically and try to answer them in the priority they come in. Also if you have any corrections please do let me know and I’ll update the article with new updates or mistakes I did.
Do you like the security docker offers to isolate your WordPress installation?
I personally like to keep my setup in containers to avoid installing things natively and to have more security layers in my system. Also I like to have fine control on starting and stopping services as needed.
If you would like to learn more about docker related stuff, I have a few articles below:
- How To Run Postgres In Docker On Mac (2022)
- How To Setup MongoDB In Docker
- How To Connect To LocalHost From Inside A Docker Container
- How to Include Files Outside of Docker – Build Context
You can find more information on docker here:
You can find more information on the official docker images here: