
Introduction
We will go over How To Test DynamoDB Locally.
Did you know that testing DynamoDB locally can save you a lot of time debugging issues?
I will break this review in the following sections:
- How to setup DynamoDB locally
- How to create and setup a table
- Test it out and see some real examples of accessing the database locally
I have used this successfully in various projects and it works very well and has saved me a ton of time debugging code and database structure.
We will go point by point on getting you up and running in less than 5mins of work.
This is a complete guide and should cover all your questions on How To Test DynamoDB Locally.
All code and examples on how to do this can be found in the Github link here.
How To Install DynamoDB Locally
The first thing we need to do is setup and install DynamoDB locally in our system. Once this is done then we can proceed into writing a few test cases to see if our deployment is functional.
Before we do this there’s a few dependencies that we will be needing in order to run DynamoDB and to run our testing.
The tools we will be needing for this are:
- JAVA: We need Java to run the DynamoDB local server as it’s implemented and bundled as a jar file.
- AWSCLI: We will be using the AWS command line utility to initialize and add entries in our DynamoDB
So lets get started on setting up our system. For simplicity I did this for a Mac but Windows/Linux is very similar.
How To Setup Java In Mac Using Brew
Setting up Java locally if you are in Windows is as simple as going to java.com and downloading the right file and running the installer.
For Mac which is the testing system we will be using today we will be leveraging brew which is a package manager.
In order to install brew in your system you need to run the following command:
$ /bin/bash -c "$(curl -fsSL https://raw.githubusercontent.com/Homebrew/install/HEAD/install.sh)"
Once brew completes installing then you need to go ahead and install Java. In our case brew supports OpenJDK which is an open source implementation of the Java interpreter and compiler.
In order to install java using brew run the following command:
$ brew install openjdk
Once the command completes ensure it’s functional by testing the version number.
$ java --version
openjdk 11.0.10 2021-01-19
OpenJDK Runtime Environment (build 11.0.10+0-b96-7249189)
OpenJDK 64-Bit Server VM (build 11.0.10+0-b96-7249189, mixed mode)
In my case the latest version was Java 11 if it installs a newer one you should be fine.
How To Setup AWS CLI In Mac Using Brew
The next step in our process is to install the AWS command line tool. For this you have two options.
If you are in Windows/Linux/Mac you can install directly from the AWS website here.
Alternatively if you are like me and prefer to use brew and you are using a Mac you can install it by running the following command:
$ brew install awscli
Once the installation completes verify it installed properly by checking the version using the following command:
$ aws --version
aws-cli/2.5.4 Python/3.9.12 Darwin/21.4.0 source/arm64 prompt/off
If you see an output it means you are good to go and we can proceed into setting up and downloading DynamoDB locally.
How To Download and DynamoDB Locally
To get the jar package of DynamoDB head over here in the AWS website and download the JAR version. To keep things simpler we are not going to use docker or anything else.
Go ahead and get it from a location closer to you and unpack it in a local folder.
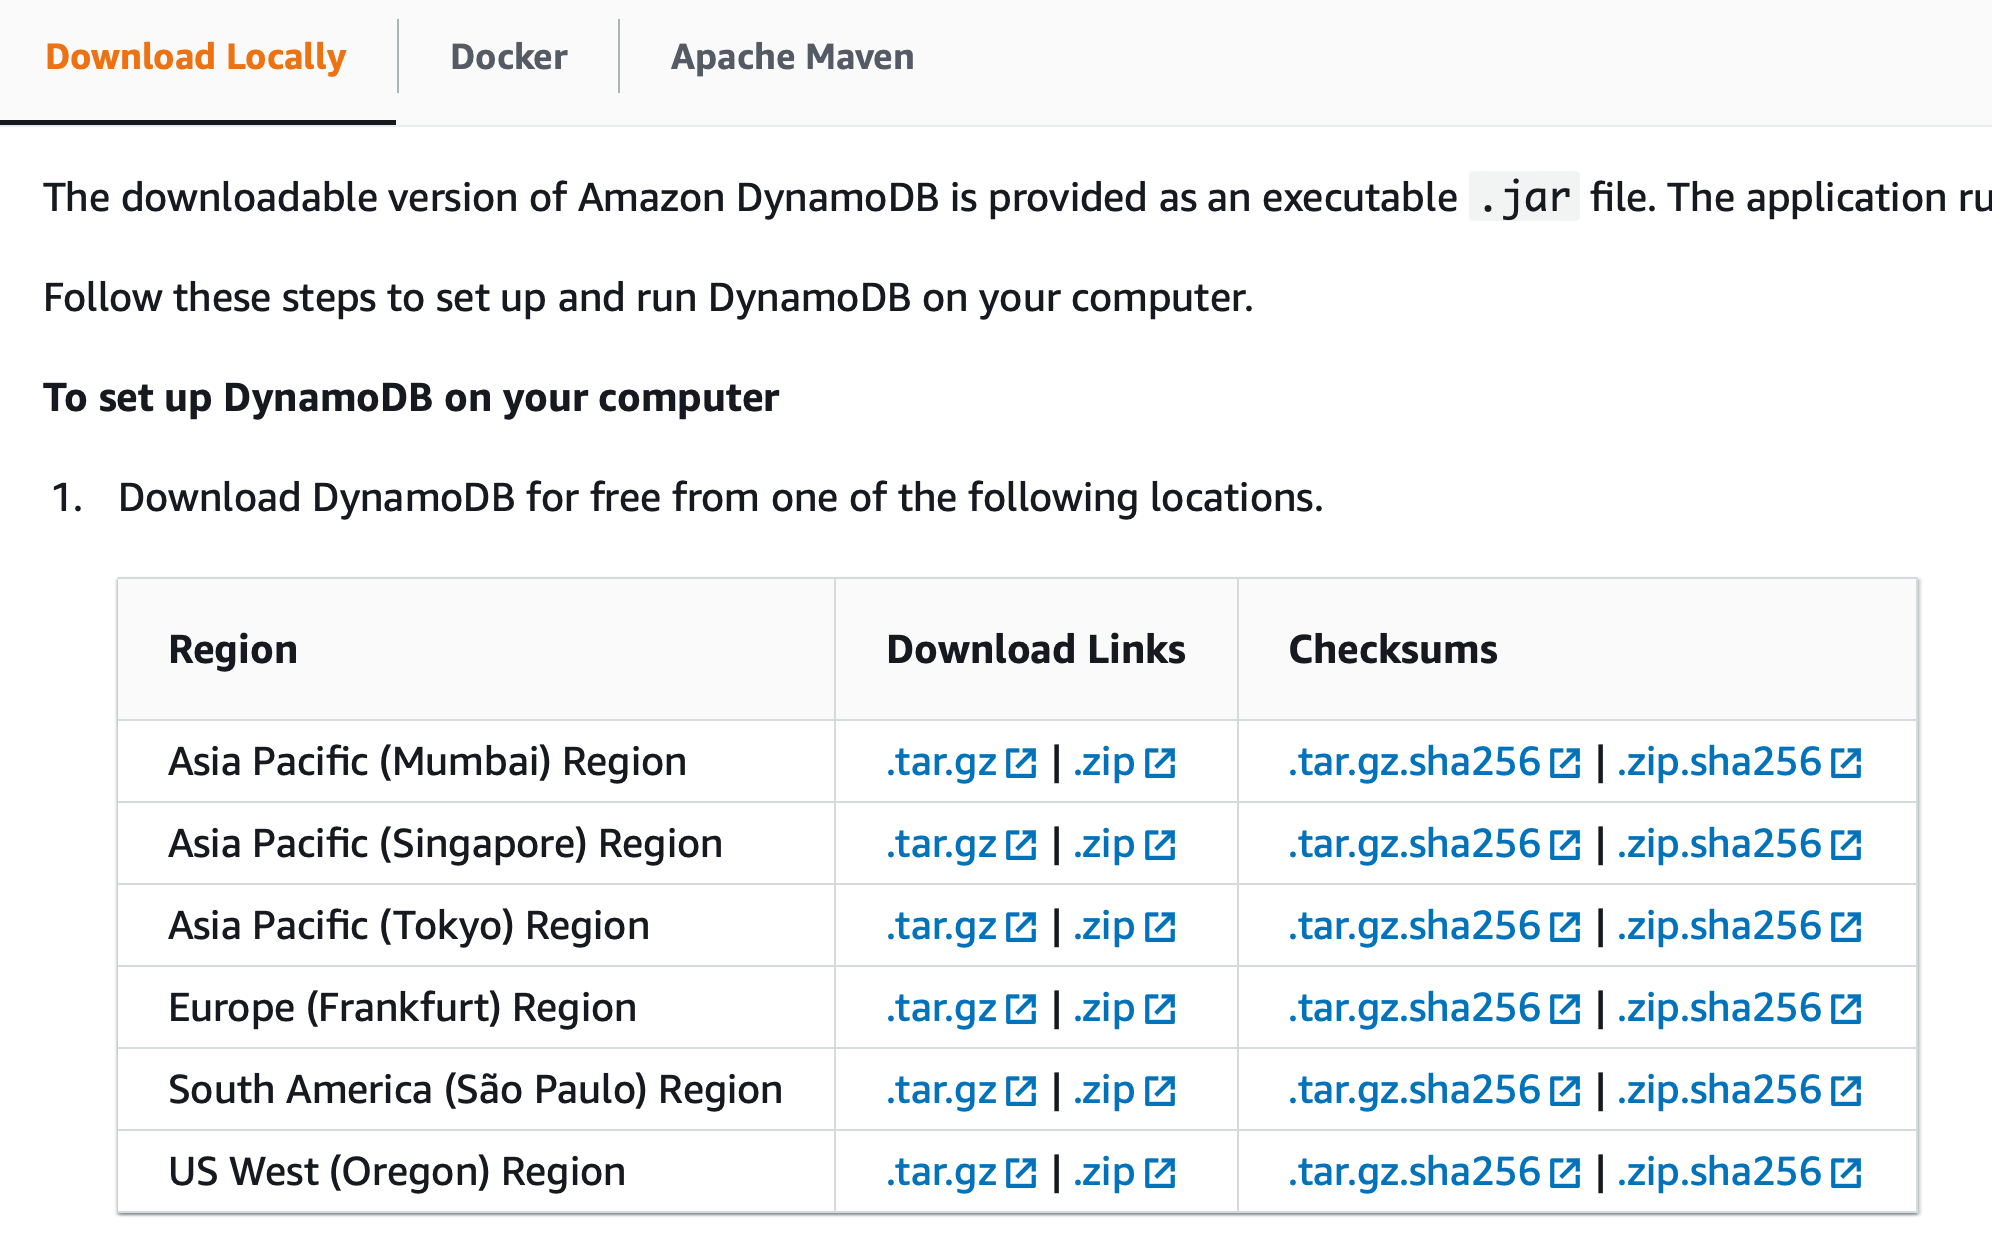
The two files you will be looking for are the following:
$ ls -al |grep Dynamo
-rw-r--r--@   1 user  staff  5863882 Jan 10 12:08 DynamoDBLocal.jar
drwxr-xr-x@ 103 user  staff     3296 Apr 13 15:58 DynamoDBLocal_lib
The first file is the executable jar which is what we will be using to start up our server locally.
How To Run DynamoDB Locally
In order to run DynamoDB locally after we unpack we will make use of the following shell script which can also be found in the Github repo here.
$ java -Djava.library.path=./DynamoDBLocal_lib -jar DynamoDBLocal.jar -sharedDb
As you can see above all this does is set the dynamodb library files path and starts the jar file with the shared library database files.
Once we execute this, it starts a local http server which will be serving our requests locally. By default it uses port 8000 for the connectivity which we can use later in our scripts to point them to the right direction.
The output of this when started looks like this:
$ ./start-dynamodb.sh
Initializing DynamoDB Local with the following configuration:
Port:	8000
InMemory:	false
DbPath:	null
SharedDb:	true
shouldDelayTransientStatuses:	false
CorsParams:	*
As a side note the start-dynamodb.sh shell script is basically the name of the file in the Github repo.
If everything started fine you are all setup with your local DynamoDB and you can start coding and using it.
How To Test DynamoDB Locally
In the next phase we will be testing to ensure our DynamoDB that’s now running locally is also functional. To do this we will be initializing a table and we will be adding and removing some items.
How To Initialize DynamoDB Table
Now that our database is confirmed to have started locally (considering you did not stop it) you can go ahead and create a table.
For this we will be leveraging a few local scripts to initialize our Table structure.
First we need to create a table schema in JSON format that AWS DynamoDB understands. This can be seen below:
{
    "TableName": "unbiased_coder_table",
    "KeySchema": [
      { "AttributeName": "name", "KeyType": "HASH" },
      { "AttributeName": "surname", "KeyType": "RANGE" }
    ],
    "AttributeDefinitions": [
      { "AttributeName": "name", "AttributeType": "S" },
      { "AttributeName": "surname", "AttributeType": "S" }
    ],
    "ProvisionedThroughput": {
      "ReadCapacityUnits": 5,
      "WriteCapacityUnits": 5
    }
}
In our case the HASH key is the name and the Sorting/Range key is the surname. Since this is just a test we won’t be adding anymore attributes it’s simply for demonstration purposes.
The next thing we do is define what type they are in this case both are Strings so that’s denoted with an ‘S’ in DynamoDB.
Finally the last section which is about provisioning and throughput is not very important in this stage as this is a local test. It basically has to do with how much resources we are giving to DynamoDB to run and process our queries. We simply set the Read and Write capacity for now to 5 units. A unit is approximately is the processing per second. If you would be writing a more extensive script feel free to fine tune according to your needs.
Now that we have the JSON schema done we can go ahead and issue the create table command using the AWS client that we previously installed in our system. If you don’t have that installed please refer to the section above.
$ aws dynamodb create-table --cli-input-json file://unbiased-coder-table.json --endpoint-url http://localhost:8000
Do note this assumes the DynamoDB is running as mentioned earlier in port 8000 which is the default. If you changed that you may need to adjust the command above to reflect the correct port number.
So now that we have it we can go ahead and execute it. The create-table.sh command is simply the contents of the command we mentioned above. I have just created all the scripts that will follow in the Github link here.
$ ./create-table.sh
{
"TableDescription": {
"AttributeDefinitions": [
{
"AttributeName": "name",
"AttributeType": "S"
},
{
"AttributeName": "surname",
"AttributeType": "S"
}
],
"TableName": "unbiased_coder_table",
"KeySchema": [
{
"AttributeName": "name",
"KeyType": "HASH"
},
{
"AttributeName": "surname",
"KeyType": "RANGE"
}
],
"TableStatus": "ACTIVE",
"CreationDateTime": "2022-04-13T18:00:10.842000+03:00",
"ProvisionedThroughput": {
"LastIncreaseDateTime": "1970-01-01T02:00:00+02:00",
"LastDecreaseDateTime": "1970-01-01T02:00:00+02:00",
"NumberOfDecreasesToday": 0,
"ReadCapacityUnits": 5,
"WriteCapacityUnits": 5
},
"TableSizeBytes": 0,
"ItemCount": 0,
"TableArn": "arn:aws:dynamodb:ddblocal:000000000000:table/unbiased_coder_table"
}
}
The output above basically tells us the table got created successfully in our local database with a status of ACTIVE as indicated.
How To Get Tables In DynamoDB Using AWS CLI
Now that we have written some code to initialize and create our table we can go ahead and test the script that lists all the items in the table. We will be using this later on too to see what we have and do not have in our DynamoDB table after every command we execute.
$ aws dynamodb list-tables --endpoint-url http://localhost:8000
Since we created the table earlier we should be seeing as a result the table name that was defined in our JSON file.
$ ./get-tables.sh
{
    "TableNames": [
        "unbiased_coder_table"
    ]
}
As expected DynamoDB returns to as a list of table names existing in our database and as expected we can see the unbiased_coder_table in there, which means our code previously worked.
How To Insert Records In DynamoDB Table Using AWS CLI
Since our table is showing successfully in the DynamoDB database we created locally now we are going to add some items in the table to see if we can list them. This is just for further testing as we already know that we have a fully functional database to test locally.
To put items in DynamoDB we run the below query which basically just inserts one entry into our previously created table.
$ aws dynamodb put-item --table-name unbiased_coder_table --item "{\"name\": { \"S\": \"unbiased\"}, \"surname\": {\"S\": \"coder\"}}" --endpoint-url http://localhost:8000
Running the command doesn’t return anything as it’s a simple insert (put-item). But we will be able to test it later on with another command that lists the items.
$ ./add-item.sh
How To List/Get Records In DynamoDB Table Using AWS CLI
So naturally now that we think some item got added to our table lets go ahead and test the code that lists all of the items in the table. To do this we continue using the AWS CLI tool.
$ aws dynamodb scan --table-name unbiased_coder_table --endpoint-url http://localhost:8000
In the case above we are using scan for simplicity since it’s for testing but if you have more complex scenarios or a lot of data feel free to leverage the query along with the index you have created.
$ ./list-items.sh
{
"Items": [
{
"name": {
"S": "unbiased"
},
"surname": {
"S": "coder"
}
}
],
"Count": 1,
"ScannedCount": 1,
"ConsumedCapacity": null
}
Running it yields the result of 1 item and as you can see this is the one we previously added with name unbiased and surname coder. This tells us the add item command succeeded.
How To Delete Records In DynamoDB Table Using AWS CLI
Finally just to be thorough we will be testing the deletion part from the Table. To do this we need to be specifying a key along with the table name. Since we only inserted one record the key is the same as the one we previously added.
$ aws dynamodb delete-item --table-name unbiased_coder_table --key "{\"name\": { \"S\": \"unbiased\"}, \"surname\": {\"S\": \"coder\"}}" --endpoint-url http://localhost:8000
Running to verify this the delete-item command does not return anything but one thing we can do is run the list items command after it to see if there’s anything left in our table.
$ ./delete-item.sh
$ ./list-items.sh
{
"Items": [],
"Count": 0,
"ScannedCount": 0,
"ConsumedCapacity": null
}
As you can see the item count is now 0 which means the item got successfully deleted with the delete command.
This completes our testing as we have successfully demonstrated the following:
- Running the DynamoDB locally
- Adding new items to DynamoDB
- Listing the items in DynamoDB
- Deleting items in DynamoDB
It must be noted here that all those scripts and commands will also work fine if you were to do this in AWS itself. The only difference is that instead of using the following:
--endpoint-url http://localhost:8000
You would be specifying a session profile that’s stored in your aws config directory. You can also set it up using the AWS configure command but that’s beyond the scope of this article. If you would like to see me write about how to setup AWS and configure it for a remote server please drop me a line below and I’ll write about it.
Conclusion
We were able to successfully go over How To Test DynamoDB Locally, hopefully I answered any questions you may have had and helped you get started on your next DynamoDB project.
If you found this useful and you think it may have helped you please drop me a cheer below I would appreciate it.
If you have any questions, comments please post them below or send me a note on my twitter. I check periodically and try to answer them in the priority they come in. Also if you have any corrections please do let me know and I’ll update the article with new updates or mistakes I did.
Which is your favorite way of testing DynamoDB interaction with your code?
I personally like to run things locally as it’s easier, saves me a lot of time and I do not have to spend money on AWS costs to run it there.
Also if there’s a coding error I won’t risk hitting a high amount of money on charges or bother setting up DynamoDB limits and alerting. Overall it just makes my life easier.
If you would like to visit the official DynamoDB documentation here.
If you would like to find more articles related to DynamoDB and Databases in general you can check the links below: