
Introduction
Today we will discuss how Boto3 DynamoDB query, scan, get, put, delete, update items.
Want to learn everything about DynamoDB with hands-on experience fast?
Look no further in this article I will discuss:
- How to setup your environment locally in your machine
- How to setup AWS to access DynamoDB
- How to write code to fully interact with DynamoDB.
All the code and examples that will be provided below can be found in my git repo here.
I have been working in the Software industry for over 23 years now and I have been a software architect, manager, developer and engineer.
I am a machine learning and crypto enthusiast with emphasis in security. I have experience in various industries such as entertainment, broadcasting, healthcare, security, education, retail and finance.
How to install Boto3 to use DynamoDB
We are going to begin on setting up our environment in particular installing any dependencies and packages necessary. I assume you already have Python 3 installed and running in your system. If you haven’t you can check the official website of Python to get that installed before proceeding forward. Furthermore I’m assuming you already have access to an AWS EC2 account and own an SDK key. If you do not you can sign up for free with Amazon here to get started. I’m also making the assumption you have the Python Package manager pip. If you haven’t you can look into this guide to learn more about installing it.
Now that we have the basic requirements out of the way we can dive in and start setting up the system. Also I want to note that all of the code you will find in this guide can be found in github here.
How to Create a Python virtual environment for Boto3 DyamoDB
- First install the virtual env using the python command: ‘pip install virtualenv’
- Then create a new virtual environment
- Finally you need to activate your virtual environment so we can start installing packages, please see below
main alex@DYNAMH ~/code/unbiased-coder/python-boto3-dynamodb-guide > virtualenv env
created virtual environment CPython3.8.6.final.0-64 in 3773ms
creator CPython3Posix(dest=/home/alex/code/unbiased-coder/python-boto3-ec2-guide/env, clear=False, no_vcs_ignore=False, global=False)
seeder FromAppData(download=False, pip=bundle, setuptools=bundle, wheel=bundle, via=copy, app_data_dir=/home/alex/.local/share/virtualenv)
added seed packages: pip==21.2.4, setuptools==57.4.0, wheel==0.37.0
activators BashActivator,CShellActivator,FishActivator,PowerShellActivator,PythonActivator
main alex@DYNAMH ~/code/unbiased-coder/python-boto3-dynamodb-guide > source env/bin/activate
How to Install pip dependencies for Boto3 DynamoDB
Next we need to go ahead and install the Python dependencies to be able to use the boto3 library. You can do this by running the pip tool as shown below. Keep in mind make sure your virtual environment is activated before you run this step. If you wish to use it without having a virtual environment which I do not recommend you can go ahead and simply install it globally in your user account.
main (env) alex@DYNAMH ~/code/unbiased-coder/python-boto3-dynamodb-guide > pip install boto3 python-dotenv
Collecting boto3
Downloading boto3-1.18.46-py3-none-any.whl (131 kB)
|████████████████████████████████| 131 kB 1.1 MB/s
Collecting s3transfer<0.6.0,>=0.5.0
Downloading s3transfer-0.5.0-py3-none-any.whl (79 kB)
|████████████████████████████████| 79 kB 2.8 MB/s
Collecting botocore<1.22.0,>=1.21.46
Downloading botocore-1.21.46.tar.gz (8.2 MB)
|████████████████████████████████| 8.2 MB 11.5 MB/s
Collecting jmespath<1.0.0,>=0.7.1
Downloading jmespath-0.10.0-py2.py3-none-any.whl (24 kB)
Collecting python-dateutil<3.0.0,>=2.1
Downloading python_dateutil-2.8.2-py2.py3-none-any.whl (247 kB)
|████████████████████████████████| 247 kB 10.1 MB/s
Collecting urllib3<1.27,>=1.25.4
Downloading urllib3-1.26.7-py2.py3-none-any.whl (138 kB)
|████████████████████████████████| 138 kB 9.9 MB/s
Collecting six>=1.5
Downloading six-1.16.0-py2.py3-none-any.whl (11 kB)
Building wheels for collected packages: botocore
Building wheel for botocore (setup.py) ... done
Created wheel for botocore: filename=botocore-1.21.46-py3-none-any.whl size=7933638 sha256=ee2d8a7f5bd91a7d2711b529706902a4a2a8fba97e69493757a8d1d461296d69
Stored in directory: /home/alex/.cache/pip/wheels/db/2a/b6/37624d07c0d7572bff3d08bd4bfd2c94b121f693278cd1ae77
Successfully built botocore
Collecting python-dotenv
Downloading python_dotenv-0.19.0-py2.py3-none-any.whl (17 kB)
Installing collected packages: six, urllib3, python-dateutil, jmespath, botocore, s3transfer, boto3, python-dotenv
Successfully installed boto3-1.18.46 botocore-1.21.46 jmespath-0.10.0 python-dateutil-2.8.2 s3transfer-0.5.0 six-1.16.0 urllib3-1.26.7 python-dotenv-0.19.0
The two packages we installed are:
- boto3: This is the core Python AWS library we will be using in this guide
- dotenv: We will use this library to pass in sensitive information to it that we do not want to have hardcoded in our code such as the AWS credentials
Verifying it works
Now that we have setup our system we need to verify the library is installed properly and it works. You can do this by simply checking in a python shell using the following command shown below, if you encounter an error please delete your virtual environment and try again. If the problem still persists please drop me a line below and I will try to help you.
main ✚ (env) alex@DYNAMH ~/code/unbiased-coder/python-boto3-dynamodb-guide > python
Python 3.8.6 (default, Oct 23 2020, 14:59:35)
[GCC 9.3.0] on msys
Type "help", "copyright", "credits" or "license" for more information.
>>> import boto3
>>> boto3.__version__
'1.18.46'
>>> import dotenv
>>> quit()
As you can see above the boto3 library got loaded successfully and the version is 1.18.46. This is as of Late 2021 so this may be different in your system based on when you install it.
How to Create a DynamoDB Table in AWS console
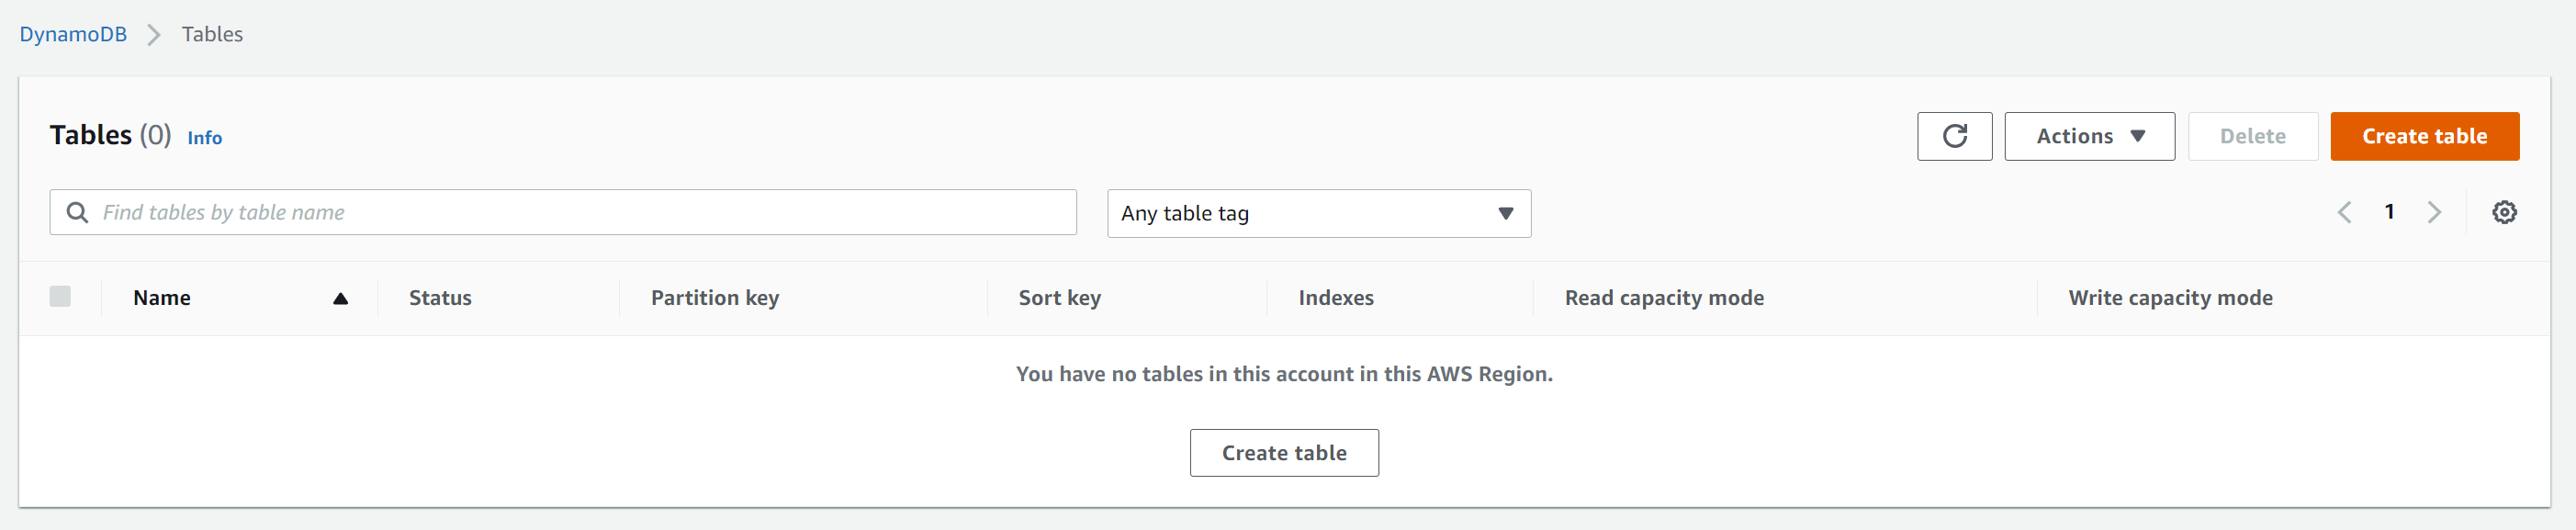
First we need to talk about how to create a DynamoDB table in AWS console. We will be using this through out our guide. To do this login to your AWS console login and navigate to the DynamoDB section. Once you do this you should be seeing the screen below which has an option to create a table.
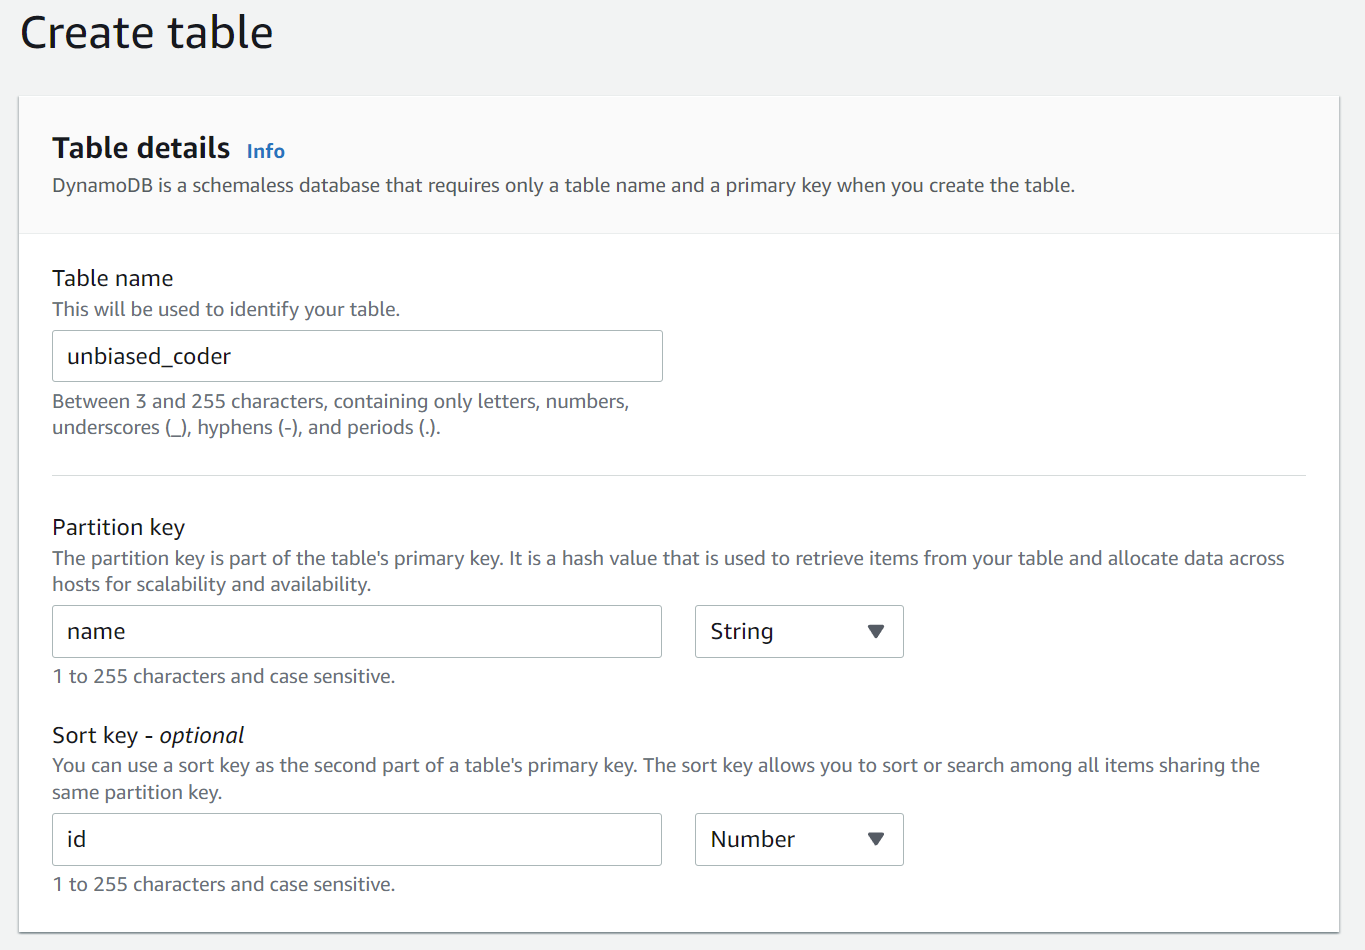
Go ahead and click on create table and this will be invoking a dialog for table name we want the following information if you are following the GitHub repository I made for this guide.
- Put unbiased_coder for the table name
- Put name in the Partition key (type string)
- Finally add an ID (type numeric)
Once this is done you can go ahead and create the table. This will take some time for AWS to configure automatic scaling and provision the DynamoDB table for you. Initially you will see a status as Creating this is normal to take some time to complete once I had to wait for 1 minute so don’t worry about it.

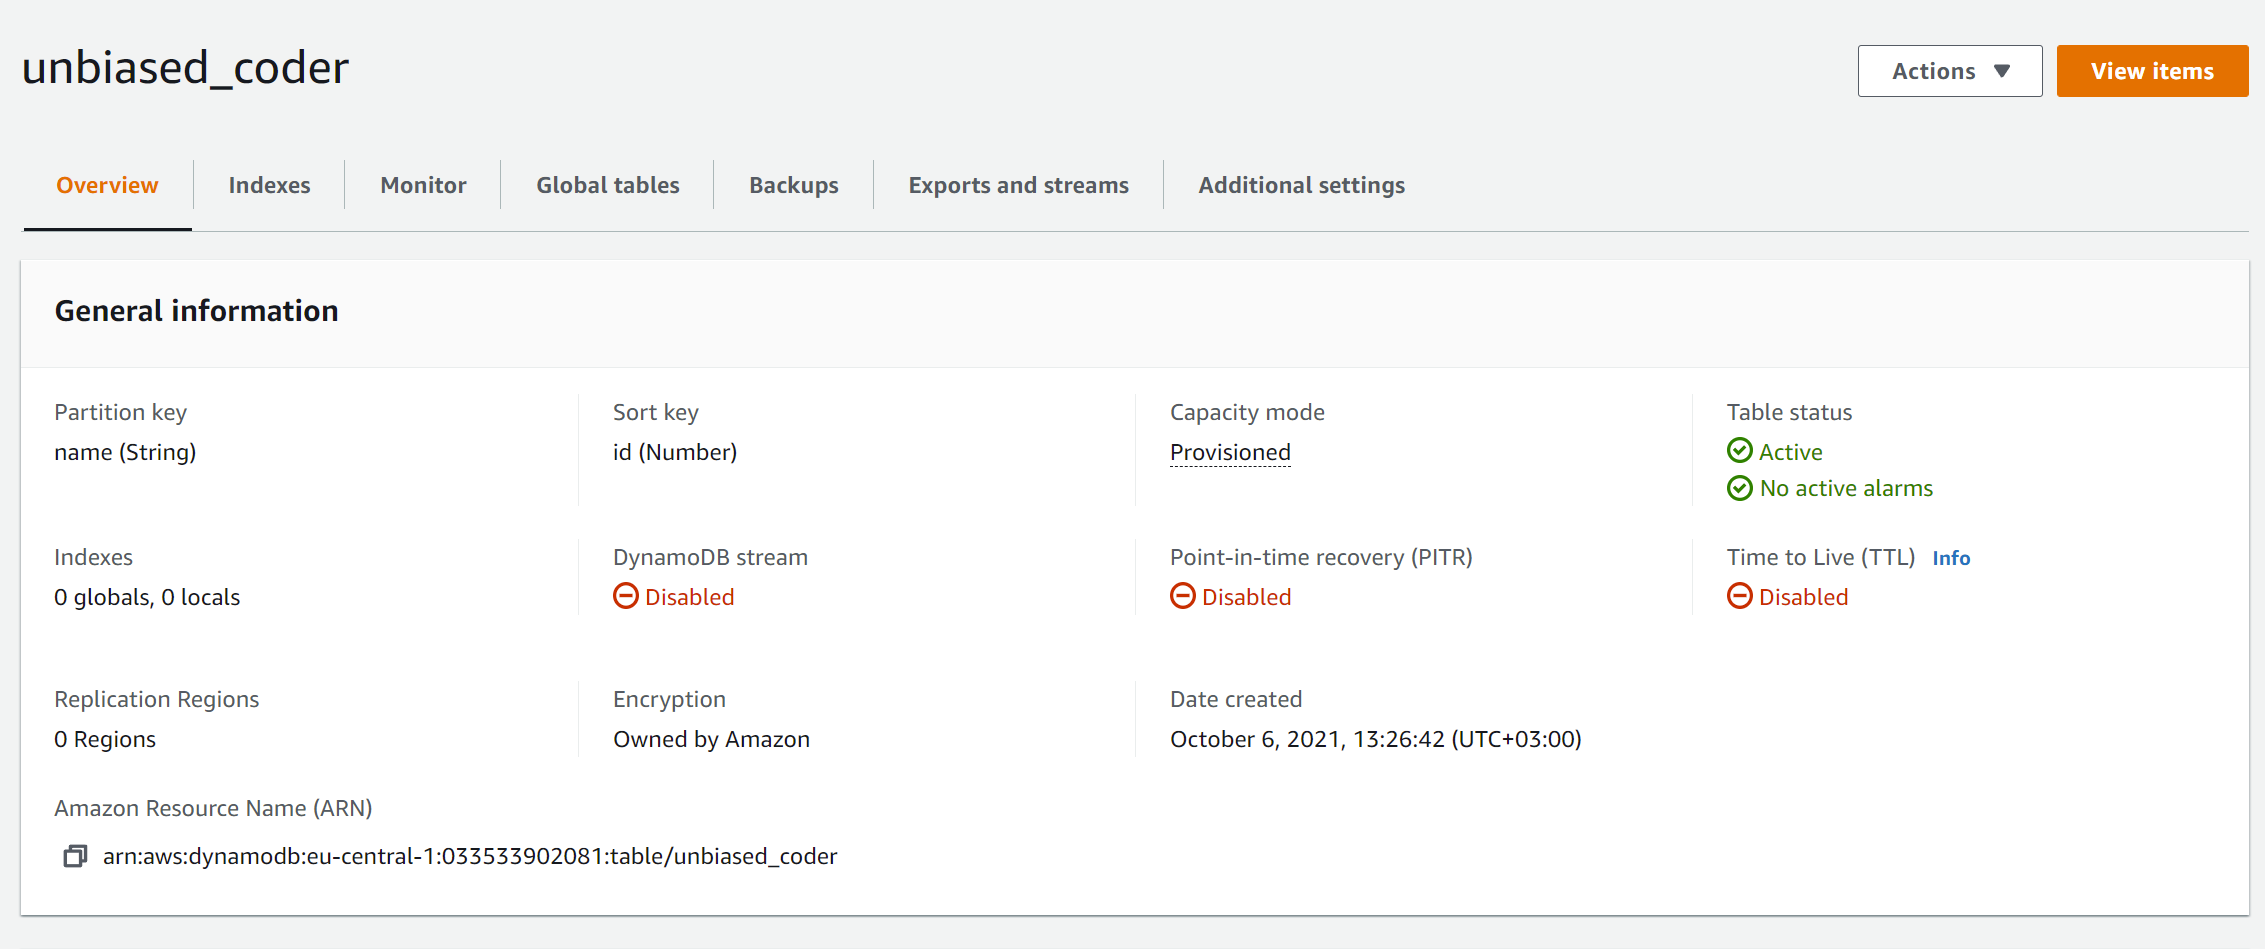
Once the provisioning finishes from the AWS end then you should be able to see the Status changing to Acting from Creating. Once this is done your table should be ready to be used.

To quickly verify click on the table name and go in the overview section. There’s a few things we need to check here:
- Sort key should have the ID field as a number
- Partition key should have the name as a string
- Table status should be Active without any alarms (note that if your administrator has set global alarms this may have something populated).
Once you verify these we are good to go. For now you can ignore the rest of the fields.
How to add items in DynamoDB Table in AWS console
Now that we have provisioned a new table for our DynamoDB we can go ahead and discuss on how to add items in DynamoDB Table in AWS console. We will do this programmatically later in this guide but to test it out and to implement some other functions in our code later we need to add some data.
So from the General overview tab go ahead and click on view items on the top right. This will get you to the view as seen below which you can control the items of your table.
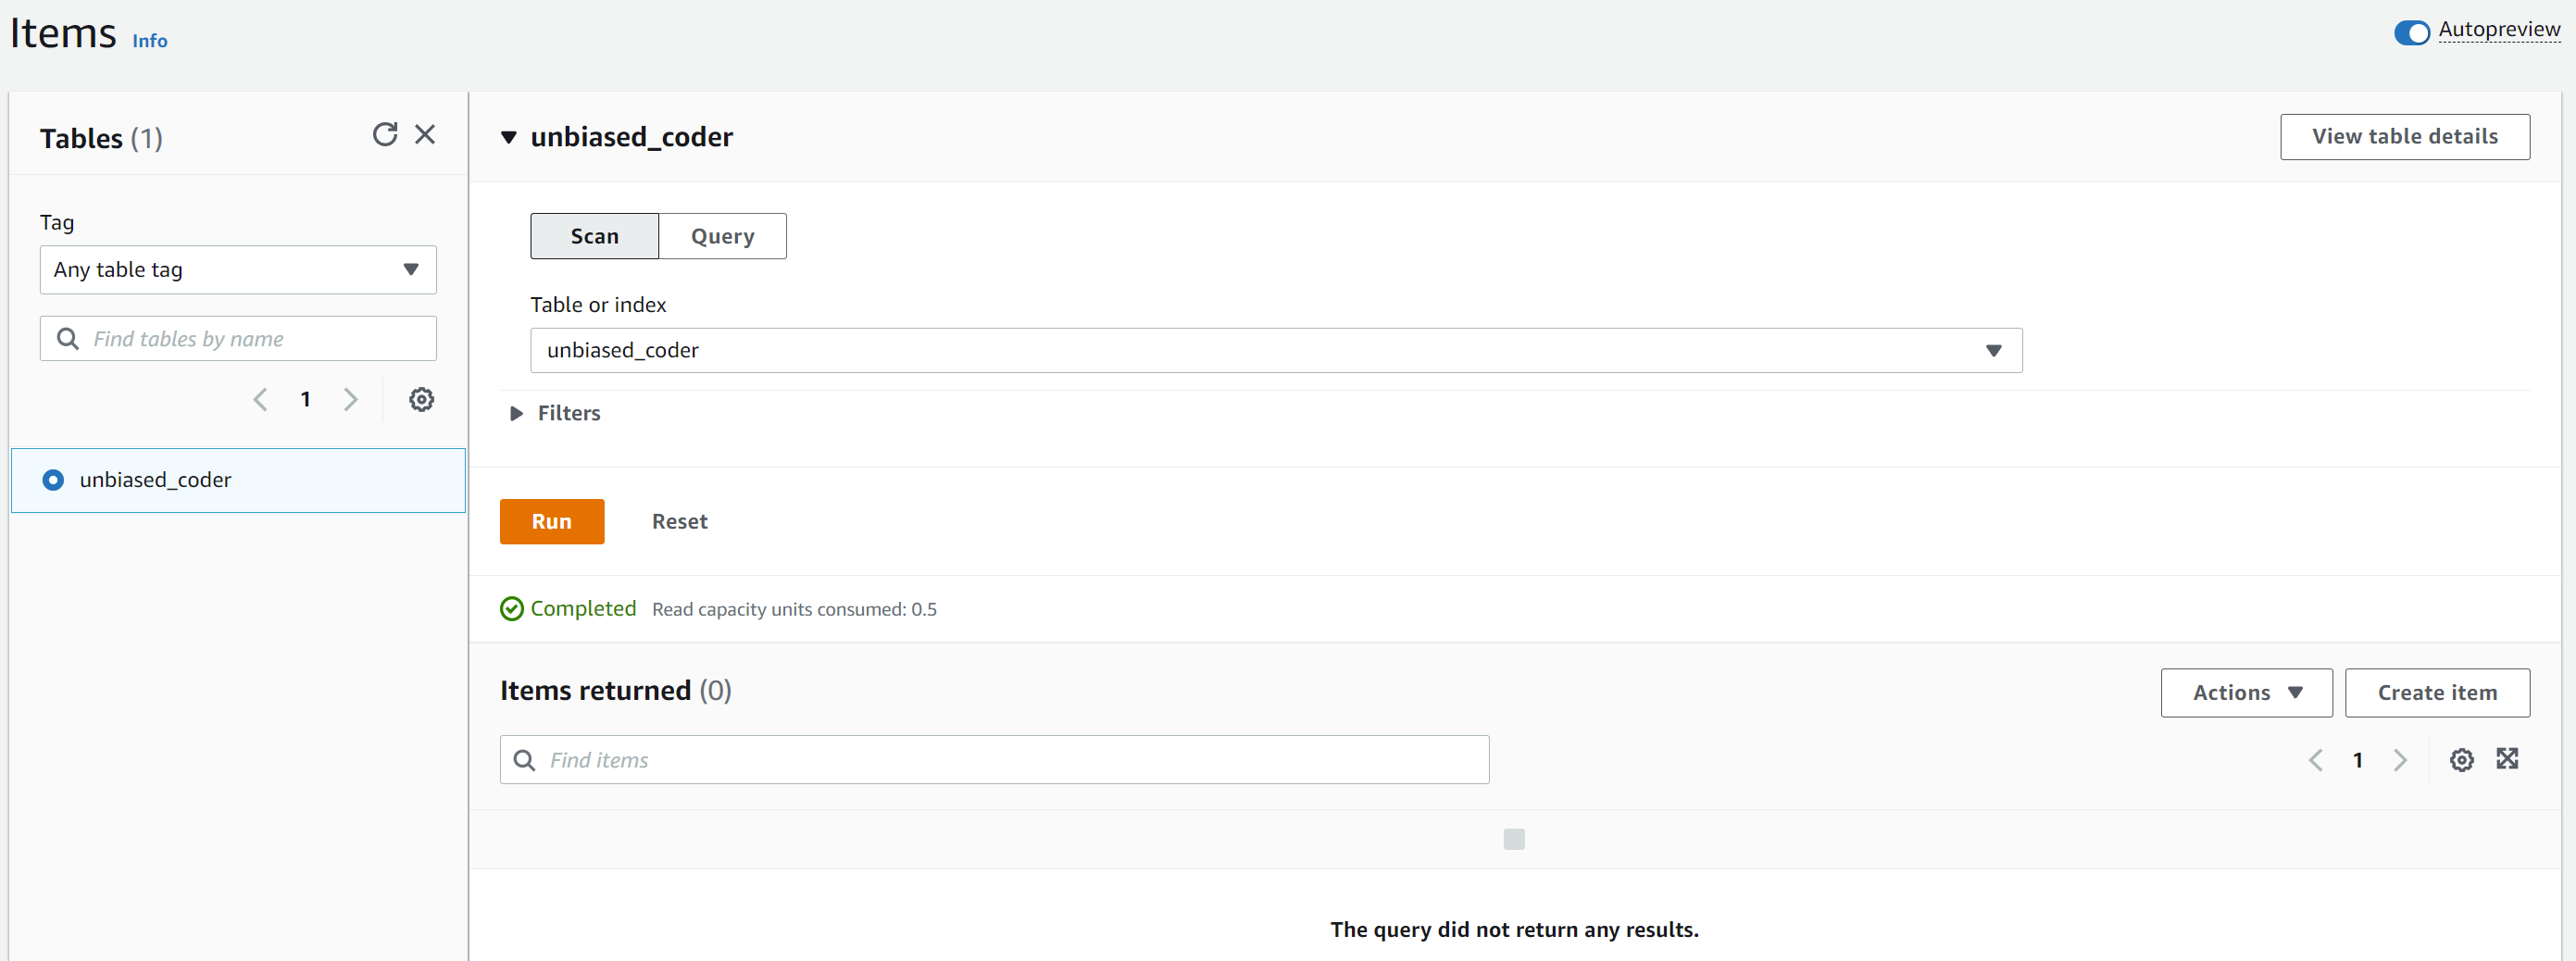
The first thing we need to do is to create an item, go ahead and put as a name Unbiased Coder and the ID as 0. Once this is done you should see in your item list an entry as seen below.
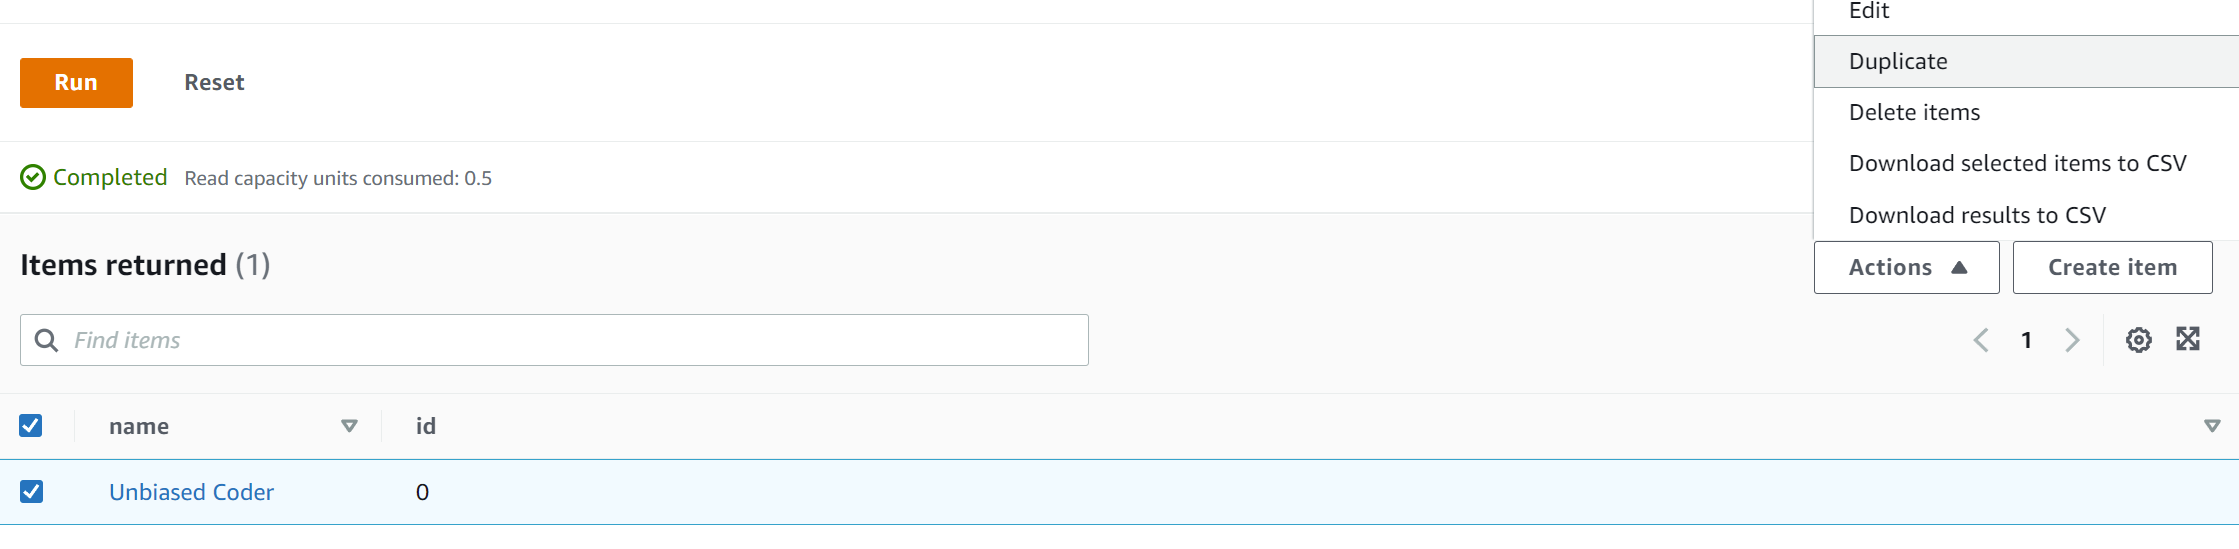
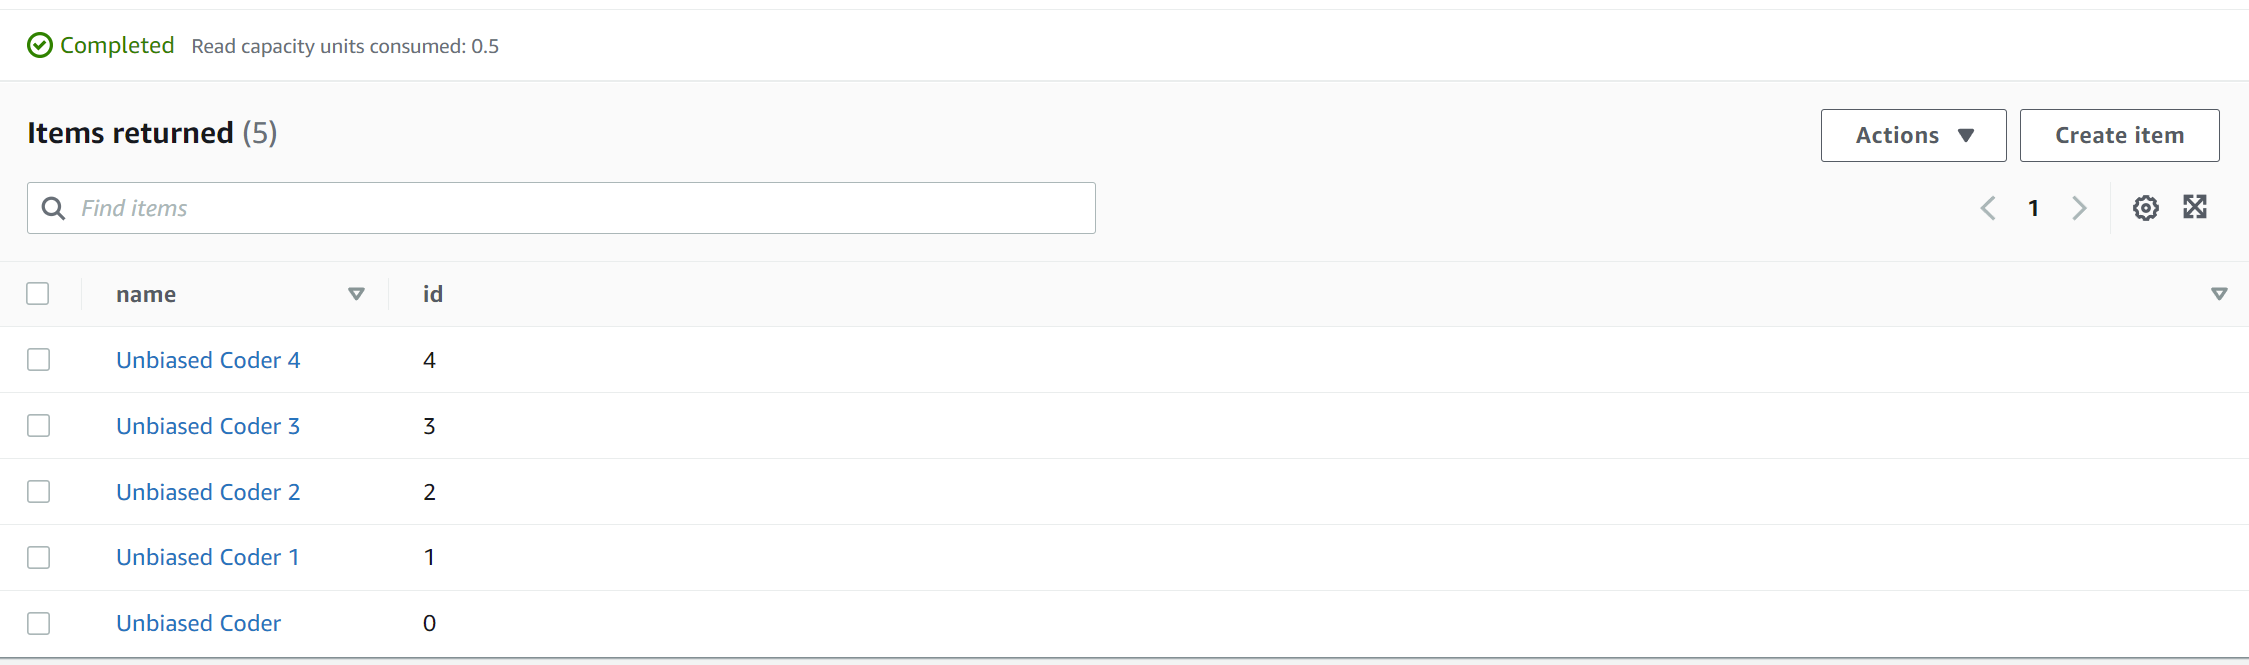
Once this is done we will want to either duplicate this entry or add more entries manually. For this example I went ahead and created 5 items in the list naming them accordingly as seen below.
How to run a query in DynamoDB Table in AWS console
Now that we have added some entries in our table we are ready to talk about how to run a query in DynamoDB table in AWS console. If you drop the menu above and click on Add Filter as seen below we can run a very simple query. For this example we will be searching by the ID number of the item.
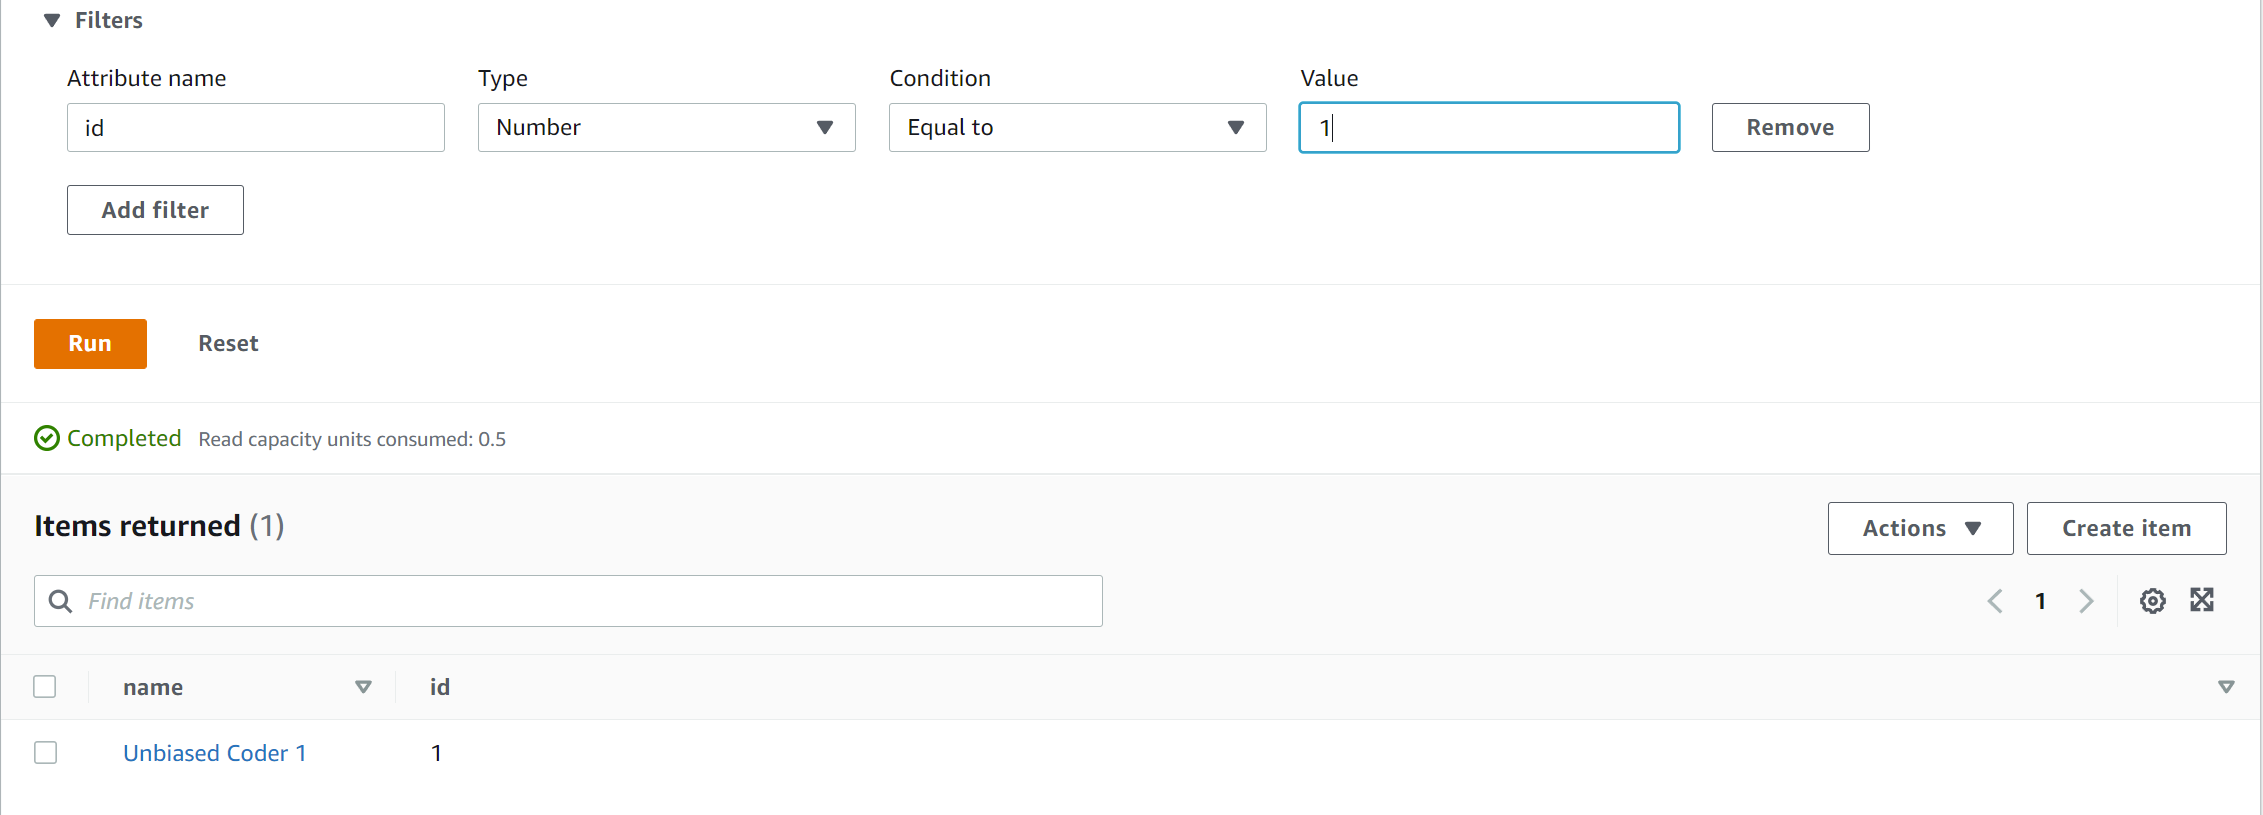
As seen above we run the query for the item with ID number 1 and the result is shown from our query. One more thing we want to get familiar with as we will be using it later on in our code is how an item looks. DynamoDB uses what is called a DynamoDB item JSON. This can be seen in the view below.
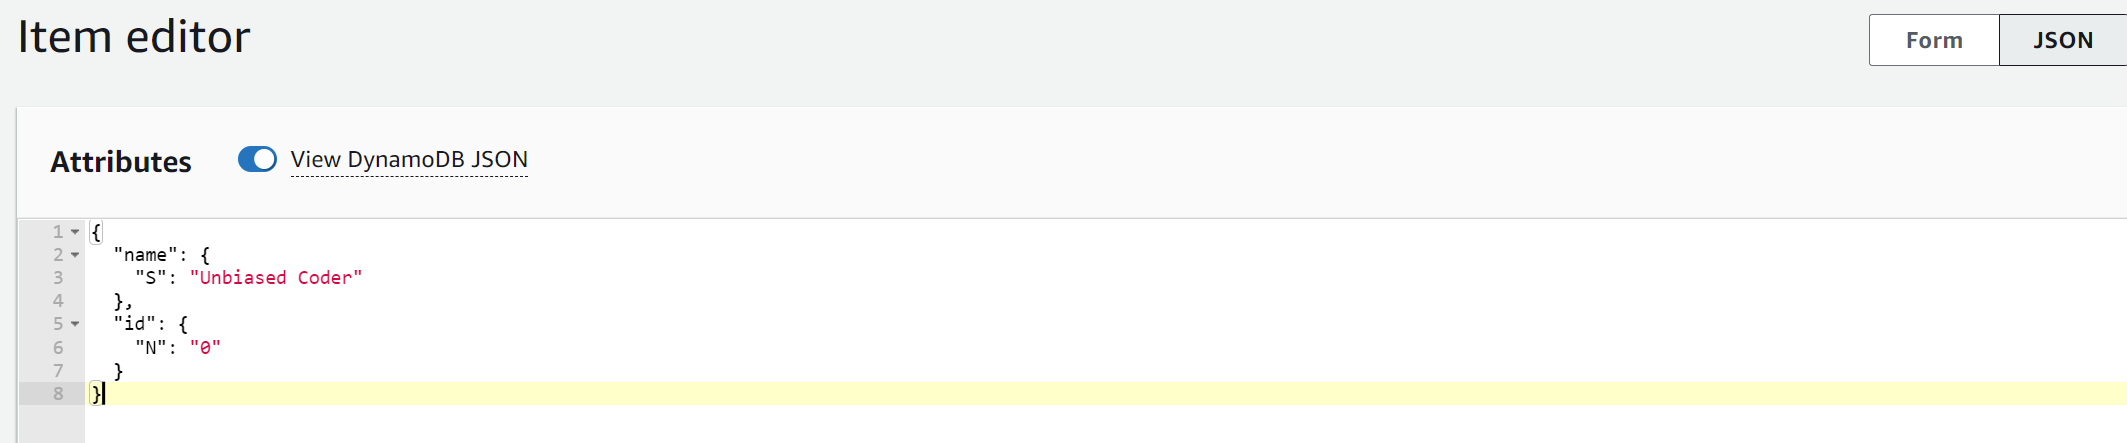
A few things to note about this are:
- Each string is represented by a prefix of “S” as a subfield of the field name
- Each number is represented by a prefix of “N” as a subfield of the field name
Having said that this is the low level interface of what DynamoDB uses behind the scenes. When we are going to talk to it programmatic there’s also a higher level interface that abstracts that portion.
How to add an AWS DynamoDB user
Before we start writing code and communicating with our API we need to get the API and Secret key that we will use alongside with the boto3 library that we previously setup. This is basically setting up permissions for the user to be able to manipulate and connect the DynamoDB. First navigate to the IAM section and click add user. This will invoke the dialog as shown below.
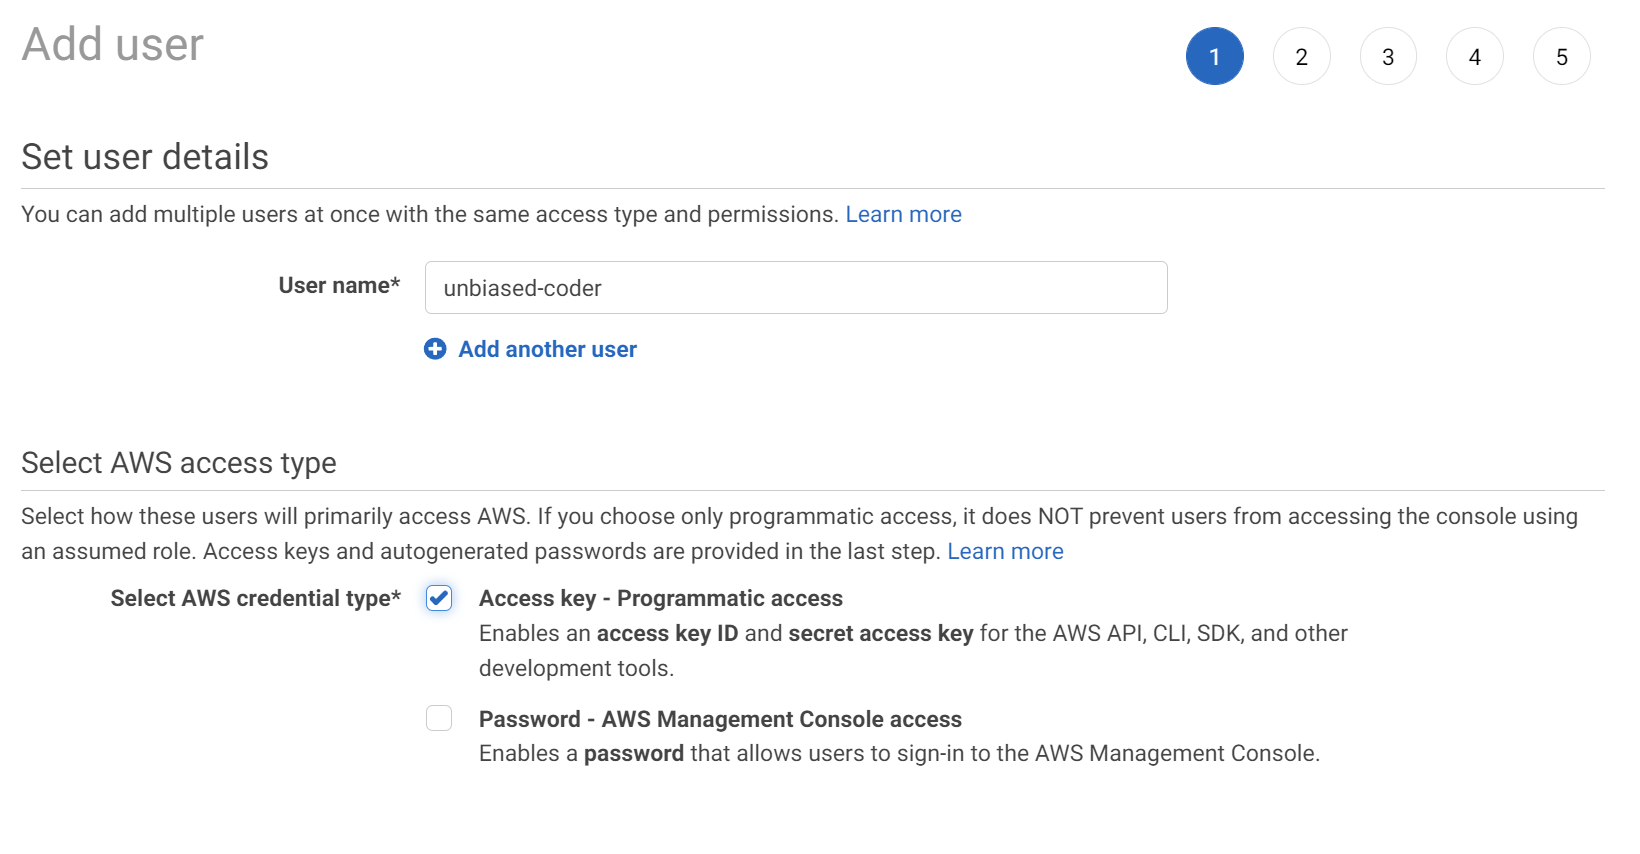
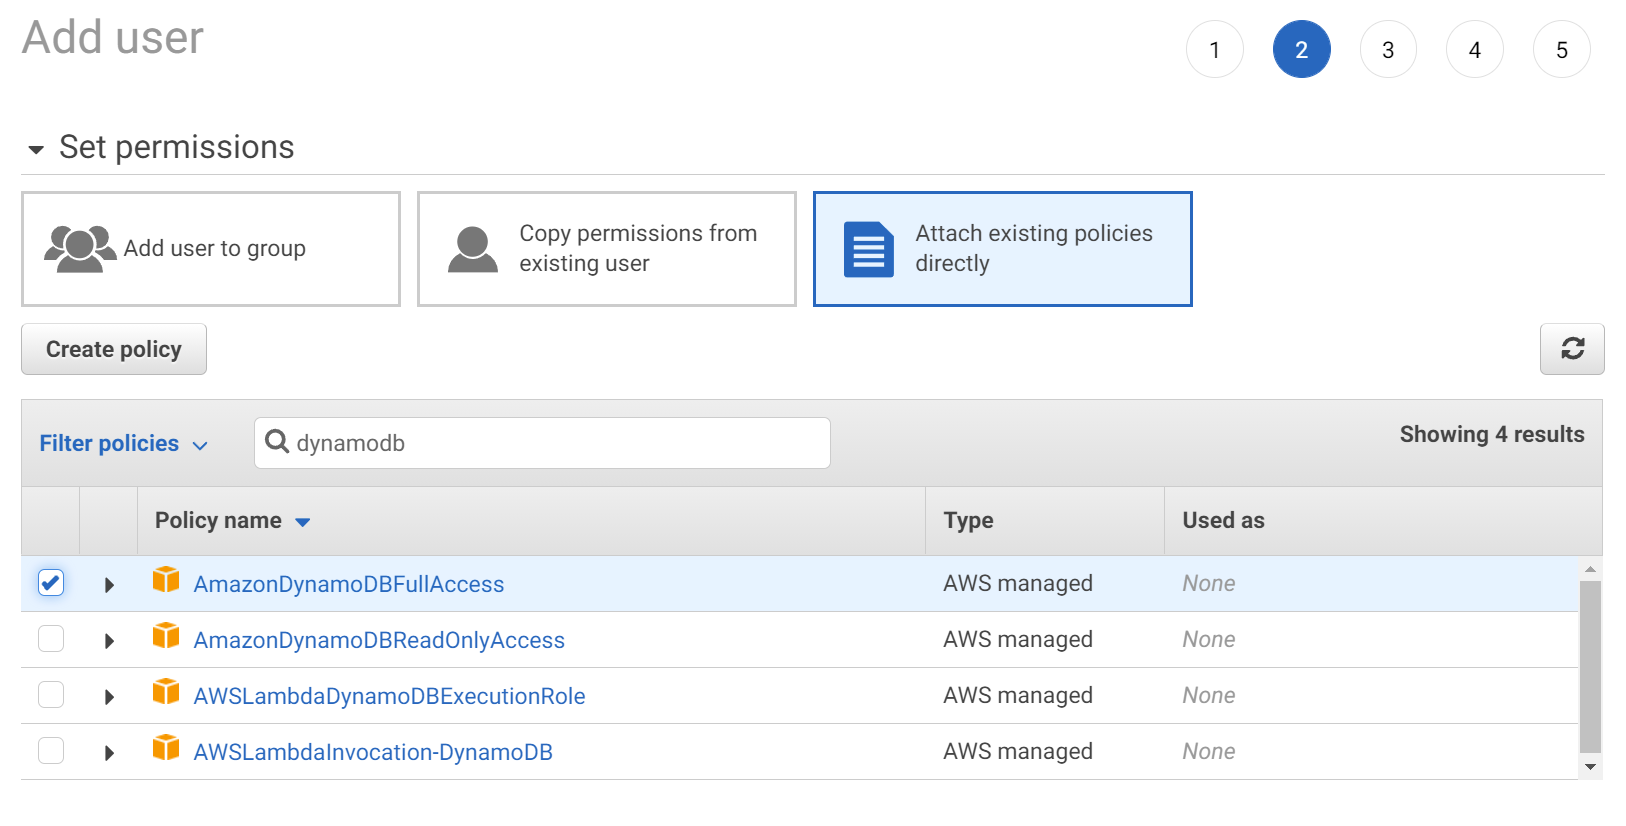
The important part we need to select is the Access key – Programmatic access. This will allow us to programmatically control things using our code. The next important part is setting the correct permissions in order to access DynamoDB, so you can go ahead and click next and on the next dialog select the Attach existing policies directly. From this tab we need to select full permissions for DynamoDB as shown below.
Once this is selected you should see the review screen based on the attributes we discussed.
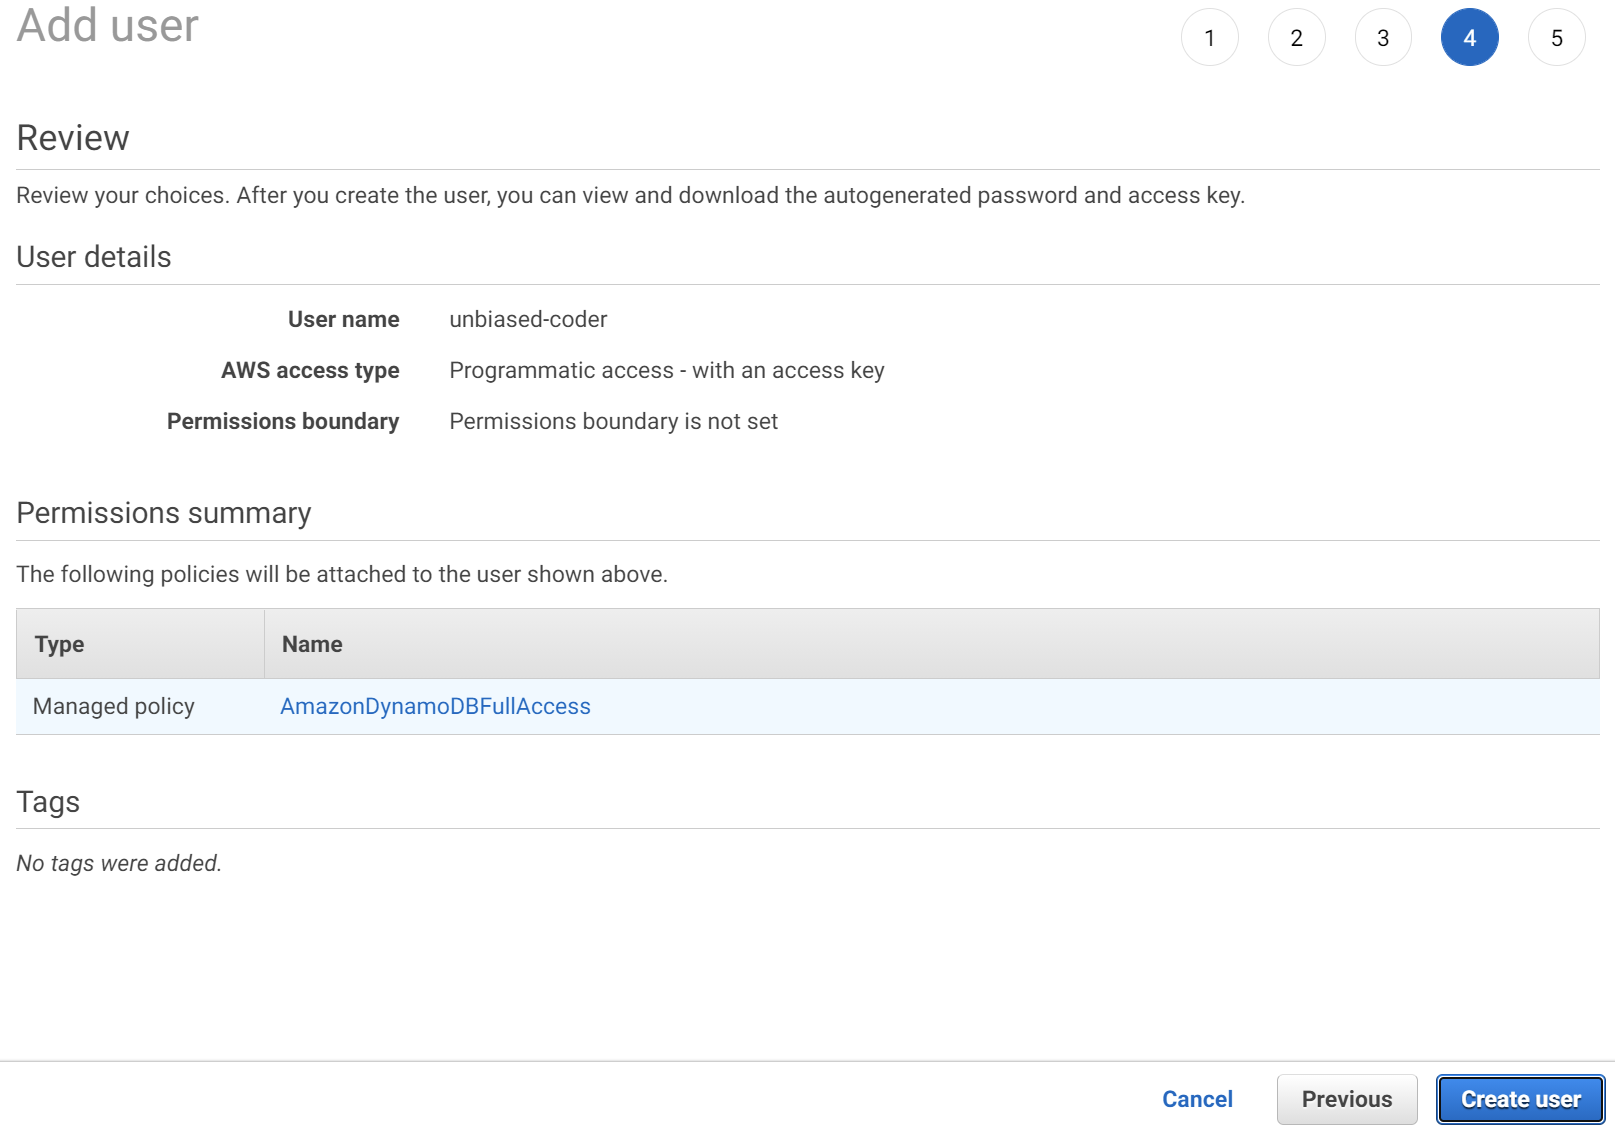
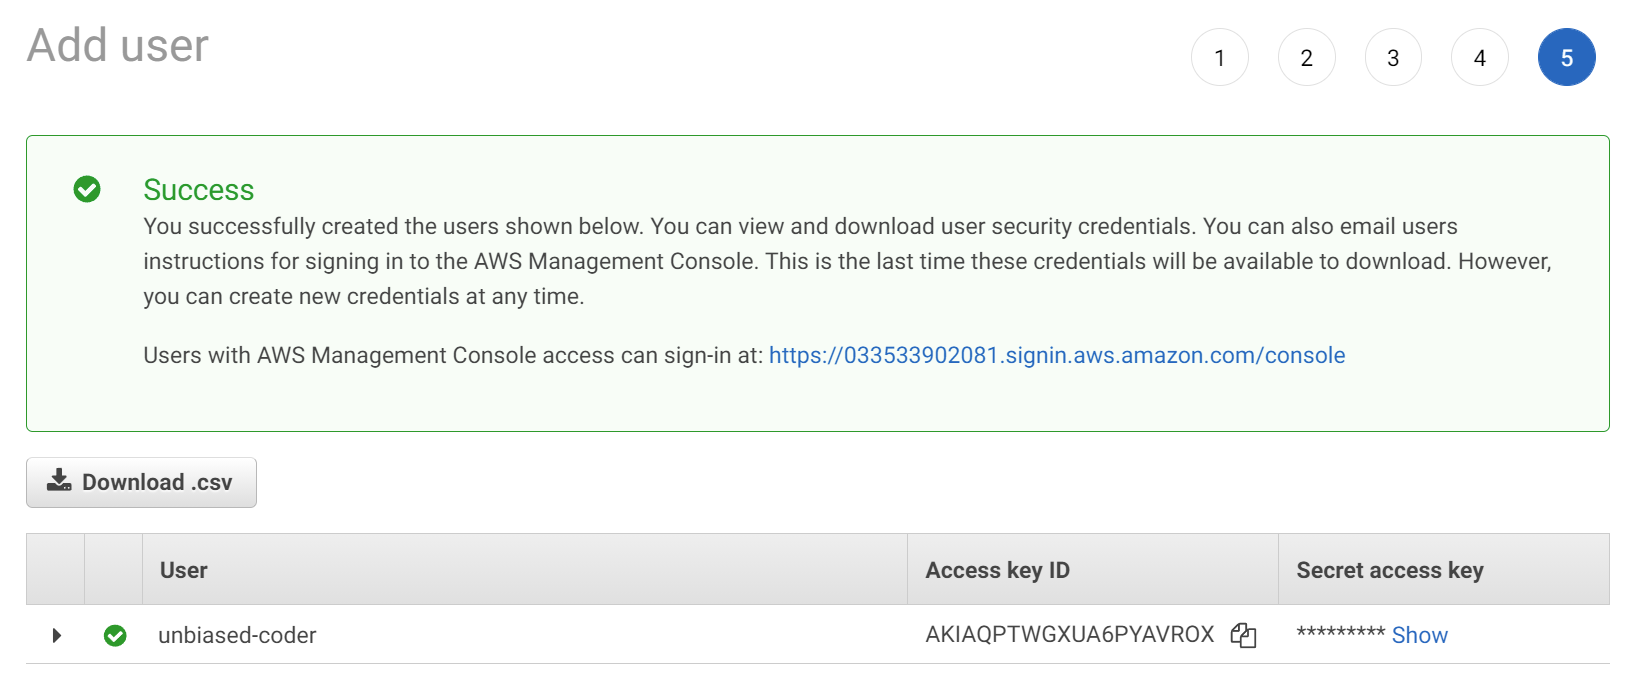
Finally once you create the user you should see the Access Key ID and the Secret access key. Those will be setup in our environment file as discussed earlier and can be found in the git repo in the env sample file.
How to connect to DynamoDB using Boto3
Now that our environment is setup and we have the local libraries installed in our system we are ready to start writing code that we will use. The first thing we need to implement is some code that connects to the DynamoDB and reads information from a table to ensure the connectivity worked.
In all of the examples below we will be leveraging a helper library that establishes a Boto3 session that can be seen below:
import os
import boto3
from dotenv import load_dotenv

def get_aws_keys():
    load_dotenv()
    return os.getenv('AWS_ACCESS_KEY'), os.getenv('AWS_SECRET_KEY')

def init_aws_session():
    access_key, secret_key = get_aws_keys()
    return boto3.Session(aws_access_key_id=access_key, aws_secret_access_key=secret_key, region_name=os.getenv('AWS_REGION'))
This component has been re-used in all my AWS articles that I wrote about Boto3. You can also find all the code in this article on a GIT repo I created for this project. As it can be seen the code above loads the API and Secret key from the dot env file that we previously created (sample in GIT repo). Furthermore it initializes a boto3 session which we will use in this article.
import boto3_helper

session = boto3_helper.init_aws_session()
dynamodb = session.resource('dynamodb')
print ('Successfully connected to DynamoDB')
table = dynamodb.Table('unbiased_coder')
print ('Found table: ', table.table_name)
print ('Table Item Count: ', table.item_count)
print ('Table Key schema: ', table.key_schema)
The first part to do above is to initialize our Boto3 session. Once this is established we get a table object and using that we access the attributes listed below to get some information about our table:
- table_name: The name of the table
- item_count: How many items we have in our table
- key_schema: The schema for our table keys
As it can be seen below the correct item count is 5 initially which is what we went ahead and added, furthermore the verification for the name and ID being used as part of our key.
main (venv) alex@DYNAMH ~/code/unbiased-coder/python-boto3-dynamodb-guide > python ./boto3_connect_dynamodb.py
Successfully connected to DynamoDB
Found table:  unbiased_coder
Table Item Count:  5
Table Key schema:  [{'AttributeName': 'name', 'KeyType': 'HASH'}, {'AttributeName': 'id', 'KeyType': 'RANGE'}]
How to put item in DynamoDB using Boto3
Now that we have created a function to connect to DynamoDB we will talk on how to put item in DynamoDB using Boto3.
Again our code will be leveraging our boto3_helper library but this time we will be adding a new Item entry in our unbiased_coder table.
We will be using the code below as our boto3 DynamoDB example to put an item:
import boto3_helper

session = boto3_helper.init_aws_session()
dynamodb = session.resource('dynamodb')
print ('Successfully connected to DynamoDB')
table = dynamodb.Table('unbiased_coder')
item = {
    'name': 'Unbiased Coder X',
    'id': 5
}
table.put_item(Item=item)
print ('Successfully added item: ', item)
If we were to execute the code above we will see that we successfully added an item. Later on when we do a scan we will be listing all of the items of our Table so this should be an additional field added to it.
main (venv) alex@DYNAMH ~/code/unbiased-coder/python-boto3-dynamodb-guide > python ./boto3_put_item_dynamodb.py
Successfully connected to DynamoDB
Successfully added item:  {'name': 'Unbiased Coder X', 'id': 5}
How to get item from DynamoDB using Boto3
Now that we successfully added a new item in the database we will go ahead and implement the code to get a specific item. This is similar to the query for 1 item which we will demonstrate later below. The difference for this is that we are only limited to 1 item rather than more than 1.
We will be using the code below as our boto3 DynamoDB example to get an item:
import boto3_helper

session = boto3_helper.init_aws_session()
dynamodb = session.resource('dynamodb')
print ('Successfully connected to DynamoDB')
table = dynamodb.Table('unbiased_coder')
item = {
    'name': 'Unbiased Coder X',
    'id': 5
}
table.get_item(Key=item)
print ('Successfully got item: ', item)
If we go and execute the code we will see that we successfully retrieve the Unbiased Coder X item that we inserted previously in the database.
main (venv) alex@DYNAMH ~/code/unbiased-coder/python-boto3-dynamodb-guide > python ./boto3_get_item_dynamodb.py
Successfully connected to DynamoDB
Successfully got item:  {'name': 'Unbiased Coder X', 'id': 5}
How to update item in DynamoDB using Boto3
Another common thing that you may need to do is to know how to update item in DynamoDB using Boto3. In this case since all of our items in the database only have two elements the name and the id and since one is the partition key and the other one is the sort key we cannot modify them. So in order to demonstrate the updating we will be adding a new field for a specific record. The code below adds the field nickname for the Unbiased Coder X record in our database.
We will be using the code below as our boto3 DynamoDB example to update an item:
import boto3_helper

session = boto3_helper.init_aws_session()
dynamodb = session.resource('dynamodb')
print ('Successfully connected to DynamoDB')
table = dynamodb.Table('unbiased_coder')
item = {
    'name': 'Unbiased Coder X',
    'id': 5,
}
db_item = table.update_item(
                            Key=item,
                            UpdateExpression="set #nickname_attr = :nickname_val",
                            ExpressionAttributeValues={
                                ':nickname_val': 'unbiasedCoder'
                            },
                            ExpressionAttributeNames={
                                '#nickname_attr': 'nickname'
                            },
                            ReturnValues="UPDATED_NEW"
)
print ('Successfully updated item: ', item)
The function that does the update takes two important arguments:
- The key value this is used as the criteria for our update query
- The value and field of the thing we want to update in the case above we are updating or adding the field nickname
If your field name is a common word you will need to use the ExpressionAttributeNames to bypass this. So for example if you were updating a field with the name ‘name’ then you wouldn’t be able to just use it in the query and you would have to use the syntax as shown above to pass it to our function invocation. If we go ahead and invoke this we should be able to update the entry in the database (we will see it later in the scan expression).
main (venv) alex@DYNAMH ~/code/unbiased-coder/python-boto3-dynamodb-guide > python ./boto3_update_item_dynamodb.py
Successfully connected to DynamoDB
Successfully updated item:  {'name': 'Unbiased Coder X', 'id': 5}
How to query DynamoDB using Boto3
The next step we will talk about is how to query DynamoDB using Boto3, this is very similar to the get item function but you can get multiple records here as you can fine tune parameter besides just the key values. Any field could be used to filter out the data. The example below will do a simple query:
- name = ‘Unbiased Coder’
We will be using the code below as our boto3 DynamoDB example to query:
import boto3_helper
from boto3.dynamodb.conditions import Key

session = boto3_helper.init_aws_session()
dynamodb = session.resource('dynamodb')
print ('Successfully connected to DynamoDB')
table = dynamodb.Table('unbiased_coder')
res = table.query(KeyConditionExpression=Key('name').eq('Unbiased Coder'))
print ('Query results from table unbiased_coder using expression: name="Unbiased Coder"')
for item in res['Items']:
    print (item['name'], item['id'])
If we were to execute the code above we should get the first entry we manually added using the AWS console earlier in this article.
main (venv) alex@DYNAMH ~/code/unbiased-coder/python-boto3-dynamodb-guide > python ./boto3_query_dynamodb.py
Successfully connected to DynamoDB
Query results from table unbiased_coder using expression: name="Unbiased Coder"
Unbiased Coder 0
Correctly we can see the Unbiased Coder record printed out along with the ID: 0.
How to scan DynamoDB using Boto3
Now that we have demonstrated adding and updating a new item in our DynamoDB we will talk about how to scan DynamoDB using Boto3 to get all the entries.
I order to do that we will be leveraging the scan function as seen below and then iterate through all the items that have been previously added. One thing to note is that we check for the field nickname which we added specifically for one item since the other ones do not have it.
We will be using the code below as our boto3 DynamoDB example to scan:
import boto3_helper

session = boto3_helper.init_aws_session()
dynamodb = session.resource('dynamodb')
print ('Successfully connected to DynamoDB')
table = dynamodb.Table('unbiased_coder')
res = table.scan()
print ('Scan results from table unbiased_coder: ')
for item in res['Items']:
    print (item['name'], end='')
    if 'nickname' in item:
        print (' has nickname: ', item['nickname'])
    else:
        print ('')
If we were to execute this code we should see the 5 items we added manually earlier along side with the 1 item we added programmatically with the extra field.
main (venv) alex@DYNAMH ~/code/unbiased-coder/python-boto3-dynamodb-guide > python ./boto3_scan_dynamodb.py
Successfully connected to DynamoDB
Scan results from table unbiased_coder:
Unbiased Coder
Unbiased Coder 2
Unbiased Coder X has nickname:  unbiasedCoder
Unbiased Coder 4
Unbiased Coder 3
Unbiased Coder 1
The code works as we can see the output we were expecting.
How to delete item from DynamoDB using Boto3
Finally we will do a bonus section and explain how to delete item from DynamoDB using Boto3. The process of doing that is very similar to getting an item but in this case we will be calling a function called delete_item.
We will be using the code below as our boto3 DynamoDB example to delete an item:
import boto3_helper

session = boto3_helper.init_aws_session()
dynamodb = session.resource('dynamodb')
print ('Successfully connected to DynamoDB')
table = dynamodb.Table('unbiased_coder')
item = {
    'name': 'Unbiased Coder X',
    'id': 5
}
db_item = table.delete_item(Key=item)
print ('Successfully deleted item: ', item)
The item we will be deleting in the code above is the Unbiased Coder X item. So executing this and then re-running the query should reveal that the item is no longer in the table. The output of the command can be seen below.
main (venv) alex@DYNAMH ~/code/unbiased-coder/python-boto3-dynamodb-guide > python ./boto3_delete_item_dynamodb.py
Successfully connected to DynamoDB
Successfully deleted item:  {'name': 'Unbiased Coder X', 'id': 5}
main (venv) alex@DYNAMH ~/code/unbiased-coder/python-boto3-dynamodb-guide > python ./boto3_scan_dynamodb.py
Successfully connected to DynamoDB
Scan results from table unbiased_coder:
Unbiased Coder
Unbiased Coder 2
Unbiased Coder 4
Unbiased Coder 3
Unbiased Coder 1
Conclusion
If you found Boto3 DynamoDB query, scan, get, put, delete, update items useful and you think it may have helped you please drop me a cheer below I would appreciate it.
If you have any questions, comments please post them below I check periodically and try to answer them in the priority they come in.
Also if you have any corrections please do let me know and I’ll update the article with new updates or mistakes I did.
Which Boto3 feature do you find useful?
If you would like to learn more about Boto3 connectors please take a look at the articles below: