
Introduction
Today we will discuss on everything you need to know about How To Sync Data from Amazon Aurora to Redshift in simple and easy to follow guide.
Did you know that AWS offers an easy interface to do this?
Today we will talk about three things
- Introduction Aurora and Redshift
- Introduction to AWS Migration Service
- Code examples and how to do the sync of the data
I have been working in the Software industry for over 23 years now and I have been a software architect, manager, developer and engineer. I am a machine learning and crypto enthusiast with emphasis in security. I have experience in various industries such as entertainment, broadcasting, healthcare, security, education, retail and finance.
Growing businesses need to store and analyze vast amounts of data. But more data can mean longer query times. To fix this problem, Amazon offers Redshift: an efficient solution for managing large datasets. But how do you sync data from Aurora, or other relational databases, to Redshift?
While several solutions exist, the most direct is to use Amazon’s own web service tools. These tools may not be suited for everyone, but they simplify the process of migrating data from Aurora to Redshift, leaving you time to focus on analysis and strategy.
It’s also possible to sync data between Aurora—or other MySQL database—and Redshift using Python. Amazon has provided an SKD called boto3 designed for this purpose. Using these AWS tools, developers can use Python as conduit for synchronizing data in Aurora and Redshift.
What is Aurora?

Amazon’s Aurora is used to create and manage relational databases. Fully compatible with both MySQL and PostgreSQL databases, Aurora simplifies the process of setting up, operating, and scaling databases in the cloud.
Aurora provides users with a management interface where they have access to common operations including backup and recovery. The Aurora system incorporates synchronized clusters that scale as needed. These clusters were built to simplify storage allocation and data replication tasks.
Why Use Amazon Redshift?
Amazon Redshift is a cloud-based data warehouse. Developers can use redshift to build, query, and maintain up to a petabyte or more of data. Each data warehouse in Redshift is made of a collection of nodes. These nodes are organized into clusters that make it easy to run analytical queries over a large amount of data. Performance metrics provided by Redshift can be used to track the health of databases
Redshift has fewer limitations than Aurora when it comes to business analytics. While you can easily find a user’s email address in Aurora, tracking their activities across an entire website is more difficult. This is why today’s businesses rely on data warehouses like Amazon Redshift to provide efficient analytic tools.
Introducing the AWS Database Migration Service
The AWS Database Migration Service (AWS DMS) is used to manage and migrate databases on the cloud. With AWS DMS, customers can sync data across many popular commercial databases including Microsoft SQL Servers, Amazon Aurora, and MySQL.
Using AWS DMS, users can run a one-time migration or set up a continuous sync. This process involves targeting a source database in a process known as replication.
Before a database can be synced, a replication instance needs to be created on the cloud server. This instance reads the source data and loads it to the target.
What are the benefits of using AWS Services?
- Quickly scale up or scale down migration resources.
- Migrate from any of the supported data sources to any supported data target.
- Secure Lock Layers (SSL) ensure that your data is encrypted during the migration process.
How to Sync Aurora and Redshift Using AWS Services
While Redshift is known for hosting data on the cloud, the service can also be used to replicate data between two databases. To sync data between Aurora and Redshift using DMS, we need to define source endpoints (MySQL) and target endpoints (Redshift).
With DMS it’s possible to create a replication task and replication instance. We can do this using the tools available within DMS. First, set up the source for your replication task. Next, set up the target.
The DMS documentation recommends specifying the primary keys for the target tables, otherwise there may be issues in Redshift. If you haven’t created unique keys on the target tables, then DMS will perform a full scan every time it updates. This will significantly decrease performance.
Tips for Replication
- Wait until all replication tasks are complete before rebooting your database. Not doing so can result in a failed operation.
- Only create only one replication task for each table. While it’s possible to create more than one replication task, this practice is not recommended.
- AWS DMS suggests setting up the target manually to ensure data types are properly converted. Be sure to choose the correct data types.
- Use a script to compare the rows of your databases. This can help pinpoint problems with the replication process.
Pros and Cons of Using AWS For Replication
Using Amazon’s AWS service to sync data between Aurora and Redshift isn’t without it’s drawbacks. While this service can simplify the work, it may not be the best option. Depending on your needs, you may need to seek other solutions.
Pros of using
- The replication instance can handle most data migrations automatically.
- Syncing data doesn’t require downtime.
Cons
- The replication process only supports up to 6 TB of data at once.
- Some of Aurora’s features are not available in Redshift.
- Service is limited by region.
Alternative Options
If Amazon’s AWS Service isn’t suitable for you, other options are available for migrating your data to Redshift. Depending on your needs, there may be several options.
One popular choice for developers is Python. As a result, Amazon has provided a Python SDK for connecting with its web services.
Using Python to Sync a Local MySQL Database
There is a Python module available for creating MySQL to NoSQL database replications. Built on top of the PySQL library, python-mysql-replication makes it possible to receive events and raw SQL queries.
The easiest way to install python-mysql-replication is with pip:
pip install mysql-replication/Before you can replicate the server data, the server will need to be configured. In your server’s MySQL configuration file, be sure to enable binary logging. If binary logging is not enabled, the replication won’t be possible.
mysqld.cnf
server-id =2
log_bin=mysql-bin.log
binlog_do_db=db
binlong-format=row
With the MySQL server configured, we’ll be able to connect to it using Python.
First, create a new database. With the database selected, create a new table and populate it with some basic data.
CREATE DATABASE my_db;
use my_db;
CREATE TABLE new_table (id int NOT NULL AUTO_INCREMENT, data VARCHAR(255), data2 VARCHAR(255), PRIMARY KEY(id));
INSERT INTO new_table (data,data2) VALUES ("Hello", "World");
UPDATE new_table SET data = "World", data2="Hello" WHERE id = 1;
DELETE FROM new_table WHERE id = 1;
Example: Log every replication event to the console
from pymysqlreplication import BinLogStreamReader

settings = {'host': 'unbiased-coder.com', 'port': 3306, 'user': 'root', 'passwd': ''}

my_stream = BinLogStreamReader(connection_settings = settings, server_id=100)

for log in my_stream:
    log.dump()

my_stream.close()
Learn more by reviewing the documentation.
Using Boto3 to Interact with AWS Services
Boto3 is the AWS SDK for Python. It provides users with an object-oriented API for accessing low-level AWS services. This tool uses the AWS authentication package which adds a level of security to your sessions.
Before you can access your data with boto3, you’ll need to create a new user in AWS. Go to the Services menu in the AWS dashboard and create a new user with programmatic access. Once the new user is created, you can download a file with your credentials.
Next you’ll need to create a credentials file and add your ID and secret key.
aws_access_key_id = ID
aws_secret_access_key = KEY
I have also written an extensive guide which you can find here on how to initialize your Boto3 session:
Boto3 Session: Setup Profile, Create, Close and Mock sessions
Install boto3 from the terminal or command line as described above and use either a resource or a client to initialize your object data.
Creating a Kinesis Delivery Stream to Publish to Redshift
Kinesis is a tool for capturing large amounts of data and streaming it to applications. Kinesis is available within AWS DMS. This tool acts as a conduit between data sources and data consumers. Kinesis can handle data of almost any variety including web log data, social media data, or information from financial trading services.
The Kinesis Firehose is used to capture data streams and load them into Redshift. Because Firehose scales to meet demand, you’ll need to manually provide enough capacity for your data.
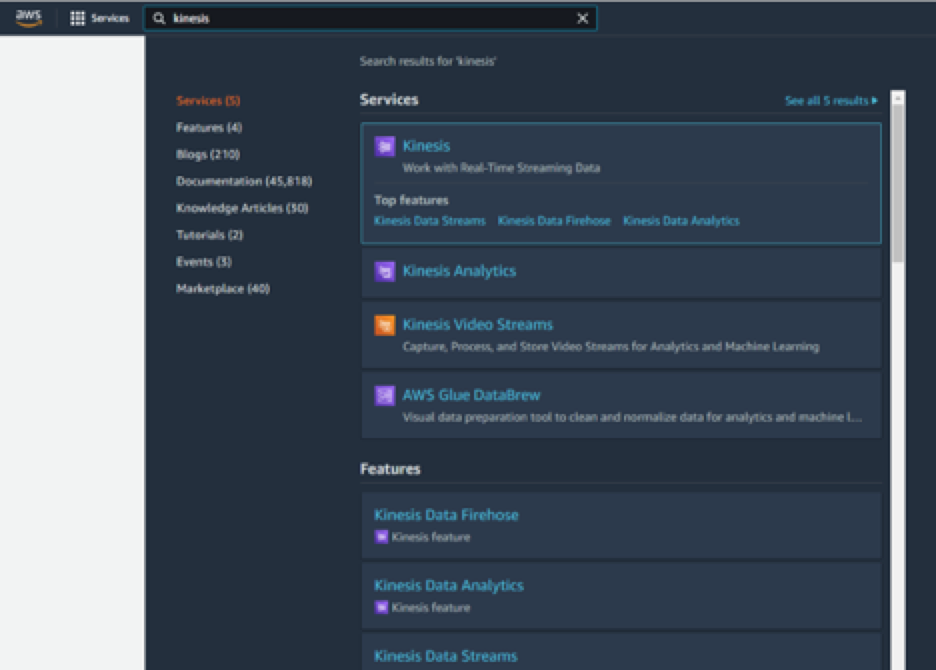
You can find Kinesis by searching for it in the Services tab on the AWS Dashboard.
In order to successfully publish your data, you’ll need to have completed following steps:
- Created a cluster on Amazon Redshift
- Connected to your cluster
- Created a new database table
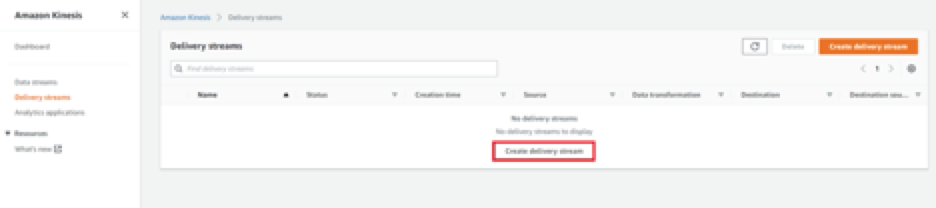
Delivering a data stream with Kinesis Data starts by logging into the Data Firehose console: https://console.aws.amazon.com/firehose/
From there you can create a new Delivery Stream and choose Amazon Redshift as the destination.
The following example shows how to use boto3 to connect to a Kinesis stream using Python.
Example: Create a Kinesis to Firehose Data Stream
mport boto3
from botocore.exceptions import ClientError
import firehose_to_s3 as fh_s3

def new_kinesis_stream(stream_name, shards=1):
    new_client = boto3.client('kinesis')
    try:
        kinesis_client.create_stream(StreamName=stream_name,
                                     shard_count=shards)
    except ClientError as error:
        logging.error(error)
        return False

    return True

def main():
    kinesis_name = 'my_stream'
    number_of_shards = 1
    firehose_name = 'my_firehose_stream'
    bucket_arn = 'arn:aws:s3:::BUCKET_NAME'
    iam_role_name = 'kinesis_to_firehose'

    success = new_kinesis_stream(kinesis_name, number_of_shards)
    if not success:
        exit(1)

if __name__ == '__main__':
    main()
Additional Resources
If you’re looking for more information on using Amazon Aurora and MySQL-compatible databases, you can read the official documentation.
Resources for using and migrating data to Redshift are also available here. For more info on using AWS DMS and Kinesis, follow this link.
Conclusion
If you found How To Sync Data from Amazon Aurora to Redshift useful and you think it may have helped you please drop me a cheer below I would appreciate it.
If you have any questions, comments please post them below I check periodically and try to answer them in the priority they come in. Also if you have any corrections please do let me know and I’ll update the article with new updates or mistakes I did.
Which database do you use in the AWS?
I personally like to use Aurora simply because it’s faster than the existing interfaces such as MySQL and PostgreSQL as AWS themselves advertise this could be x5 faster which is significant.
If you would like to learn more about automation you can take a look at some of my articles here related to Databases:
It describes the very basic use case. What about more complex user cases like:
1. The schema is Aurora is flat and in redshift it is Star. How do I involve ETL job in the middle
2. What is I need to migrate huge about of data. What will be the impact on the Redshift and/or Aurora